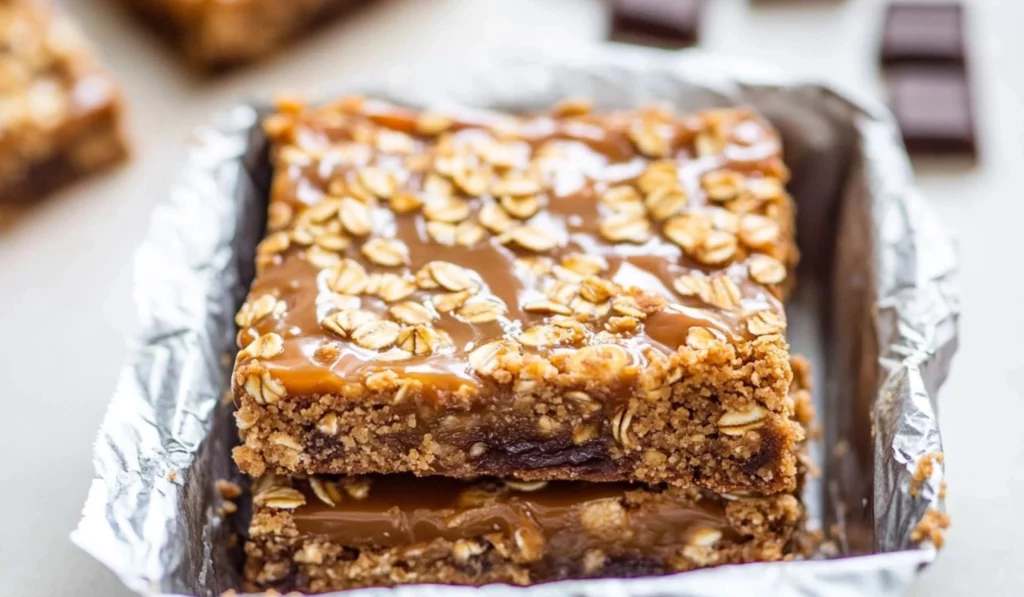
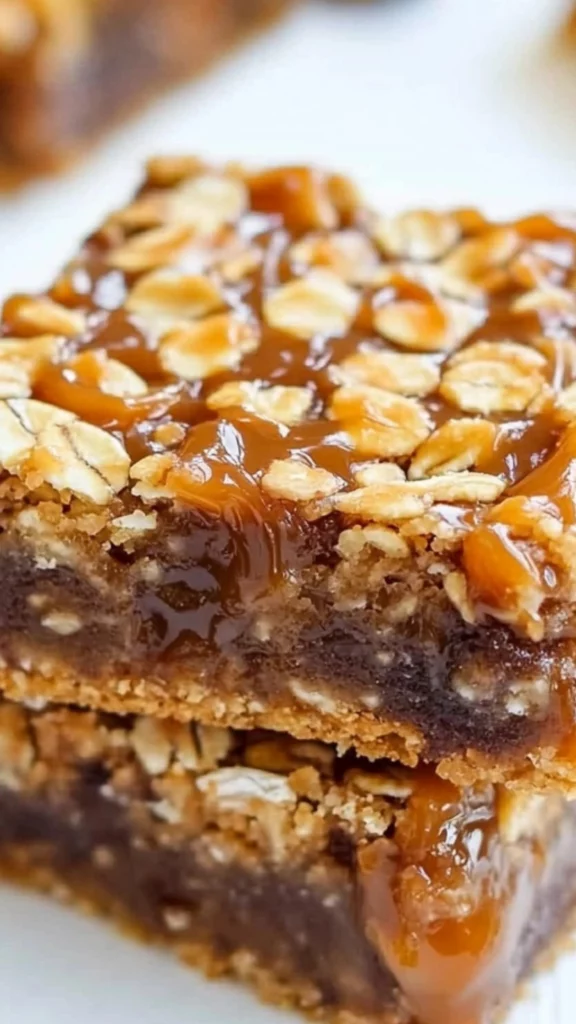
For anyone who loves caramel, few desserts can compare to the bliss of sinking a fork into a gooey, warm Carmelita. These soft, chewy bars are a heavenly combination of sweet caramel, chocolate, and oats—everything you need to satisfy that sweet tooth while enjoying a comforting, indulgent treat. Created by Averie Sunshine, this recipe has become a go-to for caramel lovers, thanks to its simplicity, rich flavor, and minimal effort required to make it.
Carmelitas: The Ultimate Caramel-Lover’s Dream Bars
If you’re someone who can’t resist the allure of caramel, then get ready for a treat that will elevate your dessert game to new heights. Carmelitas are the perfect indulgence for caramel lovers, combining soft, chewy layers of oats with a rich, gooey caramel center and a generous amount of chocolate. These bars are not only delicious but also incredibly easy to make—no mixer required and just one bowl to clean! Whether you’re a seasoned baker or a beginner, this recipe is foolproof and guaranteed to deliver a sweet, irresistible treat every time.
- Prep Time: 15 minutes
- Cook Time: 25 minutes
- Total Time: 40 minutes
- Yield: 16 servings 1x
- Category: Dessert, Bars, Sweet Treats
- Method: Baking, One-bowl
- Cuisine: American, Comfort Food
- Diet: Vegetarian
Ingredients
- ¾ cup butter, melted (1 ½ sticks; unsalted butter preferred) – Butter is the base of the oat crust, giving the Carmelitas their rich flavor and tender texture. You can use salted butter if that’s what you have on hand, though unsalted butter allows for better control over the saltiness of the final product.
- ¾ cup light brown sugar, packed – Brown sugar contributes to the rich caramel flavor and gives the bars their chewy texture. For a deeper, more robust flavor, you can substitute dark brown sugar.
- 1 tablespoon vanilla extract – Vanilla adds warmth and depth to the dessert, balancing the sweetness of the caramel and chocolate.
- 1 cup all-purpose flour – The flour forms the base for the oat crust, providing structure to the bars.
- 1 cup whole-rolled old-fashioned oats (not instant or quick cook) – These oats are crucial for that chewy, satisfying texture. Avoid instant oats or quick oats, as they won’t hold up the same way.
- 1 teaspoon baking soda – This helps to leaven the mixture, making the bars soft and chewy.
- ½ teaspoon salt (optional, or to taste) – Adding salt helps to balance the sweetness of the caramel and chocolate. You can omit it if you’re using salted butter or prefer a less salty flavor.
- 35 caramel squares, unwrapped (Averie Sunshine recommends Werther’s Originals Soft Caramels) – These caramels are the star of the show, providing that irresistible gooey center. If you use smaller caramels, you may need to add a couple more to make sure the caramel layer is thick enough.
- ½ cup heavy cream – The cream helps to melt the caramels and create a smooth, pourable sauce.
- 1 cup semi-sweet chocolate chips or chunks (a combination works best) – Chocolate chips or chunks give the bars their sweet, melty goodness. If you prefer dark chocolate, feel free to swap it out.
Instructions
- Preheat your oven: Start by preheating your oven to 350°F (175°C). Then, line an 8×8-inch baking pan with aluminum foil and lightly coat it with cooking spray. This step is important for easy removal of the bars later, as caramel can get very sticky.
- Melt the butter: Place the butter in a large microwave-safe bowl and microwave it on high for about 90 seconds or until fully melted. Alternatively, you can melt the butter in a saucepan over low heat on the stove.
- Mix the wet ingredients: Add the brown sugar and vanilla extract to the melted butter. Whisk the mixture until smooth and fully combined. The warmth of the butter will help the sugar dissolve more easily, so you should end up with a silky, cohesive mixture.
- Add dry ingredients: Add the flour, oats, baking soda, and optional salt to the wet mixture. Stir until everything is fully incorporated. The dough will be thick, so don’t worry if it’s difficult to stir—this is normal. The oats should be well distributed throughout.
- Prepare the base: Transfer half of the oat mixture into the prepared pan. Use a spatula or the back of a spoon to press the dough into an even, flat layer. This will form the base of your Carmelitas. Make sure the layer is smooth so it bakes evenly.
- Bake the base: Place the pan in the oven and bake for 10 minutes. While the base is baking, you can start preparing the caramel sauce.
- Make the caramel sauce: In a separate microwave-safe bowl, combine the unwrapped caramel squares and heavy cream. Microwave the mixture in 60-second intervals, stirring after each, until the caramels are fully melted and smooth. This should take about 4-5 minutes. Alternatively, you can melt the caramels and cream in a saucepan over medium-low heat on the stove, stirring constantly.
- Assemble the bars: Once the base has baked for 10 minutes, remove it from the oven. Evenly sprinkle the chocolate chips over the base, then pour the warm caramel sauce evenly over the chocolate. The caramel will melt into the chocolate, creating a gooey, decadent layer.
- Add the topping: Take the remaining oat mixture and crumble it over the caramel layer. Spread it as evenly as you can, but it doesn’t have to be perfect. The oats will bake into a golden, slightly crispy topping that complements the soft center.
- Bake the bars: Return the pan to the oven and bake for another 15-18 minutes, or until the edges are lightly browned and the center is bubbling slightly. You’ll know they’re done when the top is golden and set.
- Cool the Carmelitas: Let the bars cool completely in the pan before slicing. This is a crucial step—if you try to cut them while they’re still warm, the caramel will be too runny and the bars won’t hold their shape. Allow the Carmelitas to cool for at least 4 hours at room temperature (or longer if you want to refrigerate them to speed up the process). Once they’re cool, they’ll firm up and slice cleanly.
Notes
- Be patient: The most important tip when making Carmelitas is to be patient during the cooling process. If you cut them too soon, the caramel will spill out and the bars won’t hold together. Allow them to cool completely for best results.
- Adjusting the caramel: If your caramel sauce seems too thick, you can add a little more heavy cream to loosen it up. If it’s too runny, you may need to heat it for a little longer to thicken up.
- Texture tips: The oat mixture can sometimes be tricky to crumble evenly over the top, but don’t worry! Just do your best to spread it out, and the texture will still turn out great.
The beauty of this recipe lies in its ease of preparation—it’s beginner-friendly, quick, and doesn’t require any fancy tools or techniques. Whether you’re new to baking or looking for an uncomplicated yet delicious dessert to try, these Carmelitas will not disappoint. In this article, we’ll walk you through every step of the process, from gathering your ingredients to troubleshooting potential issues. By the end of it, you’ll be able to make these decadent bars like a pro, and we guarantee that they’ll be a hit with anyone who tries them.
Why These Carmelitas Are Perfect for Beginners
If you’re a beginner cook or baker, you might be hesitant to try making complicated desserts, but this recipe is the perfect introduction to the world of sweet treats. First of all, it’s a one-bowl recipe, so cleanup is a breeze. There’s no need to worry about complicated techniques like tempering chocolate or making intricate frosting. You don’t even need a stand mixer—just a simple bowl and spoon to get started. The recipe uses basic, easily accessible ingredients, and it’s hard to go wrong with caramel and chocolate, so even if you’re still mastering your kitchen skills, this recipe will turn out deliciously every time.
Carmelitas are also incredibly forgiving. They don’t require precision when it comes to shaping or mixing the dough, and even if your caramel sauce is a little runny or thick, the bars will still taste amazing. Plus, the total time needed to prepare these bars is just 40 minutes—though you’ll need a little patience for the cooling process, which allows the caramel to firm up and become perfectly sliceable. This recipe is also versatile, so you can tweak it based on what you have on hand or your personal preferences. Whether you prefer dark chocolate or want to experiment with different caramel brands, these Carmelitas will still be a crowd-pleaser.
Ingredients and Preparation
Before you start baking, it’s important to gather all the ingredients. The great thing about this recipe is that it uses just a handful of basic pantry staples, many of which you likely already have in your kitchen.
Here’s what you’ll need:
- ¾ cup butter, melted (1 ½ sticks; unsalted butter preferred) – Butter is the base of the oat crust, giving the Carmelitas their rich flavor and tender texture. You can use salted butter if that’s what you have on hand, though unsalted butter allows for better control over the saltiness of the final product.
- ¾ cup light brown sugar, packed – Brown sugar contributes to the rich caramel flavor and gives the bars their chewy texture. For a deeper, more robust flavor, you can substitute dark brown sugar.
- 1 tablespoon vanilla extract – Vanilla adds warmth and depth to the dessert, balancing the sweetness of the caramel and chocolate.
- 1 cup all-purpose flour – The flour forms the base for the oat crust, providing structure to the bars.
- 1 cup whole-rolled old-fashioned oats (not instant or quick cook) – These oats are crucial for that chewy, satisfying texture. Avoid instant oats or quick oats, as they won’t hold up the same way.
- 1 teaspoon baking soda – This helps to leaven the mixture, making the bars soft and chewy.
- ½ teaspoon salt (optional, or to taste) – Adding salt helps to balance the sweetness of the caramel and chocolate. You can omit it if you’re using salted butter or prefer a less salty flavor.
- 35 caramel squares, unwrapped (Averie Sunshine recommends Werther’s Originals Soft Caramels) – These caramels are the star of the show, providing that irresistible gooey center. If you use smaller caramels, you may need to add a couple more to make sure the caramel layer is thick enough.
- ½ cup heavy cream – The cream helps to melt the caramels and create a smooth, pourable sauce.
- 1 cup semi-sweet chocolate chips or chunks (a combination works best) – Chocolate chips or chunks give the bars their sweet, melty goodness. If you prefer dark chocolate, feel free to swap it out.
Alternative Ingredient Suggestions:
- Butter: You can use margarine or coconut oil if needed, though these will change the flavor slightly. Coconut oil will add a subtle coconut flavor to the bars, while margarine can create a slightly lighter texture.
- Brown Sugar: If you prefer a richer flavor, dark brown sugar will give the bars a deeper caramel taste. Light brown sugar is more common in most recipes, but both will work well.
- Oats: Make sure to use old-fashioned rolled oats, as quick oats or instant oats will not provide the same texture. Rolled oats give the bars that chewy, hearty bite.
- Caramels: If you’re not using Werther’s Originals, any soft, individually wrapped caramel will work. However, keep in mind that you might need to use more if they are smaller in size.
- Chocolate: Semi-sweet chocolate is the go-to option, but if you’re a fan of dark or milk chocolate, you can substitute them for a different kind of chocolate to suit your taste.
Step-by-Step Instructions
Now that you have your ingredients ready, let’s break down the process step by step so you can achieve Carmelita perfection.
- Preheat your oven: Start by preheating your oven to 350°F (175°C). Then, line an 8×8-inch baking pan with aluminum foil and lightly coat it with cooking spray. This step is important for easy removal of the bars later, as caramel can get very sticky.
- Melt the butter: Place the butter in a large microwave-safe bowl and microwave it on high for about 90 seconds or until fully melted. Alternatively, you can melt the butter in a saucepan over low heat on the stove.
- Mix the wet ingredients: Add the brown sugar and vanilla extract to the melted butter. Whisk the mixture until smooth and fully combined. The warmth of the butter will help the sugar dissolve more easily, so you should end up with a silky, cohesive mixture.
- Add dry ingredients: Add the flour, oats, baking soda, and optional salt to the wet mixture. Stir until everything is fully incorporated. The dough will be thick, so don’t worry if it’s difficult to stir—this is normal. The oats should be well distributed throughout.
- Prepare the base: Transfer half of the oat mixture into the prepared pan. Use a spatula or the back of a spoon to press the dough into an even, flat layer. This will form the base of your Carmelitas. Make sure the layer is smooth so it bakes evenly.
- Bake the base: Place the pan in the oven and bake for 10 minutes. While the base is baking, you can start preparing the caramel sauce.
- Make the caramel sauce: In a separate microwave-safe bowl, combine the unwrapped caramel squares and heavy cream. Microwave the mixture in 60-second intervals, stirring after each, until the caramels are fully melted and smooth. This should take about 4-5 minutes. Alternatively, you can melt the caramels and cream in a saucepan over medium-low heat on the stove, stirring constantly.
- Assemble the bars: Once the base has baked for 10 minutes, remove it from the oven. Evenly sprinkle the chocolate chips over the base, then pour the warm caramel sauce evenly over the chocolate. The caramel will melt into the chocolate, creating a gooey, decadent layer.
- Add the topping: Take the remaining oat mixture and crumble it over the caramel layer. Spread it as evenly as you can, but it doesn’t have to be perfect. The oats will bake into a golden, slightly crispy topping that complements the soft center.
- Bake the bars: Return the pan to the oven and bake for another 15-18 minutes, or until the edges are lightly browned and the center is bubbling slightly. You’ll know they’re done when the top is golden and set.
- Cool the Carmelitas: Let the bars cool completely in the pan before slicing. This is a crucial step—if you try to cut them while they’re still warm, the caramel will be too runny and the bars won’t hold their shape. Allow the Carmelitas to cool for at least 4 hours at room temperature (or longer if you want to refrigerate them to speed up the process). Once they’re cool, they’ll firm up and slice cleanly.
Beginner Tips and Notes
- Be patient: The most important tip when making Carmelitas is to be patient during the cooling process. If you cut them too soon, the caramel will spill out and the bars won’t hold together. Allow them to cool completely for best results.
- Adjusting the caramel: If your caramel sauce seems too thick, you can add a little more heavy cream to loosen it up. If it’s too runny, you may need to heat it for a little longer to thicken up.
- Texture tips: The oat mixture can sometimes be tricky to crumble evenly over the top, but don’t worry! Just do your best to spread it out, and the texture will still turn out great.
Serving Suggestions
These Carmelitas are delicious on their own, but if you’re looking to elevate the experience, consider pairing them with:
- Vanilla ice cream: The cold, creamy ice cream pairs beautifully with the warm, gooey Carmelitas.
- Whipped cream: A dollop of whipped cream adds a light, airy contrast to the rich caramel and chocolate.
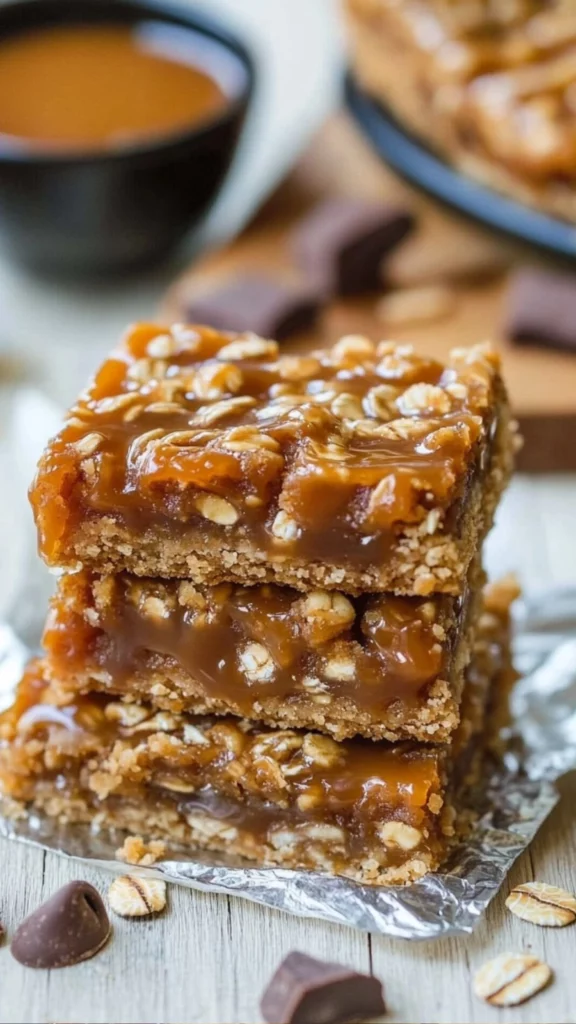
- Coffee or tea: Carmelitas are perfect with a cup of coffee or a rich, spiced tea like chai or Earl Grey.
Storage Tips
If you happen to have leftovers (though they probably won’t last long), store them in an airtight container at room temperature for up to a week. You can also refrigerate them to extend their shelf life. If you want to freeze them, wrap individual bars in plastic wrap and foil to prevent freezer burn.
Conclusion
These Carmelitas are an indulgent treat that even beginners can master. With their gooey caramel center, chewy oats, and chocolatey goodness, they’re sure to become a family favorite. Whether you’re making them for a special occasion or just because you’re craving something sweet, these bars are simple to make and absolutely delicious.
Try them out, and let us know how they turn out! Did you make any fun variations or tweaks? Share your thoughts in the comments below—we can’t wait to hear about your baking adventures!