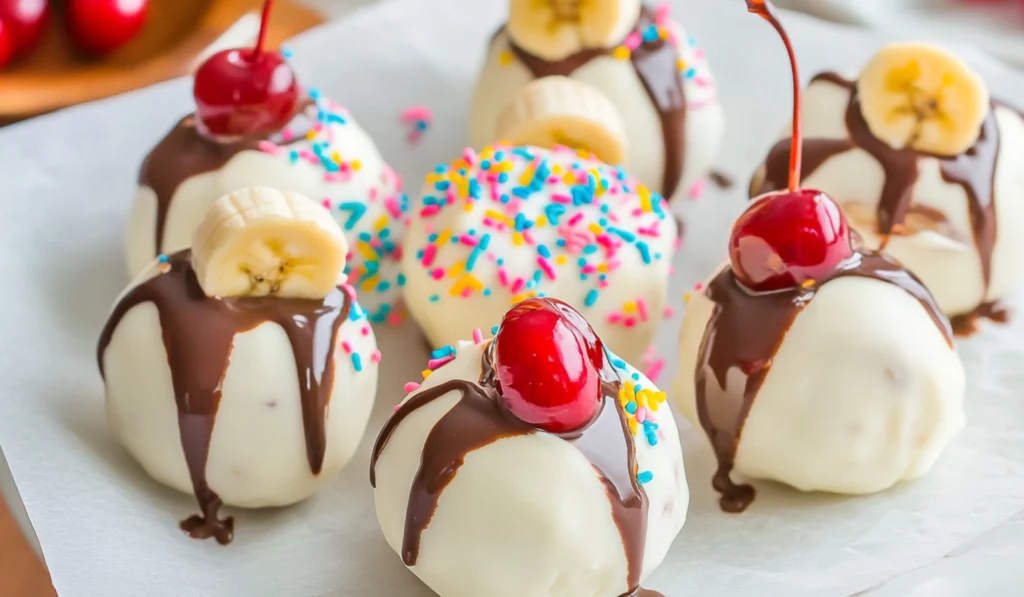
If you’re on the hunt for a dessert that brings together the delicious flavors of a classic banana split in a bite-sized, decadent treat, then look no further than these Banana Split Truffles. These indulgent, no-bake truffles offer the perfect balance of sweetness, creaminess, and crunch. Imagine the creamy richness of a white cake base, the tropical tang of pineapple, the soft sweetness of banana, and the satisfying crunch of walnuts, all coated in silky white chocolate and topped with a drizzle of chocolate syrup, sprinkles, and a cherry. These truffles are a fun and delicious way to enjoy the flavors of a banana split in a form that’s perfect for parties, gatherings, or just a special treat for yourself and loved ones.
Banana Split Truffles: The Perfect Dessert for Any Occasion
Craving a fun twist on a classic dessert? These Banana Split Truffles combine the sweet flavors of banana, pineapple, and walnuts in a bite-sized treat. Coated in smooth white chocolate and topped with a chocolate drizzle and cherry, they’re easy to make and perfect for any occasion. Let’s dive in and make these delicious truffles a hit at your next gathering!
- Prep Time: 25 mins
- Cook Time: 2 hrs
- Total Time: 2 hrs 25 mins
- Yield: 18 Truffles 1x
- Category: Dessert
- Method: No-bake, Dipping
- Cuisine: American
- Diet: Vegetarian
Ingredients
- 1 (15.25 oz) box white cake mix (heat-treated—see notes for instructions)
- 8 oz block cream cheese (softened to room temperature)
- 1 teaspoon vanilla extract
- ½ cup crushed pineapple (very well drained)
- ¾ cup chopped walnuts
- 1 ripe banana (sliced)
- 8 oz white candy coating
- ½ cup chocolate melting wafers
- Rainbow sprinkles (for garnishing)
- Stemmed maraschino cherries (for topping)
Instructions
Step 1: Prepare the Cookie Sheet
Start by preparing a large cookie sheet with parchment paper. This will be the surface on which you’ll place your truffles while they chill and firm up. Parchment paper helps prevent sticking and ensures that the truffles don’t get too messy as they set. Set the prepared sheet aside for now.
Step 2: Mix the Dough
In a medium mixing bowl, combine the white cake mix, softened cream cheese, and vanilla extract. Use a hand mixer or a spoon to blend the ingredients together until fully combined, creating a dough-like consistency. The cream cheese adds moisture to the dry cake mix and helps give the truffles a smooth texture.
At this stage, the dough should be thick enough to hold its shape but not overly sticky. If it feels too soft, you can add a little extra cake mix to thicken it up. Conversely, if the dough feels too dry, you can add a tiny bit of cream cheese to make it more pliable.
Step 3: Add the Fruits and Nuts
Now it’s time to fold in the fun stuff! Add the crushed pineapple, chopped walnuts, and banana slices to the dough. Stir everything together gently until the pineapple is evenly distributed, the banana is spread throughout, and the walnuts are mixed in. These ingredients give the truffles their delightful texture and flavor, with the pineapple offering a refreshing burst, the banana providing natural sweetness, and the walnuts giving the truffles a satisfying crunch.
Make sure that the pineapple is very well drained to avoid excess moisture in the dough. If there’s too much moisture, the truffles may not hold together as well, so be sure to squeeze out any extra juice before mixing it in.
Step 4: Form the Truffles
Using a 1-2 inch cookie scoop, portion out the dough and roll each portion into a smooth ball. You can use the palms of your hands to gently smooth and round each ball. Each truffle should be about 1 to 1 ½ inches in diameter. This recipe should yield about 18 truffles, but if you’d like them smaller or larger, feel free to adjust the size accordingly.
As you roll the balls, make sure they are tightly packed to ensure that they don’t fall apart during the dipping process. If you find that the mixture is a bit sticky, lightly grease your hands or dust them with a small amount of powdered sugar to make the rolling process easier.
Step 5: Chill the Truffles
Once all your truffles are rolled, place them onto the prepared cookie sheet. Arrange them in a single layer, making sure they don’t touch each other. Put the cookie sheet into the refrigerator and chill the truffles for 1 hour. Chilling is an essential step because it helps the truffles firm up, making them easier to dip and handle.
Step 6: Melt the White Candy Coating
While the truffles are chilling, you can prepare the candy coating. Place the white candy coating into a microwave-safe bowl and heat it on 50% power for 1 minute. Stir the coating and then return it to the microwave for 30-second intervals, stirring in between each one, until the candy coating is silky smooth and fully melted. Be patient during this process to avoid overheating the coating. Stirring is key to ensuring that it melts evenly.
Step 7: Dip the Truffles
Once your truffles are chilled and your candy coating is ready, it’s time to dip! Using two forks or dipping tools, dip each truffle ball into the melted white candy coating. Use the forks to roll the truffle around in the coating, ensuring that it’s completely covered. Gently tap the forks against the bowl to remove any excess coating before placing the truffle back on the parchment paper. Repeat this process until all the truffles are coated.
If the candy coating begins to thicken as you work, you can reheat it briefly in the microwave to restore its smooth consistency.
Step 8: Chill Again
After you’ve coated all the truffles, return the cookie sheet to the refrigerator for another 30 minutes. This final chilling time allows the candy coating to fully harden, giving the truffles that perfect glossy finish.
Step 9: Prepare the Chocolate Syrup
While the truffles are chilling, melt the chocolate melting wafers to make the “chocolate syrup” topping. Place the wafers in a microwave-safe bowl and heat them in the same manner as the white candy coating. After stirring and melting until smooth, the chocolate should have a smooth, pourable consistency.
Step 10: Decorate the Truffles
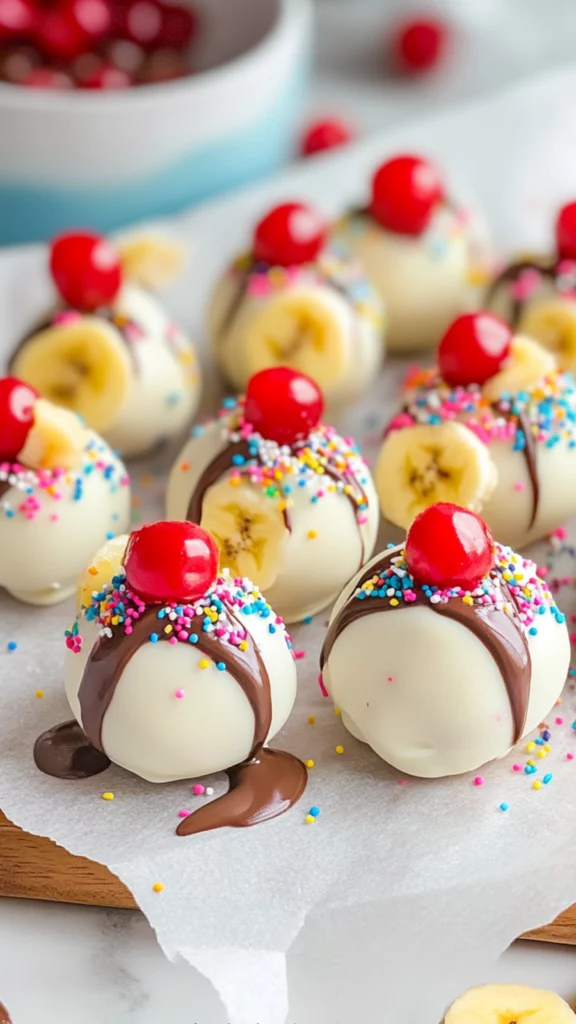
To give your truffles that classic banana split appearance, drizzle a small spoonful of the melted chocolate over the top of each truffle. This creates the “chocolate syrup” effect. Immediately top each truffle with a maraschino cherry, gently pressing it into the melted chocolate. Hold the cherry in place for a few seconds until it firms up.
To finish, sprinkle each truffle with a generous amount of rainbow sprinkles for a fun, festive touch. Repeat the process for each truffle, working one at a time.
Step 11: Final Chill
Once the truffles are decorated, return the baking sheet to the refrigerator and allow them to chill for an additional 30 minutes to let the chocolate syrup set and the truffles firm up completely.
Notes
- Chilling Time: Don’t rush the chilling process—it’s essential for helping the truffles firm up and set properly. If you skip this step, the truffles may fall apart when dipped or decorated.
- Rolling the Truffles: If the dough feels too sticky, lightly grease your hands or use a small amount of powdered sugar to help with rolling the truffles into balls.
- Smooth Coating: If the candy coating starts to thicken or becomes too clumpy, simply reheat it in the microwave for a few seconds, stirring until smooth. This will ensure a silky finish when dipping your truffles.
- No Candy Coating? If you can’t find candy coating, you can use white chocolate chips or bars, but they require extra care to avoid overheating. Be sure to stir them constantly while melting.
- Topping Variations: You can customize the topping by using different colored sprinkles or even drizzle with caramel or peanut butter for a unique twist.
Not only are these Banana Split Truffles incredibly tasty, but they’re also super simple to make. If you’re a beginner cook, don’t worry—this recipe has been broken down into easy-to-follow steps that anyone can master, whether you’re new to the kitchen or simply looking for a sweet, hassle-free dessert. These truffles are easy to prep, don’t require any special tools or complicated techniques, and can be made in advance, so you’ll have plenty of time to focus on other tasks if you’re hosting an event or enjoying some downtime. What’s more, they look impressive and are guaranteed to wow your guests!
In this recipe, we’ll take you through every step—from preparing the ingredients to forming the truffles, dipping them in delicious white chocolate, and decorating them with chocolate syrup and sprinkles. Plus, we’ll share some handy tips and tricks along the way, ensuring your truffles come out perfectly every time.
Ingredients and Preparation
The beauty of this recipe lies in the simplicity of the ingredients. With a handful of pantry staples and a few special touches, you’ll be able to create these delightful Banana Split Truffles with ease. Here’s what you’ll need:
Ingredients:
- 1 (15.25 oz) box white cake mix (heat-treated—see notes for instructions)
- 8 oz block cream cheese (softened to room temperature)
- 1 teaspoon vanilla extract
- ½ cup crushed pineapple (very well drained)
- ¾ cup chopped walnuts
- 1 ripe banana (sliced)
- 8 oz white candy coating
- ½ cup chocolate melting wafers
- Rainbow sprinkles (for garnishing)
- Stemmed maraschino cherries (for topping)
Alternative Ingredient Suggestions:
- Nuts: You can substitute walnuts with other nuts like pecans, almonds, or cashews for different textures and flavors.
- Cake Mix: If you prefer a homemade base, you can swap the box cake mix with your favorite white cake recipe. Just be sure to adjust for moisture levels.
- Pineapple: If you’re not a fan of pineapple or want a variation, consider replacing it with shredded coconut for a tropical twist or even some finely chopped dried fruits for a different texture.
- Candy Coating: While white candy coating is ideal for this recipe, you can use white chocolate chips or a block of white chocolate if candy coating isn’t available. Just make sure to melt it properly to avoid any lumps or uneven coating.
Now that you have all your ingredients lined up, it’s time to get started with the preparation.
Step-by-Step Instructions
Step 1: Prepare the Cookie Sheet
Start by preparing a large cookie sheet with parchment paper. This will be the surface on which you’ll place your truffles while they chill and firm up. Parchment paper helps prevent sticking and ensures that the truffles don’t get too messy as they set. Set the prepared sheet aside for now.
Step 2: Mix the Dough
In a medium mixing bowl, combine the white cake mix, softened cream cheese, and vanilla extract. Use a hand mixer or a spoon to blend the ingredients together until fully combined, creating a dough-like consistency. The cream cheese adds moisture to the dry cake mix and helps give the truffles a smooth texture.
At this stage, the dough should be thick enough to hold its shape but not overly sticky. If it feels too soft, you can add a little extra cake mix to thicken it up. Conversely, if the dough feels too dry, you can add a tiny bit of cream cheese to make it more pliable.
Step 3: Add the Fruits and Nuts
Now it’s time to fold in the fun stuff! Add the crushed pineapple, chopped walnuts, and banana slices to the dough. Stir everything together gently until the pineapple is evenly distributed, the banana is spread throughout, and the walnuts are mixed in. These ingredients give the truffles their delightful texture and flavor, with the pineapple offering a refreshing burst, the banana providing natural sweetness, and the walnuts giving the truffles a satisfying crunch.
Make sure that the pineapple is very well drained to avoid excess moisture in the dough. If there’s too much moisture, the truffles may not hold together as well, so be sure to squeeze out any extra juice before mixing it in.
Step 4: Form the Truffles
Using a 1-2 inch cookie scoop, portion out the dough and roll each portion into a smooth ball. You can use the palms of your hands to gently smooth and round each ball. Each truffle should be about 1 to 1 ½ inches in diameter. This recipe should yield about 18 truffles, but if you’d like them smaller or larger, feel free to adjust the size accordingly.
As you roll the balls, make sure they are tightly packed to ensure that they don’t fall apart during the dipping process. If you find that the mixture is a bit sticky, lightly grease your hands or dust them with a small amount of powdered sugar to make the rolling process easier.
Step 5: Chill the Truffles
Once all your truffles are rolled, place them onto the prepared cookie sheet. Arrange them in a single layer, making sure they don’t touch each other. Put the cookie sheet into the refrigerator and chill the truffles for 1 hour. Chilling is an essential step because it helps the truffles firm up, making them easier to dip and handle.
Step 6: Melt the White Candy Coating
While the truffles are chilling, you can prepare the candy coating. Place the white candy coating into a microwave-safe bowl and heat it on 50% power for 1 minute. Stir the coating and then return it to the microwave for 30-second intervals, stirring in between each one, until the candy coating is silky smooth and fully melted. Be patient during this process to avoid overheating the coating. Stirring is key to ensuring that it melts evenly.
Step 7: Dip the Truffles
Once your truffles are chilled and your candy coating is ready, it’s time to dip! Using two forks or dipping tools, dip each truffle ball into the melted white candy coating. Use the forks to roll the truffle around in the coating, ensuring that it’s completely covered. Gently tap the forks against the bowl to remove any excess coating before placing the truffle back on the parchment paper. Repeat this process until all the truffles are coated.
If the candy coating begins to thicken as you work, you can reheat it briefly in the microwave to restore its smooth consistency.
Step 8: Chill Again
After you’ve coated all the truffles, return the cookie sheet to the refrigerator for another 30 minutes. This final chilling time allows the candy coating to fully harden, giving the truffles that perfect glossy finish.
Step 9: Prepare the Chocolate Syrup
While the truffles are chilling, melt the chocolate melting wafers to make the “chocolate syrup” topping. Place the wafers in a microwave-safe bowl and heat them in the same manner as the white candy coating. After stirring and melting until smooth, the chocolate should have a smooth, pourable consistency.
Step 10: Decorate the Truffles
To give your truffles that classic banana split appearance, drizzle a small spoonful of the melted chocolate over the top of each truffle. This creates the “chocolate syrup” effect. Immediately top each truffle with a maraschino cherry, gently pressing it into the melted chocolate. Hold the cherry in place for a few seconds until it firms up.
To finish, sprinkle each truffle with a generous amount of rainbow sprinkles for a fun, festive touch. Repeat the process for each truffle, working one at a time.
Step 11: Final Chill
Once the truffles are decorated, return the baking sheet to the refrigerator and allow them to chill for an additional 30 minutes to let the chocolate syrup set and the truffles firm up completely.
Beginner Tips and Notes
- Chilling Time: Don’t rush the chilling process—it’s essential for helping the truffles firm up and set properly. If you skip this step, the truffles may fall apart when dipped or decorated.
- Rolling the Truffles: If the dough feels too sticky, lightly grease your hands or use a small amount of powdered sugar to help with rolling the truffles into balls.
- Smooth Coating: If the candy coating starts to thicken or becomes too clumpy, simply reheat it in the microwave for a few seconds, stirring until smooth. This will ensure a silky finish when dipping your truffles.
- No Candy Coating? If you can’t find candy coating, you can use white chocolate chips or bars, but they require extra care to avoid overheating. Be sure to stir them constantly while melting.
- Topping Variations: You can customize the topping by using different colored sprinkles or even drizzle with caramel or peanut butter for a unique twist.
Serving Suggestions
These Banana Split Truffles are indulgent on their own, but pairing them with complementary flavors can elevate the experience even further. Serve them with a scoop of vanilla, chocolate, or banana ice cream for a complete banana split experience. You can also present them alongside a chilled glass of milk, coffee, or a fruity beverage to balance out the richness of the truffles.
For an extra touch of elegance, arrange them in a decorative box or on a fancy dessert platter at a party. They make an eye-catching addition to any spread, sure to be the talk of the event!
Conclusion
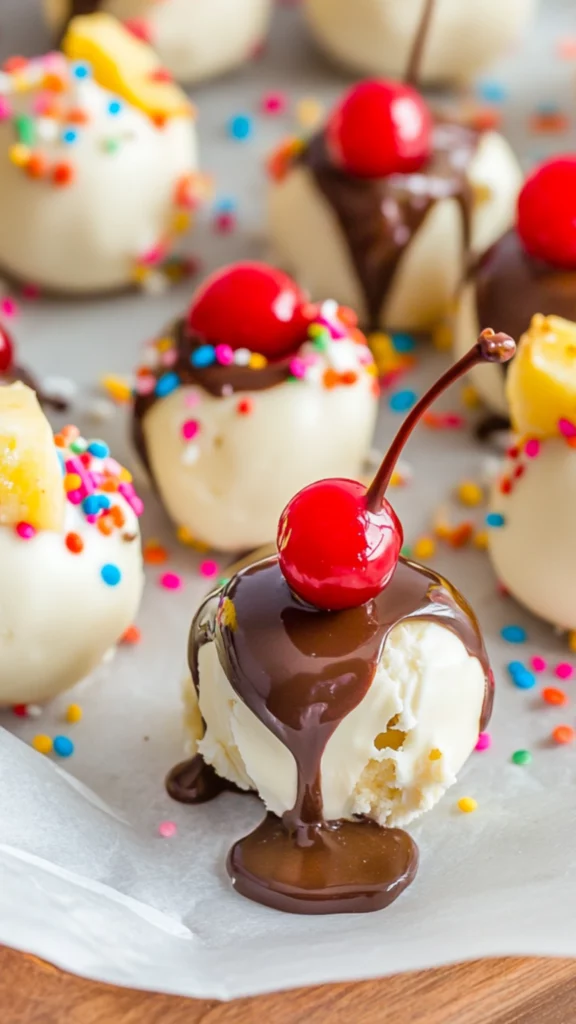
Banana Split Truffles are a delightful way to enjoy the nostalgic flavors of a classic banana split in an easy-to-make, bite-sized form. Whether you’re hosting a gathering or just treating yourself, these truffles are guaranteed to bring joy and smiles to anyone who tries them. The combination of creamy white cake, pineapple, banana, and crunchy walnuts, topped with a sweet chocolate drizzle and a cherry, makes each bite an explosion of flavor. With this step-by-step guide, you can master these irresistible truffles, making them your go-to dessert for any occasion.
Whether you follow the recipe as written or make your own personalized tweaks, these truffles are sure to become a favorite among your friends, family, and anyone who’s lucky enough to indulge in them. Enjoy!


