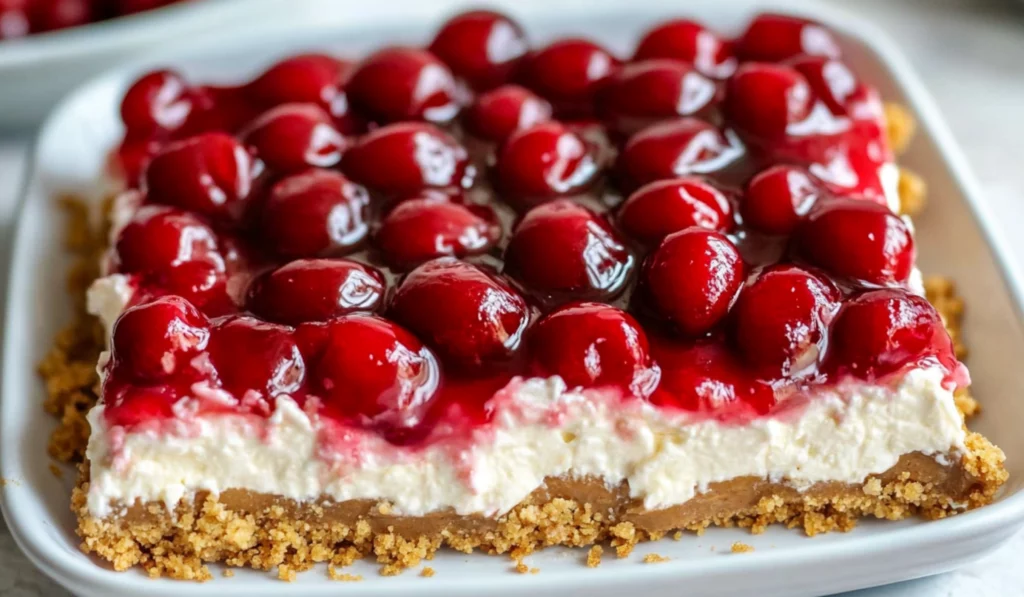
Cherry Delight is a dessert that offers a perfect balance of creamy, sweet, and tart flavors. The combination of a buttery graham cracker crust, a luscious cheesecake filling, and a sweet cherry topping makes it an irresistible treat. This recipe is especially ideal for beginners because it requires minimal effort and utilizes store-bought ingredients that save time. Whether you’re new to baking or simply want a quick dessert for a special occasion, Cherry Delight is a great choice.
Cherry Delight Recipe: A Simple, Layered Dessert Everyone Will Love
Looking for an easy, delicious dessert? Cherry Delight is your answer! This no-bake treat features a buttery graham cracker crust, creamy cheesecake layer, and sweet cherry topping. Perfect for beginners, it comes together with just a few ingredients and minimal effort. Whether you’re new to cooking or just craving something sweet, this dessert is sure to impress everyone at the table. Ready to make it? Let’s dive in!
- Prep Time: 15 minutes
- Cook Time: 12 minutes
- Total Time: 4 hours 27 minutes (includes refrigeration time)
- Yield: 12 slices 1x
- Category: Dessert
- Method: No-bake
- Cuisine: American
- Diet: Vegetarian
Ingredients
For the Crust:
- 2 1/2 cups graham cracker crumbs
- 1/4 cup granulated sugar
- 3/4 cup butter, melted
For the Cheesecake Layer:
- 2 (8-ounce) blocks cream cheese, softened
- 1/4 cup sour cream
- 1 (8-ounce) tub Cool Whip, thawed overnight in the fridge
- 1 cup confectioner’s sugar
- 2 teaspoons vanilla extract
For the Topping:
- 1 (21-ounce) can cherry pie filling
Instructions
Step 1: Prepare the Crust
Preheat your oven to 350°F (177ºC). Then, prepare a 9×13-inch baking dish by spraying it with nonstick cooking spray. This will help prevent the dessert from sticking to the pan.
In a large bowl, combine the 2 1/2 cups of graham cracker crumbs, 1/4 cup of granulated sugar, and 3/4 cup of melted butter. Stir until the mixture is well combined. The butter will help bind the crumbs together, while the sugar adds sweetness and depth to the crust.
Next, press the crumb mixture evenly into the bottom of the prepared baking dish. You can use the back of a spoon or your hands to firmly press the crumbs down. Bake the crust in the preheated oven for about 12 to 14 minutes, or until the edges are golden brown. The crust should be slightly firm but not too hard.
After baking, remove the crust from the oven and allow it to cool completely, about 45 minutes. This is an important step, as you don’t want to add the cheesecake layer while the crust is still warm. The crust needs to cool to hold the layers together properly.
Step 2: Prepare the Cheesecake Layer
While the crust is cooling, it’s time to prepare the cheesecake layer. In a large mixing bowl, beat the 2 blocks of softened cream cheese and 1/4 cup of sour cream with an electric mixer until smooth and creamy. Make sure to beat the mixture until there are no lumps left. The sour cream adds a slight tanginess that complements the cream cheese.
Once the cream cheese and sour cream are well combined, add the 1 cup of confectioner’s sugar and 2 teaspoons of vanilla extract. Beat on medium speed for about 2 minutes until the mixture is light and fluffy. This step ensures that the sugar is fully dissolved and the mixture reaches the right consistency.
Step 3: Add the Cool Whip
Now, gently fold in the tub of Cool Whip. It’s important not to overmix at this stage. The goal is to maintain the light, airy texture of the Cool Whip. Use a spatula to fold the whipped topping into the cream cheese mixture until it’s fully incorporated. You should end up with a fluffy, creamy mixture that’s ready to be spread over the crust.
Step 4: Spread the Cheesecake Mixture
Once the graham cracker crust has cooled, spread the cream cheese mixture evenly over the crust. Use a spatula to smooth it out and make sure the layer is evenly distributed. You want the cheesecake layer to cover the entire crust, filling in any gaps.
After spreading the mixture, cover the dessert with plastic wrap or aluminum foil and refrigerate for at least 4 hours. If you have time, refrigerating it overnight is even better. The chilling time helps the layers set and allows the flavors to meld together.
Step 5: Add the Cherry Topping
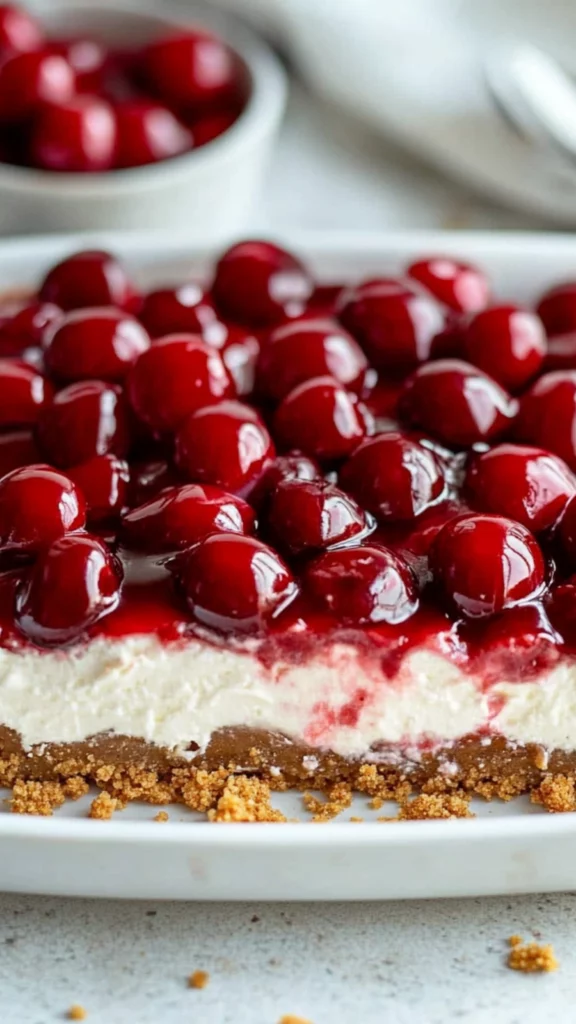
Once the dessert has chilled and set, it’s time to top it with the cherry pie filling. Open the can of cherry pie filling and spread it evenly over the cheesecake layer. You can use the entire can or adjust the amount to your taste.
The cherry topping adds a burst of color and flavor to the dessert. It’s sweet and slightly tart, which complements the rich and creamy cheesecake layer. If you prefer, you can use a different fruit topping, such as blueberry, strawberry, or peach. You could even use fresh berries if you prefer a more natural option.
Step 6: Serve and Enjoy
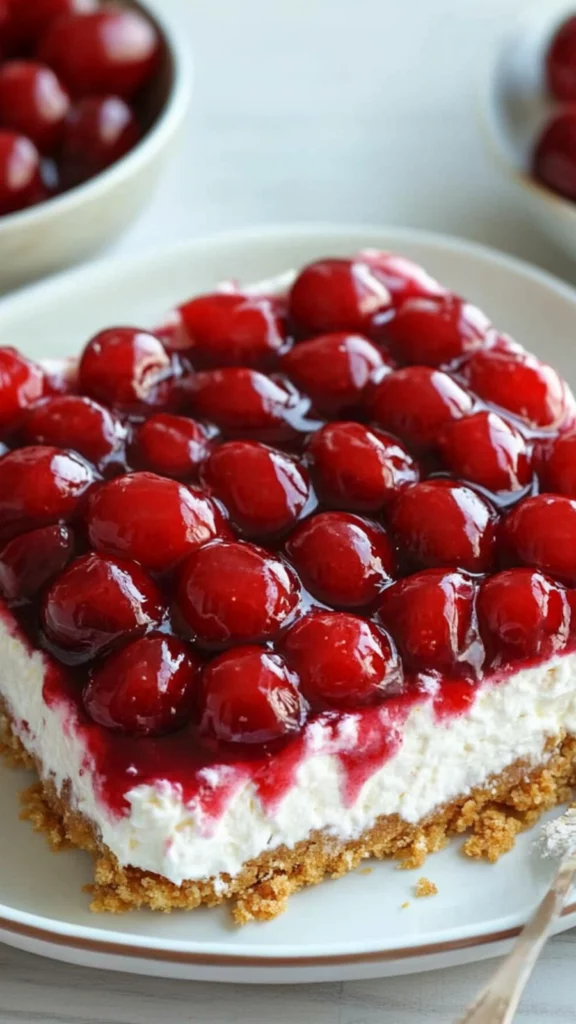
Cut the Cherry Delight into squares and serve immediately. The dessert can be enjoyed right away, but it also stores well in the refrigerator for up to 2-3 days. If you’re not serving it right away, keep it covered in the fridge until you’re ready to serve.
For extra flair, you can garnish the dessert with some extra crushed graham crackers, whipped cream, or even a few whole cherries on top. The presentation is just as important as the taste, and a little extra decoration goes a long way in making your dessert look even more appetizing.
Notes
- Crust Consistency: When pressing the graham cracker crumbs into the pan, make sure to press them down firmly but not too hard. This will help create a crisp, firm crust without making it too tough to cut.
- Chilling Time: Make sure to allow the dessert to chill for at least 4 hours. If you’re in a rush, you could try placing it in the freezer for a shorter time, but refrigeration is key to allowing the layers to set and the flavors to meld.
- Avoid Overmixing: When folding in the Cool Whip, be gentle. Overmixing can cause the whipped topping to lose its airy texture, which can affect the overall lightness of the dessert.
- Topping Variations: If you don’t like cherry pie filling, feel free to experiment with different fruit toppings. Blueberry, strawberry, and raspberry pie fillings are great alternatives, or you can use fresh fruit for a lighter, more natural option.
- Storage: Cherry Delight keeps well in the fridge for 2-3 days. Just make sure to cover it tightly to prevent the crust from becoming soggy.
I first encountered this dessert at a family gathering, where it quickly became the star of the table. What I love most about it is its simplicity — you don’t need to be a baking expert to create this show-stopping dessert. You can impress your friends and family without the stress of complicated techniques or long preparation times. Plus, it’s a no-bake dessert, which means you don’t need to worry about baking times or temperatures.
For beginners, Cherry Delight is a foolproof recipe that yields consistently delicious results. With its easy layers and minimal ingredients, it’s a fantastic dessert to start with if you’re looking to build your confidence in the kitchen. This dessert is versatile, too — while it’s traditionally topped with cherry pie filling, you can experiment with different fruits and toppings to suit your taste. Whether it’s for a casual weeknight treat or a special occasion, Cherry Delight is sure to become a favorite in your dessert repertoire.
Ingredients and Preparation
Let’s dive into the ingredients that make this dessert so delectable. You’ll need a few simple items that are easy to find at any grocery store. Here’s a breakdown of what you need for each layer:
For the Crust:
- 2 1/2 cups graham cracker crumbs
- 1/4 cup granulated sugar
- 3/4 cup butter, melted
The graham cracker crumbs form the base of this dessert, creating a rich and buttery layer that contrasts perfectly with the creamy filling. You can easily crush the graham crackers yourself or purchase pre-crushed crumbs for convenience.
For the Cheesecake Layer:
- 2 (8-ounce) blocks cream cheese, softened
- 1/4 cup sour cream
- 1 (8-ounce) tub Cool Whip, thawed overnight in the fridge
- 1 cup confectioner’s sugar
- 2 teaspoons vanilla extract
The cream cheese and sour cream create a tangy, smooth base that’s complemented by the sweetness of the powdered sugar and Cool Whip. The result is a light, airy texture that’s not too heavy — a perfect match for the graham cracker crust.
For the Topping:
- 1 (21-ounce) can cherry pie filling
The cherry topping is what really makes this dessert shine. It adds a burst of color and a sweet-tart flavor that pairs wonderfully with the creamy layers below. If cherries aren’t your thing, feel free to swap the cherry pie filling with your favorite fruit filling, like blueberry or strawberry, for a different flavor twist.
Alternative Ingredient Suggestions:
- If you don’t have Cool Whip, you can substitute it with freshly whipped cream. Simply whip 1 1/2 cups of heavy cream with 1 tablespoon of sugar until stiff peaks form. This will give you a fresh, homemade touch to the dessert.
- You can experiment with different crusts by using crushed vanilla cookies or even chocolate wafer cookies. This will add a unique flavor to your dessert.
- For a tangier cheesecake layer, you could substitute the sour cream with Greek yogurt, which will also add a bit of extra protein to the dessert.
Step-by-Step Instructions
Here’s how to make Cherry Delight, step by step. The process is simple and doesn’t require much time or skill, making it the perfect recipe for beginners.
Step 1: Prepare the Crust
Preheat your oven to 350°F (177ºC). Then, prepare a 9×13-inch baking dish by spraying it with nonstick cooking spray. This will help prevent the dessert from sticking to the pan.
In a large bowl, combine the 2 1/2 cups of graham cracker crumbs, 1/4 cup of granulated sugar, and 3/4 cup of melted butter. Stir until the mixture is well combined. The butter will help bind the crumbs together, while the sugar adds sweetness and depth to the crust.
Next, press the crumb mixture evenly into the bottom of the prepared baking dish. You can use the back of a spoon or your hands to firmly press the crumbs down. Bake the crust in the preheated oven for about 12 to 14 minutes, or until the edges are golden brown. The crust should be slightly firm but not too hard.
After baking, remove the crust from the oven and allow it to cool completely, about 45 minutes. This is an important step, as you don’t want to add the cheesecake layer while the crust is still warm. The crust needs to cool to hold the layers together properly.
Step 2: Prepare the Cheesecake Layer
While the crust is cooling, it’s time to prepare the cheesecake layer. In a large mixing bowl, beat the 2 blocks of softened cream cheese and 1/4 cup of sour cream with an electric mixer until smooth and creamy. Make sure to beat the mixture until there are no lumps left. The sour cream adds a slight tanginess that complements the cream cheese.
Once the cream cheese and sour cream are well combined, add the 1 cup of confectioner’s sugar and 2 teaspoons of vanilla extract. Beat on medium speed for about 2 minutes until the mixture is light and fluffy. This step ensures that the sugar is fully dissolved and the mixture reaches the right consistency.
Step 3: Add the Cool Whip
Now, gently fold in the tub of Cool Whip. It’s important not to overmix at this stage. The goal is to maintain the light, airy texture of the Cool Whip. Use a spatula to fold the whipped topping into the cream cheese mixture until it’s fully incorporated. You should end up with a fluffy, creamy mixture that’s ready to be spread over the crust.
Step 4: Spread the Cheesecake Mixture
Once the graham cracker crust has cooled, spread the cream cheese mixture evenly over the crust. Use a spatula to smooth it out and make sure the layer is evenly distributed. You want the cheesecake layer to cover the entire crust, filling in any gaps.
After spreading the mixture, cover the dessert with plastic wrap or aluminum foil and refrigerate for at least 4 hours. If you have time, refrigerating it overnight is even better. The chilling time helps the layers set and allows the flavors to meld together.
Step 5: Add the Cherry Topping
Once the dessert has chilled and set, it’s time to top it with the cherry pie filling. Open the can of cherry pie filling and spread it evenly over the cheesecake layer. You can use the entire can or adjust the amount to your taste.
The cherry topping adds a burst of color and flavor to the dessert. It’s sweet and slightly tart, which complements the rich and creamy cheesecake layer. If you prefer, you can use a different fruit topping, such as blueberry, strawberry, or peach. You could even use fresh berries if you prefer a more natural option.
Step 6: Serve and Enjoy
Cut the Cherry Delight into squares and serve immediately. The dessert can be enjoyed right away, but it also stores well in the refrigerator for up to 2-3 days. If you’re not serving it right away, keep it covered in the fridge until you’re ready to serve.
For extra flair, you can garnish the dessert with some extra crushed graham crackers, whipped cream, or even a few whole cherries on top. The presentation is just as important as the taste, and a little extra decoration goes a long way in making your dessert look even more appetizing.
Beginner Tips and Notes
To ensure your Cherry Delight turns out perfectly every time, here are some helpful tips and notes:
- Crust Consistency: When pressing the graham cracker crumbs into the pan, make sure to press them down firmly but not too hard. This will help create a crisp, firm crust without making it too tough to cut.
- Chilling Time: Make sure to allow the dessert to chill for at least 4 hours. If you’re in a rush, you could try placing it in the freezer for a shorter time, but refrigeration is key to allowing the layers to set and the flavors to meld.
- Avoid Overmixing: When folding in the Cool Whip, be gentle. Overmixing can cause the whipped topping to lose its airy texture, which can affect the overall lightness of the dessert.
- Topping Variations: If you don’t like cherry pie filling, feel free to experiment with different fruit toppings. Blueberry, strawberry, and raspberry pie fillings are great alternatives, or you can use fresh fruit for a lighter, more natural option.
- Storage: Cherry Delight keeps well in the fridge for 2-3 days. Just make sure to cover it tightly to prevent the crust from becoming soggy.
Serving Suggestions
Cherry Delight is a versatile dessert that pairs well with many other dishes. Here are some ideas for complementary sides or beverages:
- Fresh Fruit: Add a side of fresh fruit, such as strawberries, raspberries, or even a tropical fruit salad. The freshness of the fruit pairs perfectly with the richness of the Cherry Delight.
- Whipped Cream: A dollop of freshly whipped cream on top of each serving enhances the creamy texture and adds a touch of sweetness.
- Coffee or Iced Tea: Serve Cherry Delight with a hot cup of coffee or a refreshing glass of iced tea. The slightly tart cherries balance out the sweetness of the dessert, making it an ideal pairing for coffee or tea.
Conclusion
Cherry Delight is the ultimate beginner-friendly dessert that combines simplicity, deliciousness, and a stunning presentation. Its creamy texture, buttery graham cracker crust, and sweet cherry topping make it a dessert that everyone will love. Plus, it’s a no-bake recipe, so it’s perfect for beginners who want to create something impressive without spending hours in the kitchen.
This dessert is perfect for any occasion, from casual family dinners to more formal gatherings. It’s easy to make ahead of time, making it a stress-free option for busy cooks. Whether you stick with the classic cherry topping or experiment with other fruits, Cherry Delight is a dessert that you’ll return to again and again.
So, gather your ingredients, follow the simple steps, and enjoy this delightful dessert with your loved ones. If you make this recipe, I’d love to hear how it turned out for you! Happy baking, and enjoy the delicious results!


