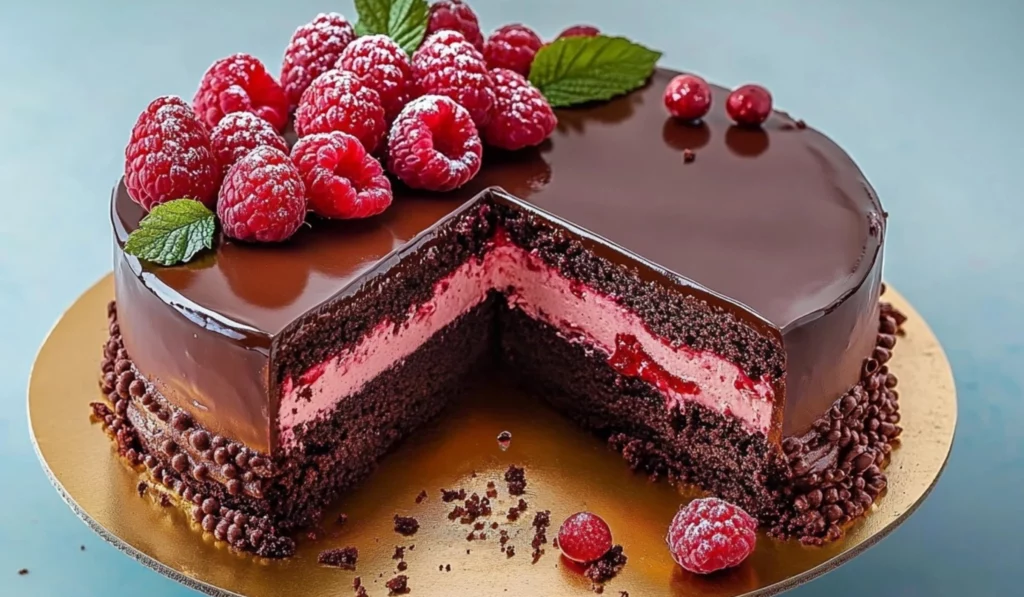
Chocolate and raspberry—two ingredients that harmonize so perfectly together, they almost seem destined to be paired. A dessert that showcases the best of both, the Chocolate Raspberry Mousse Cake is a beautiful, indulgent treat that’s perfect for any occasion. Imagine a soft, cocoa brownie base topped with a delightful crunch, followed by a fluffy, airy raspberry mousse, all enveloped in a glossy chocolate glaze and garnished with fresh raspberries. This cake is as rich and decadent as it sounds, but it’s also surprisingly approachable, making it an excellent choice for beginner bakers looking to challenge themselves in the kitchen. Whether you’re preparing it for a special celebration or simply treating yourself and your loved ones, this cake is sure to wow anyone who tastes it.
Decadent Chocolate Raspberry Mousse Cake: A Step-by-Step Guide for Beginners
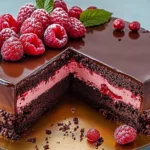
Chocolate and raspberry—these two ingredients are a match made in dessert heaven, and when combined in a cake, they create a flavor profile that is simply irresistible. Imagine a rich, velvety cocoa brownie base that gives way to a crunchy layer of chocolate raspberry goodness, topped off with a light, airy raspberry mousse. Then, as if it wasn’t already tempting enough, everything is coated in a smooth, glossy chocolate ganache and adorned with fresh raspberries for that perfect finishing touch. This Chocolate Raspberry Mousse Cake is a dessert that is as impressive as it is delicious, and while it may look and taste like a professional creation, it’s actually surprisingly beginner-friendly.
- Prep Time: 40 minutes
- Cook Time: 10 minutes
- Total Time: 50 minutes
- Yield: 12 servings 1x
- Category: Dessert
- Method: Baking, Assembling
- Cuisine: American, French
- Diet: Vegetarian
Ingredients
For the Cocoa Brownie
- 1 large egg
- 1/3 cup (70g) sugar
- 1 tsp (5g) vanilla extract
- 1/3 cup (70g) vegetable oil
- 1/4 cup (30g) unsweetened cocoa powder
- 1/4 tsp (1g) salt
- 1/4 cup (30g) all-purpose flour
For the Chocolate Raspberry Crunch
- 2.5 oz (70g) shortbread cookie crumbs
- 1/2 cup (30g) paillete feuilletine (crunchy flakes of wafer)
- 3 tbsp (6g) freeze-dried raspberries (optional, but highly recommended)
- 1.5 oz (40g) milk chocolate
- 1.5 oz (40g) semisweet chocolate
- 3 tbsp (42g) butter
For the Raspberry Mousse
- 18 oz (510g) raspberries (fresh or frozen)
- 2/3 cup (135g) sugar
- 1 tbsp (15ml) lemon juice
- 1 tbsp (10g) gelatin powder
- 1/4 cup (60ml) water
- 1 ⅔ cup (400g) whipping cream (35% fat)
For the Chocolate Glaze
- 5.5 oz (150g) semisweet chocolate
- 6 oz (170g) whipping cream
Optional Chocolate Raspberry Shards
- 2.5 oz (70g) semisweet chocolate
- 1 oz (30g) semisweet chocolate (for tempering)
- freeze-dried raspberries
- coconut flakes (optional)
For Decoration
- Fresh raspberries
- Powdered sugar
- Chocolate shards
- Fresh mint leaves
Instructions
Step 1: Prepare the Raspberry Sauce
- Start by making the raspberry sauce. In a small saucepan, combine the raspberries, sugar, and lemon juice. Place the saucepan over medium heat and bring to a boil. Stir occasionally to help the raspberries break down and release their juices.
- Once the mixture has boiled for about 10 minutes and slightly thickened, remove it from the heat and strain it through a fine-mesh sieve to remove the seeds.
- Set the raspberry sauce aside to cool while you prepare the gelatin. In a separate small bowl, sprinkle the gelatin powder over the water and let it sit for about 5 to 10 minutes to allow it to bloom.
- After the gelatin has bloomed, stir it into the warm raspberry sauce until fully dissolved. Allow the raspberry mixture to cool to room temperature.
Step 2: Prepare the Cocoa Brownie
- Preheat your oven to 350°F (180°C) and grease and line an 8-inch (20cm) springform pan with parchment paper.
- In a medium bowl, whisk the egg and sugar together until smooth. Add the vanilla extract and vegetable oil, whisking until everything is well combined.
- Sift the flour, cocoa powder, and salt into the egg mixture and stir until fully incorporated.
- Pour the batter into the prepared pan and spread it evenly.
- Bake the brownie for 10-12 minutes, or until a toothpick inserted into the center comes out clean or with just a few moist crumbs attached. Let it cool completely before moving on to the next step.
Step 3: Prepare the Chocolate Raspberry Crunch
- While the brownie cools, prepare the crunch layer. Melt the milk chocolate, semisweet chocolate, and butter in a heatproof bowl set over a pan of simmering water (bain-marie). Stir until the mixture is smooth.
- In a medium bowl, combine the shortbread cookie crumbs, paillete feuilletine, and freeze-dried raspberries (if using).
- Once the chocolate and butter mixture has melted, pour it over the dry ingredients and mix well to combine.
- Spread the chocolate crunch mixture evenly over the cooled brownie, leaving a small border around the edges. Refrigerate the cake until the mousse layer is ready.
Step 4: Prepare the Raspberry Mousse
- In a large mixing bowl, whip the cold whipping cream until stiff peaks form.
- Add the cooled raspberry mixture to the whipped cream and gently fold them together until fully combined.
- Line the sides of the springform pan with an acetate sheet for easy removal after the cake has set.
- Pour the raspberry mousse over the chocolate crunch layer, smoothing the top with a spatula.
- Refrigerate the cake for at least 4 to 6 hours, or overnight if possible, to allow the mousse to set completely.
Step 5: Prepare the Chocolate Glaze
- For the glaze, melt the semisweet chocolate and whipping cream together over a bain-marie. Stir until smooth and glossy.
- Once the mousse has set, remove the cake from the refrigerator. If you used an acetate sheet, gently peel it away from the sides of the cake.
- Place the cake on a wire rack set over a baking sheet or another pan to catch any drips. Pour the chocolate glaze over the top and allow it to cover the sides of the cake.
- Use a spatula to smooth out any drips and to decorate the base of the cake with chopped chocolate.
- Place the cake back in the refrigerator for 20-30 minutes to allow the glaze to set completely.
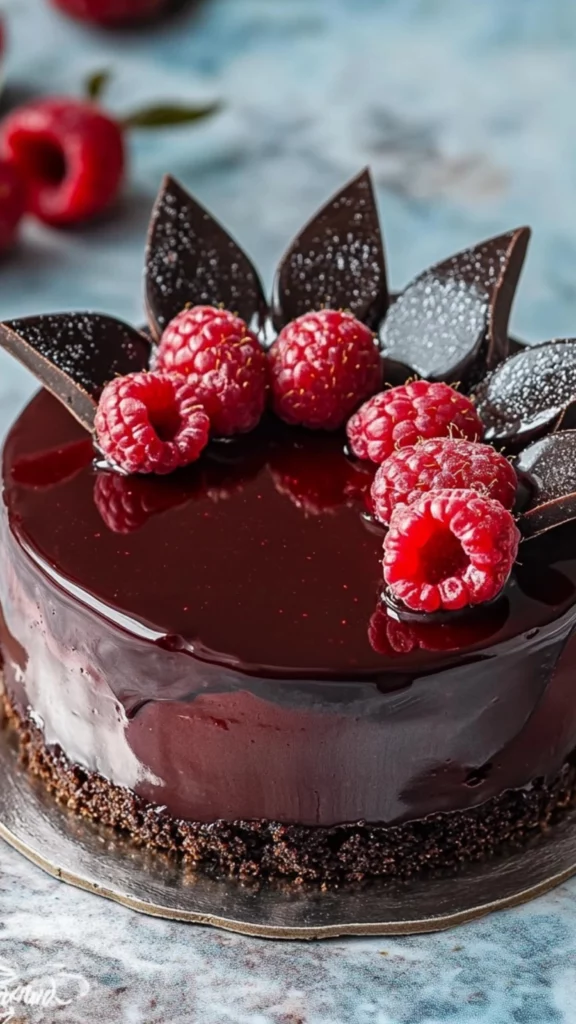
Step 6: Optional Chocolate Raspberry Shards
- If you want to add a decorative touch, melt the semisweet chocolate and stir in some tempered chocolate for a smooth finish.
- Spread the melted chocolate onto a parchment-lined baking sheet and sprinkle it with freeze-dried raspberries and coconut flakes if desired.
- Refrigerate the chocolate until set, then break it into shards.
- Decorate the top of the cake with these chocolate shards, fresh raspberries, a dusting of powdered sugar, and fresh mint leaves.
Notes
- How to prevent overbaking the brownies: Keep an eye on the brownies toward the end of baking. A toothpick inserted into the center should come out clean or with a few moist crumbs attached. Don’t overbake to maintain a soft, moist texture.
- How to whip cream properly: Be sure to use chilled cream, and whip it on medium-high speed to avoid turning it into butter. Stop when you see stiff peaks, meaning the cream holds its shape when lifted with a whisk.
- How to prevent the mousse from separating: The key to a smooth mousse is folding the raspberry mixture gently into the whipped cream. Be careful not to deflate the cream while mixing.
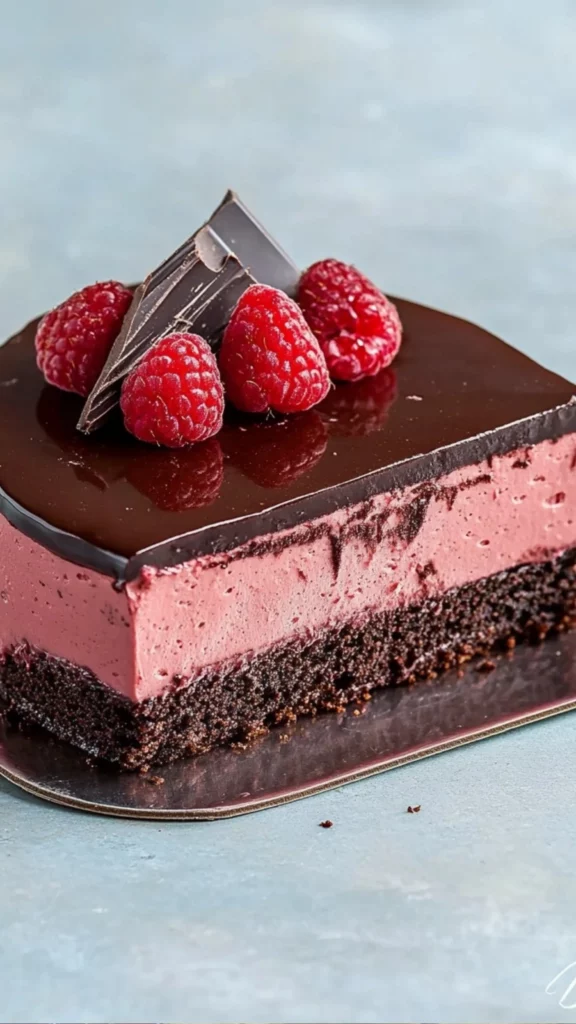
What makes this cake truly special is its layers. The brownie base is moist and rich, providing the perfect foundation for the next layer—the chocolate raspberry crunch. This layer adds a delightful contrast with its texture, combining shortbread cookie crumbs, feuilletine, and melted chocolate. Then comes the raspberry mousse, which is light, airy, and full of fruity flavor, topped off with a luscious chocolate glaze that hardens perfectly to give the cake a beautiful, professional finish. Not only does the taste come together effortlessly, but the presentation of this cake makes it feel like a special occasion dessert, one that will impress even the most discerning guests. With the right instructions and guidance, beginners can confidently recreate this delicious masterpiece at home. Let’s break down each element of this cake, with a focus on the steps and techniques that ensure success in the kitchen.
Ingredients and Preparation
Before you dive into making this decadent Chocolate Raspberry Mousse Cake, it’s essential to gather all the ingredients and ensure you’re well-prepared. Don’t worry about feeling overwhelmed—this cake may have a few layers, but each step is straightforward, and all the ingredients can be found at your local grocery store or baking supply shop. Here’s a breakdown of the ingredients you’ll need:
For the Cocoa Brownie
- 1 large egg
- 1/3 cup (70g) sugar
- 1 tsp (5g) vanilla extract
- 1/3 cup (70g) vegetable oil
- 1/4 cup (30g) unsweetened cocoa powder
- 1/4 tsp (1g) salt
- 1/4 cup (30g) all-purpose flour
For the Chocolate Raspberry Crunch
- 2.5 oz (70g) shortbread cookie crumbs
- 1/2 cup (30g) paillete feuilletine (crunchy flakes of wafer)
- 3 tbsp (6g) freeze-dried raspberries (optional, but highly recommended)
- 1.5 oz (40g) milk chocolate
- 1.5 oz (40g) semisweet chocolate
- 3 tbsp (42g) butter
For the Raspberry Mousse
- 18 oz (510g) raspberries (fresh or frozen)
- 2/3 cup (135g) sugar
- 1 tbsp (15ml) lemon juice
- 1 tbsp (10g) gelatin powder
- 1/4 cup (60ml) water
- 1 ⅔ cup (400g) whipping cream (35% fat)
For the Chocolate Glaze
- 5.5 oz (150g) semisweet chocolate
- 6 oz (170g) whipping cream
Optional Chocolate Raspberry Shards
- 2.5 oz (70g) semisweet chocolate
- 1 oz (30g) semisweet chocolate (for tempering)
- freeze-dried raspberries
- coconut flakes (optional)
For Decoration
- Fresh raspberries
- Powdered sugar
- Chocolate shards
- Fresh mint leaves
As you gather these ingredients, there are a few substitutions to keep in mind. If you don’t have paillete feuilletine, you can substitute with crushed wafer cookies or even cornflakes for a different texture. Freeze-dried raspberries add a punch of flavor and a gorgeous color contrast, but if they’re unavailable, you can skip them or substitute with another type of freeze-dried fruit. You can also use dark chocolate if you prefer a more intense cocoa flavor in the crunch and glaze. When it comes to the whipping cream, make sure to use heavy cream or double cream with at least 35% fat content for the best results in whipping and mousse texture.
Step-by-Step Instructions
With all the ingredients prepped and ready, it’s time to start assembling the cake. Don’t feel rushed—this dessert may have a few layers, but it’s completely doable with patience. Below are the detailed, step-by-step instructions to guide you through the process, ensuring you end up with a beautiful and delicious cake.
Step 1: Prepare the Raspberry Sauce
- Start by making the raspberry sauce. In a small saucepan, combine the raspberries, sugar, and lemon juice. Place the saucepan over medium heat and bring to a boil. Stir occasionally to help the raspberries break down and release their juices.
- Once the mixture has boiled for about 10 minutes and slightly thickened, remove it from the heat and strain it through a fine-mesh sieve to remove the seeds.
- Set the raspberry sauce aside to cool while you prepare the gelatin. In a separate small bowl, sprinkle the gelatin powder over the water and let it sit for about 5 to 10 minutes to allow it to bloom.
- After the gelatin has bloomed, stir it into the warm raspberry sauce until fully dissolved. Allow the raspberry mixture to cool to room temperature.
Step 2: Prepare the Cocoa Brownie
- Preheat your oven to 350°F (180°C) and grease and line an 8-inch (20cm) springform pan with parchment paper.
- In a medium bowl, whisk the egg and sugar together until smooth. Add the vanilla extract and vegetable oil, whisking until everything is well combined.
- Sift the flour, cocoa powder, and salt into the egg mixture and stir until fully incorporated.
- Pour the batter into the prepared pan and spread it evenly.
- Bake the brownie for 10-12 minutes, or until a toothpick inserted into the center comes out clean or with just a few moist crumbs attached. Let it cool completely before moving on to the next step.
Step 3: Prepare the Chocolate Raspberry Crunch
- While the brownie cools, prepare the crunch layer. Melt the milk chocolate, semisweet chocolate, and butter in a heatproof bowl set over a pan of simmering water (bain-marie). Stir until the mixture is smooth.
- In a medium bowl, combine the shortbread cookie crumbs, paillete feuilletine, and freeze-dried raspberries (if using).
- Once the chocolate and butter mixture has melted, pour it over the dry ingredients and mix well to combine.
- Spread the chocolate crunch mixture evenly over the cooled brownie, leaving a small border around the edges. Refrigerate the cake until the mousse layer is ready.
Step 4: Prepare the Raspberry Mousse
- In a large mixing bowl, whip the cold whipping cream until stiff peaks form.
- Add the cooled raspberry mixture to the whipped cream and gently fold them together until fully combined.
- Line the sides of the springform pan with an acetate sheet for easy removal after the cake has set.
- Pour the raspberry mousse over the chocolate crunch layer, smoothing the top with a spatula.
- Refrigerate the cake for at least 4 to 6 hours, or overnight if possible, to allow the mousse to set completely.
Step 5: Prepare the Chocolate Glaze
- For the glaze, melt the semisweet chocolate and whipping cream together over a bain-marie. Stir until smooth and glossy.
- Once the mousse has set, remove the cake from the refrigerator. If you used an acetate sheet, gently peel it away from the sides of the cake.
- Place the cake on a wire rack set over a baking sheet or another pan to catch any drips. Pour the chocolate glaze over the top and allow it to cover the sides of the cake.
- Use a spatula to smooth out any drips and to decorate the base of the cake with chopped chocolate.
- Place the cake back in the refrigerator for 20-30 minutes to allow the glaze to set completely.
Step 6: Optional Chocolate Raspberry Shards
- If you want to add a decorative touch, melt the semisweet chocolate and stir in some tempered chocolate for a smooth finish.
- Spread the melted chocolate onto a parchment-lined baking sheet and sprinkle it with freeze-dried raspberries and coconut flakes if desired.
- Refrigerate the chocolate until set, then break it into shards.
- Decorate the top of the cake with these chocolate shards, fresh raspberries, a dusting of powdered sugar, and fresh mint leaves.
Beginner Tips and Notes
- How to prevent overbaking the brownies: Keep an eye on the brownies toward the end of baking. A toothpick inserted into the center should come out clean or with a few moist crumbs attached. Don’t overbake to maintain a soft, moist texture.
- How to whip cream properly: Be sure to use chilled cream, and whip it on medium-high speed to avoid turning it into butter. Stop when you see stiff peaks, meaning the cream holds its shape when lifted with a whisk.
- How to prevent the mousse from separating: The key to a smooth mousse is folding the raspberry mixture gently into the whipped cream. Be careful not to deflate the cream while mixing.
Serving Suggestions
This cake is a showstopper on its own, but it can be elevated with a few simple serving ideas. Serve the cake with a dollop of fresh whipped cream on the side or add a scoop of vanilla ice cream for an extra indulgence. A drizzle of extra chocolate sauce or a sprinkle of chopped pistachios can add texture and flavor that pairs beautifully with the chocolate and raspberry. For an even more luxurious touch, you could serve it with a glass of champagne or a fruity dessert wine.
Conclusion
The Chocolate Raspberry Mousse Cake is the epitome of indulgence. With its multi-layered construction and perfect balance of textures and flavors, it is a cake that not only looks stunning but tastes incredible. The combination of rich cocoa brownie, crunchy chocolate raspberry crunch, airy raspberry mousse, and glossy chocolate glaze will satisfy even the most discerning dessert lover. The best part is that this recipe is suitable for beginner bakers. With a little patience, attention to detail, and love for baking, you can create this show-stopping dessert in your own kitchen. So why wait? Gather your ingredients, follow the instructions, and get ready to impress your family and friends with this truly spectacular cake.


