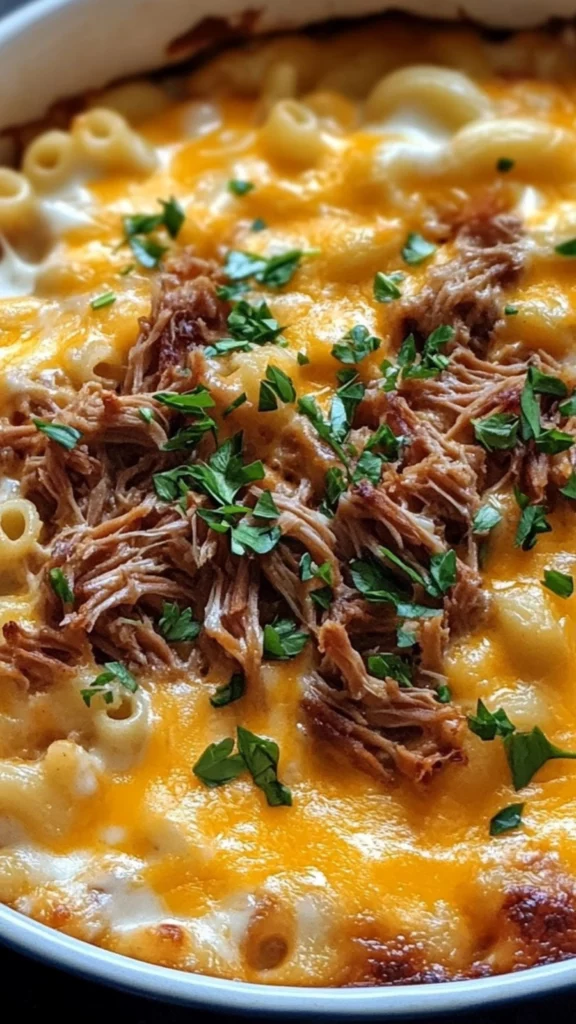
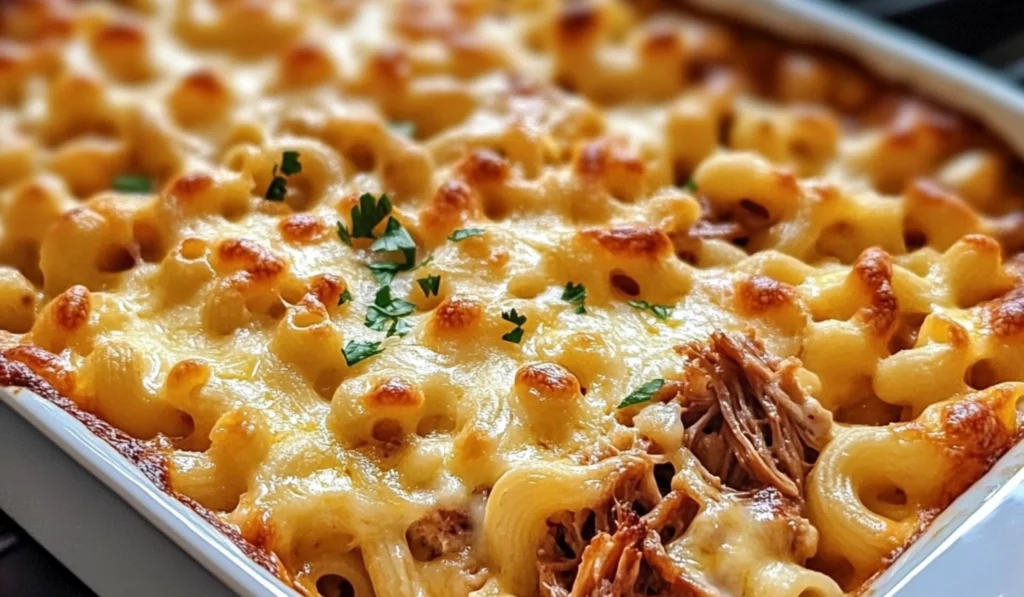
Picture this: perfectly cooked elbow macaroni, each piece coated in a velvety, luscious cheese sauce, the kind that clings to your fork and melts in your mouth. Now, imagine that creamy, cheesy goodness mingling with tender, smoky pulled pork, adding a layer of savory depth that elevates this classic comfort food to a whole new level of deliciousness. This isn’t just your average mac and cheese; it’s a culinary masterpiece, surprisingly simple to create, and guaranteed to satisfy even the most discerning palates. I can still remember the first time I made pulled pork mac and cheese. I had some leftover pulled pork from a weekend barbecue, and I was brainstorming ways to use it that were a little more exciting than the usual sandwiches.

Deliciously Cheesy Pulled Pork Mac & Cheese: A Symphony of Flavors and Textures
Craving creamy, cheesy mac and cheese with a smoky twist? This Pulled Pork Mac & Cheese is the answer! Tender pulled pork nestled in a rich cheese sauce, topped with even more cheese, and baked to bubbly perfection.
- Prep Time: 15 minutes
- Cook Time: 30 minutes
- Total Time: 45 minutes
- Yield: 6–8 servings 1x
- Category: Main Course, Dinner
- Method: Baking
- Cuisine: American
Ingredients
- 2 cups elbow macaroni
- 2 cups cooked pulled pork
- 3 cups sharp cheddar cheese, shredded
- 1 cup cream cheese
- 2 cups milk
- ¼ cup butter
- ¼ cup all-purpose flour
- 1 teaspoon garlic powder
- 1 teaspoon onion powder
- 1 teaspoon smoked paprika
- ½ teaspoon salt
- ¼ teaspoon black pepper
- ¼ cup chopped fresh parsley (optional)
Instructions
- Preheat Oven: Preheat your oven to 350°F (175°C). This ensures the oven is at the correct temperature when you’re ready to bake the mac and cheese, which helps the cheese to melt evenly and the top to get bubbly and golden brown. Beginner Note: If your oven tends to run hot or cold, use an oven thermometer to ensure accuracy.
- Cook Macaroni: Bring a large pot of salted water to a rolling boil. Add the elbow macaroni and cook according to the package instructions until al dente. Al dente means the pasta is cooked through but still has a slight bite to it. This is important because the pasta will continue to cook a bit more in the oven, and you don’t want it to become mushy. Beginner Note: Overcooked pasta will become mushy in the mac and cheese, so it’s crucial to cook it al dente.
- Drain Macaroni: Once the macaroni is cooked al dente, drain it thoroughly using a colander. Rinsing the pasta with cold water can stop the cooking process and prevent it from sticking together, but it’s not strictly necessary for baked mac and cheese. Beginner Note: Make sure the pasta is well drained to prevent the cheese sauce from becoming watery.
- Make Roux: In a large pot (a Dutch oven or a large saucepan works well), melt the butter over medium heat. Once the butter is melted, whisk in the flour to create a roux. A roux is the base for many creamy sauces, including cheese sauce, and it helps to thicken the sauce. Keep whisking the roux constantly for about 1-2 minutes until it turns a lovely golden color. This step is important for developing the flavor of the roux and preventing lumps from forming in the sauce. Beginner Note: Whisking constantly prevents lumps from forming in the roux. If you see any lumps, whisk them out vigorously.
- Add Milk and Simmer: Gradually whisk in the milk, a little at a time, ensuring that each addition is fully incorporated before adding more. This helps to prevent lumps from forming in the sauce. Bring the mixture to a gentle simmer (a gentle bubbling) over medium heat. Keep an eye on it and stir occasionally for about 5-7 minutes, or until the sauce thickens beautifully and coats the back of a spoon. It should have that nice, smooth, creamy consistency we all love in a good mac and cheese sauce. Beginner Note: Adding the milk gradually and whisking constantly helps to prevent lumps from forming in the sauce.
- Add Cheese and Seasonings: Once the sauce has thickened, lower the heat to low and stir in the cream cheese, garlic powder, onion powder, smoked paprika, salt, and pepper. Mix until everything is well combined and the cream cheese is melted and smooth. Taste the sauce and adjust the seasoning to your liking. You can add more salt, pepper, or other spices as needed. Beginner Note: Using a whisk can help to ensure a smooth and lump-free sauce.
- Add Macaroni and Pulled Pork: Remove the pot from the heat and fold in 2 cups of the shredded cheddar cheese until it is melted and smooth, creating a luscious cheese sauce. Then, add the cooked macaroni and the pulled pork to the pot and gently mix everything together until it’s all nicely coated with the cheesy sauce. Make sure the pulled pork is evenly distributed throughout the mac and cheese. Beginner Note: Be gentle when mixing so you don’t break the macaroni.
- Transfer to Baking Dish: Transfer the mac and cheese mixture into a greased baking dish (a 9×13 inch dish is recommended). Greasing the dish prevents the mac and cheese from sticking to the bottom and makes it easier to serve. Beginner Note: You can also use a smaller baking dish for a thicker mac and cheese.
- Top with Cheese: Sprinkle the remaining 1 cup of shredded cheddar cheese evenly over the top of the mac and cheese. This extra layer of cheese will create a bubbly, golden-brown crust that’s irresistible. You can also add a sprinkle of breadcrumbs (panko breadcrumbs are a great choice) for added crunch and texture. Beginner Note: You can also use other cheeses for the topping, such as Parmesan or Gruyere.
- Bake: Bake the mac and cheese in your preheated oven for about 25-30 minutes, or until the cheese is melted, bubbly, and golden brown. Keep an eye on it towards the end to prevent it from burning. The mac and cheese is done when the cheese is melted and bubbly and the top is golden brown. Beginner Note: Baking times may vary slightly depending on your oven.
- Cool and Garnish: Once the mac and cheese is done baking, remove it from the oven and let it cool for a few minutes before serving. This will allow the cheese to set a bit, making it easier to serve and preventing it from being too runny. If you want to go the extra mile, sprinkle some chopped fresh parsley on top for that pop of color and freshness. Parsley adds a touch of brightness and complements the richness of the mac and cheese. Beginner Note: Letting it cool slightly will also prevent you from burning your mouth!
Notes
- Use any short pasta shape.
- Freshly grated cheese melts best.
- Don’t overcook the pasta.
This recipe was a game-changer! It was so easy to put together – just a matter of making a cheese sauce, adding the macaroni and pulled pork, and baking it until bubbly and golden brown – and the combination of the smoky, tender pork and the rich, creamy cheese sauce was absolutely divine. It was an instant hit with my family, and now it’s one of our most requested comfort food dishes. This recipe is an absolute dream for beginner cooks. It’s straightforward, requires minimal ingredients and prep work (especially if you already have cooked pulled pork on hand!), and is a fantastic way to create a restaurant-quality meal in the comfort of your own home kitchen. Plus, it’s incredibly versatile – you can easily customize it to your liking, experimenting with different cheeses, meats, vegetables, and seasonings to create your own signature mac and cheese creation. If you’re looking for a crowd-pleasing dish that’s both easy to make and irresistibly delicious, this Cheesy Pulled Pork Mac & Cheese is the answer you’ve been searching for.
Ingredients and Preparation: The Building Blocks of Cheesy Goodness
This recipe utilizes simple, readily available ingredients, making it a breeze for even the most inexperienced cooks to assemble.
- 2 cups elbow macaroni (small or medium size works best) – Alternative: You can use other short pasta shapes, such as shells, cavatappi, rotini, penne, or even farfalle. Just keep in mind that different pasta shapes may require slightly different cooking times, so check the package instructions and adjust accordingly. You can also use gluten-free pasta if needed.
- 2 cups cooked pulled pork (store-bought or homemade, your choice!) – Alternative: You can use store-bought pulled pork for convenience, or you can make your own using a slow cooker, pressure cooker, or smoker. You can also use other types of cooked meat, such as shredded chicken, ground beef (browned and drained), or even chopped smoked sausage. For a vegetarian or vegan option, try using shredded jackfruit (which has a similar texture to pulled pork), roasted vegetables (like butternut squash or sweet potatoes), or even sautéed mushrooms.
- 3 cups sharp cheddar cheese, shredded (for a classic mac and cheese flavor) – Alternative: You can use a blend of cheeses for a more complex flavor profile. Monterey Jack, Colby, pepper jack (for a spicy kick), or even Gruyere are all excellent choices. Pre-shredded cheese is convenient, but freshly grated cheese melts more smoothly and has a better flavor.
- 1 cup cream cheese (for added creaminess and richness) – Alternative: You can use Neufchâtel cheese for a slightly lighter option, although the texture might not be quite as rich. For an even richer and more decadent sauce, you can use mascarpone cheese.
- 2 cups milk (whole milk is recommended for the creamiest and most luscious sauce) – Alternative: You can use 2% milk, skim milk, or even almond milk for a dairy-free option. However, keep in mind that the sauce may not be as thick or creamy if you use a lower-fat or non-dairy milk. Evaporated milk can also be used for a richer and thicker sauce.
- ¼ cup butter (unsalted) – Alternative: You can use margarine or a plant-based butter alternative. Brown butter adds a nutty complexity if you have the time.
- ¼ cup all-purpose flour (for thickening the sauce) – Alternative: You can use gluten-free all-purpose flour for a gluten-free version of this recipe. Cornstarch can also be used as a thickener, but the texture might be slightly different.
- 1 teaspoon garlic powder (for added flavor) – Alternative: You can use 2 cloves of fresh garlic, minced, instead of garlic powder. Sauté the minced garlic in the butter before adding the flour to make the roux. Roasted garlic adds a mellow sweetness.
- 1 teaspoon onion powder (for added flavor) – Alternative: You can use ½ cup diced onion, sautéed until softened and translucent, instead of onion powder. Add the sautéed onion to the sauce after it has thickened.
- 1 teaspoon smoked paprika (for a hint of smoky flavor) – Alternative: You can use regular paprika, but the flavor will be noticeably different – it will lack the smoky depth. You can also add a pinch of cayenne pepper or chipotle powder for a bit of heat.
- ½ teaspoon salt (or to taste – start with less and add more as needed)
- ¼ teaspoon black pepper (or to taste – freshly ground black pepper is always a good choice)
- ¼ cup chopped fresh parsley (optional, for garnish and a touch of freshness)
Step-by-Step Instructions: Creating Mac & Cheese Magic
These easy-to-follow instructions will guide you through each step of creating your delicious Cheesy Pulled Pork Mac & Cheese:
- Preheat Oven: Preheat your oven to 350°F (175°C). This ensures the oven is at the correct temperature when you’re ready to bake the mac and cheese, which helps the cheese to melt evenly and the top to get bubbly and golden brown. Beginner Note: If your oven tends to run hot or cold, use an oven thermometer to ensure accuracy.
- Cook Macaroni: Bring a large pot of salted water to a rolling boil. Add the elbow macaroni and cook according to the package instructions until al dente. Al dente means the pasta is cooked through but still has a slight bite to it. This is important because the pasta will continue to cook a bit more in the oven, and you don’t want it to become mushy. Beginner Note: Overcooked pasta will become mushy in the mac and cheese, so it’s crucial to cook it al dente.
- Drain Macaroni: Once the macaroni is cooked al dente, drain it thoroughly using a colander. Rinsing the pasta with cold water can stop the cooking process and prevent it from sticking together, but it’s not strictly necessary for baked mac and cheese. Beginner Note: Make sure the pasta is well drained to prevent the cheese sauce from becoming watery.
- Make Roux: In a large pot (a Dutch oven or a large saucepan works well), melt the butter over medium heat. Once the butter is melted, whisk in the flour to create a roux. A roux is the base for many creamy sauces, including cheese sauce, and it helps to thicken the sauce. Keep whisking the roux constantly for about 1-2 minutes until it turns a lovely golden color. This step is important for developing the flavor of the roux and preventing lumps from forming in the sauce. Beginner Note: Whisking constantly prevents lumps from forming in the roux. If you see any lumps, whisk them out vigorously.
- Add Milk and Simmer: Gradually whisk in the milk, a little at a time, ensuring that each addition is fully incorporated before adding more. This helps to prevent lumps from forming in the sauce. Bring the mixture to a gentle simmer (a gentle bubbling) over medium heat. Keep an eye on it and stir occasionally for about 5-7 minutes, or until the sauce thickens beautifully and coats the back of a spoon. It should have that nice, smooth, creamy consistency we all love in a good mac and cheese sauce. Beginner Note: Adding the milk gradually and whisking constantly helps to prevent lumps from forming in the sauce.
- Add Cheese and Seasonings: Once the sauce has thickened, lower the heat to low and stir in the cream cheese, garlic powder, onion powder, smoked paprika, salt, and pepper. Mix until everything is well combined and the cream cheese is melted and smooth. Taste the sauce and adjust the seasoning to your liking. You can add more salt, pepper, or other spices as needed. Beginner Note: Using a whisk can help to ensure a smooth and lump-free sauce.
- Add Macaroni and Pulled Pork: Remove the pot from the heat and fold in 2 cups of the shredded cheddar cheese until it is melted and smooth, creating a luscious cheese sauce. Then, add the cooked macaroni and the pulled pork to the pot and gently mix everything together until it’s all nicely coated with the cheesy sauce. Make sure the pulled pork is evenly distributed throughout the mac and cheese. Beginner Note: Be gentle when mixing so you don’t break the macaroni.
- Transfer to Baking Dish: Transfer the mac and cheese mixture into a greased baking dish (a 9×13 inch dish is recommended). Greasing the dish prevents the mac and cheese from sticking to the bottom and makes it easier to serve. Beginner Note: You can also use a smaller baking dish for a thicker mac and cheese.
- Top with Cheese: Sprinkle the remaining 1 cup of shredded cheddar cheese evenly over the top of the mac and cheese. This extra layer of cheese will create a bubbly, golden-brown crust that’s irresistible. You can also add a sprinkle of breadcrumbs (panko breadcrumbs are a great choice) for added crunch and texture. Beginner Note: You can also use other cheeses for the topping, such as Parmesan or Gruyere.
- Bake: Bake the mac and cheese in your preheated oven for about 25-30 minutes, or until the cheese is melted, bubbly, and golden brown. Keep an eye on it towards the end to prevent it from burning. The mac and cheese is done when the cheese is melted and bubbly and the top is golden brown. Beginner Note: Baking times may vary slightly depending on your oven.
- Cool and Garnish: Once the mac and cheese is done baking, remove it from the oven and let it cool for a few minutes before serving. This will allow the cheese to set a bit, making it easier to serve and preventing it from being too runny. If you want to go the extra mile, sprinkle some chopped fresh parsley on top for that pop of color and freshness. Parsley adds a touch of brightness and complements the richness of the mac and cheese. Beginner Note: Letting it cool slightly will also prevent you from burning your mouth!
Beginner Tips and Notes: Your Kitchen Companion
Even simple recipes have a few tricks to make them even better:
- Don’t Overcook the Pasta for Perfect Texture: Cooking the macaroni al dente is crucial for achieving the perfect texture in your mac and cheese. Overcooked pasta will result in mushy mac and cheese, while undercooked pasta will be too firm. Al dente pasta will continue to cook a bit more in the oven, so it’s important to cook it just until it’s tender but still has a slight bite.
- Use Whole Milk (or Evaporated Milk) for a Creamier Sauce: Whole milk will create a richer and creamier cheese sauce than lower-fat milk options. The higher fat content in whole milk contributes to the creamy texture. Evaporated milk can also be used for an even richer and thicker sauce.
- Grate Your Own Cheese for Smoother Melting: Freshly grated cheese melts more smoothly than pre-shredded cheese, which often contains cellulose that can prevent it from melting properly. Pre-shredded cheese is convenient, but freshly grated cheese will give you a superior texture in your cheese sauce.
- Don’t Skip the Roux – It’s Essential: The roux (the combination of butter and flour) is essential for thickening the cheese sauce. Make sure to cook it until it turns a light golden color before adding the milk. This step is important for developing the flavor of the roux and preventing lumps from forming in the sauce.
- Adjust Seasonings to Taste – Make it Your Own: Don’t be afraid to experiment with the seasonings. You can add a pinch of cayenne pepper for heat, a dash of Worcestershire sauce for depth of flavor, a sprinkle of nutmeg for warmth, or other spices that you enjoy. Taste the sauce before adding the macaroni and adjust the seasonings to your liking.
- Make it Ahead for Convenience: You can assemble the mac and cheese ahead of time (up to a day in advance) and bake it when you’re ready to eat. Just add about 10-15 minutes to the baking time if you’re baking it from cold. This is a great option for busy weeknights or when you’re entertaining guests.
- Preventing a Dry Mac & Cheese: If you find that your mac and cheese tends to be dry, you can add a little bit more milk or cream to the cheese sauce. You can also add a layer of shredded cheese between the macaroni and the pulled pork for extra moisture.
- Adding Vegetables for Nutrition: Feel free to add some chopped vegetables to the mac and cheese for added nutrition and flavor. Broccoli florets, peas, corn, or roasted vegetables are all great options. Add the vegetables to the mac and cheese mixture before transferring it to the baking dish.
Serving Suggestions: Completing the Mac & Cheese Experience
This Deliciously Cheesy Pulled Pork Mac & Cheese is a hearty and satisfying meal on its own, but you can also enhance it with some complementary sides and pairings to create a complete and well-rounded meal.
- Side Salad for Freshness and Balance: A fresh green salad with a light vinaigrette dressing will add some freshness and balance to the richness of the mac and cheese. The acidity of the dressing will cut through the richness of the cheese and pulled pork.
- Coleslaw for Crunch and Tang: Creamy or vinegar-based coleslaw is a classic pairing with pulled pork and will add a crunchy and refreshing element to the meal. The coleslaw will also complement the smoky flavors of the pulled pork.
- Cornbread for a Southern Touch: Fluffy cornbread is another classic Southern side dish that pairs perfectly with mac and cheese and pulled pork. The sweetness of the cornbread complements the savory flavors of the mac and cheese and pulled pork.
- Roasted Vegetables for Added Nutrition: Roasted vegetables, such as broccoli, asparagus, Brussels sprouts, or carrots, will add some nutritional value and color to the meal. Roasting the vegetables brings out their natural sweetness and enhances their flavor.
- Fruit Salad for a Sweet Ending: A light and refreshing fruit salad makes a great dessert after a rich and cheesy meal like this.
Storage Tips for Leftovers:
Store leftover mac and cheese in an airtight container in the refrigerator for up to 3 days. Reheat in the microwave or oven. To reheat in the oven, add a little bit of milk or cream to the mac and cheese to prevent it from drying out. You can also freeze leftover mac and cheese for up to 3 months. Thaw it overnight in the refrigerator before reheating. When reheating frozen mac and cheese, you may need to add a little bit more milk or cream to restore its creamy consistency.

Conclusion: A Mac & Cheese Masterpiece
This Deliciously Cheesy Pulled Pork Mac & Cheese is the ultimate comfort food mashup. It’s creamy, cheesy, smoky, and satisfying – everything you could want in a mac and cheese dish. It’s perfect for a weeknight dinner, a potluck, or any occasion when you want to impress your family and friends with a truly special meal. I highly encourage you to give this recipe a try and make it your own. Don’t be afraid to experiment with different cheeses, meats, and seasonings to create your perfect mac and cheese masterpiece. Share your culinary creations and experiences in the comments below – I’d love to see your variations! This easy and impressive recipe is a fantastic way to elevate a classic comfort food to new heights. It’s a crowd-pleasing dish that’s sure to become a family favorite. So, gather your ingredients, preheat your oven, and get ready to indulge in the cheesy goodness! You won’t be disappointed. This Pulled Pork Mac & Cheese is more than just a recipe; it’s an experience. It’s a celebration of flavor, texture, and the joy of sharing a delicious meal with loved ones. It’s the kind of dish that warms the heart and satisfies the soul. So, what are you waiting for? Get cooking and create some mac & cheese magic!


First time making homemade mac & cheese. The instructions were very clear and easy to follow. The sauce was thick and creamy. I added an extra cup of pulled pork, just cause we had so much we needed to use it. My husband and I both really enjoyed it, but felt something was missing… I think next time I’ll add a splash of bbq sauce to the pulled pork before mixing it in, and then add breadcrumbs on top for some crunch. Overall though, very good!