Cake pops are one of those treats that always seem to draw a crowd. Whether they’re served at a birthday party, as an afternoon snack, or just because you’re craving something sweet, cake pops are an instant hit. But if you’ve ever thought about making cake pops at home, you might have felt intimidated by the idea of shaping, dipping, and decorating them. It might seem like a time-consuming process with complex techniques, but it doesn’t have to be that way!
Easy Cake Pop Recipe with Cake Mix: A Beginner’s Guide to Perfect Cake Pops
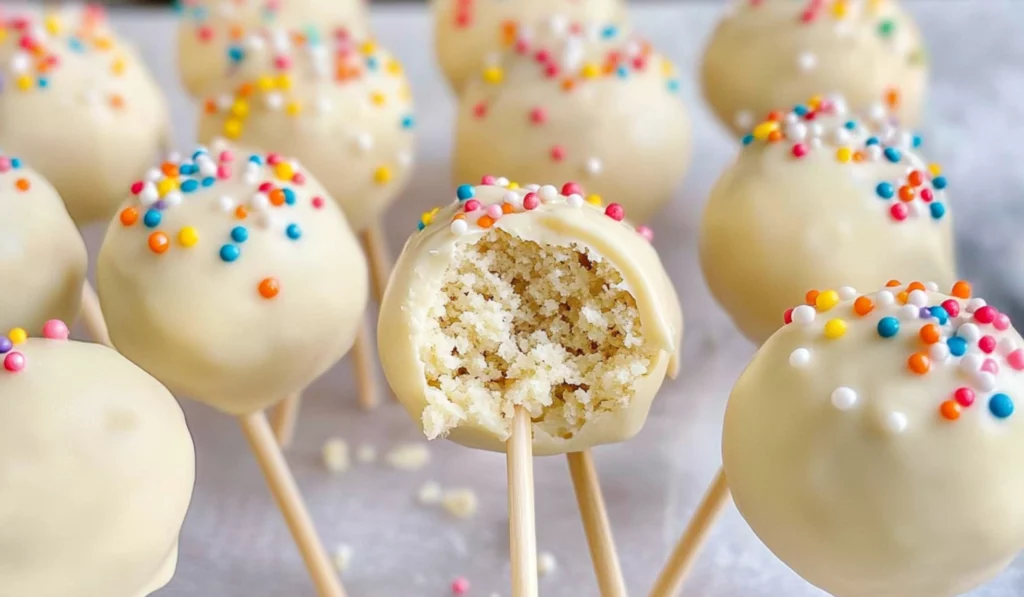
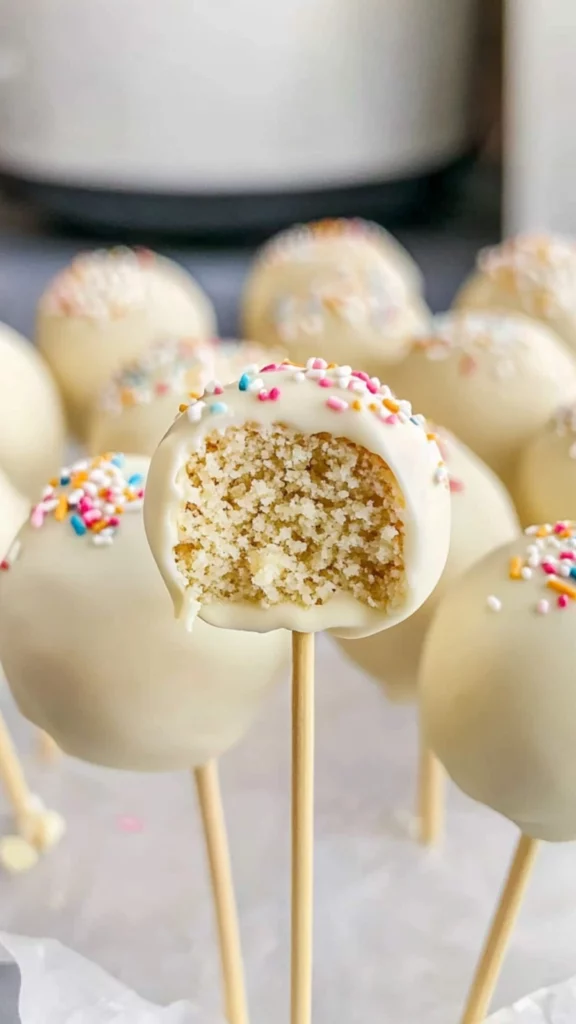
Cake pops are a fun and delicious treat that anyone can make, even beginners! With this easy cake pop recipe using cake mix, you can create sweet, bite-sized desserts in no time. Perfect for any occasion, these vanilla cake pops are simple to make and sure to impress. Let’s dive in and make baking fun and easy!
- Prep Time: 30 minutes
- Cook Time: 30 minutes
- Total Time: 3 hours
- Yield: 24 cake pops 1x
- Category: Dessert
- Method: Baking
- Cuisine: American
- Diet: Vegetarian
Ingredients
For the Cake:
- 1 box (15.25 oz) vanilla cake mix: Using a boxed cake mix takes the guesswork out of baking. All you need is the mix and the required ingredients (usually water, oil, and eggs) as specified on the box.
- Ingredients for the cake mix: These typically include water, vegetable oil, and eggs. Check the back of your box for specific measurements.
For the Frosting:
- 4 tablespoons salted butter, softened: The butter gives the frosting a rich, creamy texture. You can also substitute with unsalted butter if that’s what you have on hand.
- 1 cup powdered sugar: Powdered sugar is the main ingredient in the frosting, providing sweetness and thickness. It blends easily into the butter for a smooth consistency.
- 1 tablespoon heavy cream or milk: This helps to loosen the frosting, giving it the right consistency for mixing with the crumbled cake.
- ½ teaspoon vanilla extract: Vanilla adds a lovely depth of flavor to the frosting, complementing the vanilla cake.
For Decorating:
- 24 cake pop sticks: These are the sticks you’ll insert into the cake balls. You can find these at most grocery or craft stores. Alternatively, wooden skewers can work in a pinch.
- 12 ounces white chocolate: White chocolate is the classic coating for cake pops, but you can use dark or milk chocolate if you prefer. You’ll divide this into two portions: 4 oz for dipping the sticks and 8 oz for dipping the cake pops.
- Sprinkles: Decorate your cake pops with colorful sprinkles for a festive look. You can also use different types of decorations such as colored sugar or edible glitter to make your cake pops extra special.
Instructions
Step 1: Bake the Cake
Preheat your oven according to the instructions on the cake mix package. Typically, you’ll need to set the oven to 350°F (175°C) for a standard cake mix. Prepare a cake pan by greasing it with butter or non-stick spray. You can also line the pan with parchment paper to prevent the cake from sticking.
Follow the directions on the cake mix box, usually mixing the cake mix with the water, oil, and eggs. Stir until the batter is smooth and well-combined, then pour it into the prepared pan. Bake according to the package instructions, usually around 25-30 minutes, depending on the size of your pan.
Once the cake is done, remove it from the oven and allow it to cool completely. This is important because you don’t want the cake to be warm when you crumble it—it could make the frosting too runny.
Step 2: Crumble the Cake
Once the cake is cool, it’s time to crumble it. Using your hands or two forks, break the cake into small crumbs. It’s okay if there are a few larger pieces, but try to get most of the cake crumbled into fine, even bits.
Step 3: Make the Frosting
In a medium-sized bowl, beat the softened butter with a hand mixer until it’s light and fluffy. This will usually take about 2-3 minutes. Add the powdered sugar slowly and continue mixing until the frosting becomes smooth. Next, add the vanilla extract and heavy cream (or milk), and beat the mixture for another minute. The goal is to achieve a frosting that’s thick but spreadable—similar to the consistency of peanut butter. If the frosting is too stiff, add a teaspoon of milk at a time to thin it out. If it’s too runny, add more powdered sugar to thicken it.
Step 4: Combine the Cake and Frosting
Now it’s time to combine the crumbled cake with the frosting. Start by adding 3 tablespoons of frosting to the crumbled cake and mix it together until the texture is uniform. The mixture should hold together when you squeeze it into a ball, but not be too wet. If the mixture is too dry, add an extra tablespoon of frosting at a time until the consistency is just right.
Step 5: Roll the Cake Balls
Using a small cookie scoop or a tablespoon, scoop out about 2 tablespoons of cake mixture. Roll it into a ball using your hands. Repeat this step until all the mixture is used up. If you have a cake pop press, you can use that to shape the balls as well.
Step 6: Insert the Cake Pop Sticks
In a small microwave-safe bowl, melt 4 oz of the white chocolate for about 45 seconds. Dip the tip of each cake pop stick into the melted chocolate, then insert the stick into the center of each cake ball about halfway. The melted chocolate will help the stick stay in place once the cake pop is dipped. After inserting the sticks, place the cake pops on a tray lined with parchment paper.
Step 7: Chill the Cake Pops
Place the tray of cake pops into the freezer for about 1 hour, or the fridge for 2 hours. This step is essential for helping the cake balls firm up, making it easier to dip them into the chocolate without them falling apart.
Step 8: Melt the Remaining White Chocolate
While the cake pops are chilling, melt the remaining 8 oz of white chocolate in a microwave-safe bowl or mug. Heat in 30-second intervals at 50% power, stirring between each interval, until the chocolate is fully melted and smooth.
Step 9: Dip the Cake Pops
Carefully dip each cake pop into the melted white chocolate, allowing any excess chocolate to drip off. You can use a spoon to help coat the cake pop evenly if needed. Immediately after dipping, sprinkle the cake pops with colorful sprinkles or other decorations of your choice.
Step 10: Let the Chocolate Harden
Place the decorated cake pops back onto the parchment-lined tray or into a styrofoam block to allow the chocolate to set. You can also stick the cake pops in a box with holes punched into it. Let them cool and harden at room temperature for a few minutes, then refrigerate them until ready to serve.
Notes
- If your cake pops are too crumbly and won’t hold together, add a little more frosting. The frosting acts as a binder, helping the cake stick together.
- If your melted chocolate starts to thicken and become difficult to work with, reheat it in the microwave for 10-15 seconds to make it easier to dip the cake pops.
- If you’re having trouble with the chocolate coating, try dipping the cake pop in chocolate and gently tapping it on the edge of the bowl to remove excess chocolate.
- For a fun twist, experiment with different flavor combinations. You can use chocolate cake with chocolate frosting and dark chocolate coating for a decadent treat.
This easy cake pop recipe with cake mix is the perfect way to start making these delightful treats in the comfort of your own kitchen. Not only is this recipe beginner-friendly, but it also uses a box of cake mix to make the process faster and simpler. If you’re someone who loves baking but isn’t quite ready to tackle elaborate recipes from scratch, this guide is for you. This simple approach allows you to create delicious cake pops that look like they came straight from a bakery, without the stress.
Cake pops are an ideal recipe for beginners because they require minimal ingredients and kitchen tools, but they still result in an impressive and tasty dessert. The best part? You don’t need to be a professional baker to make them. Follow the easy steps below, and you’ll have beautiful, tasty cake pops ready in no time.
Why This Recipe Is Perfect for Beginners
This easy cake pop recipe is perfect for beginners because it eliminates the need for complicated techniques and focuses on simplicity. The use of a boxed cake mix ensures that the cake base is quick to prepare, and the frosting requires only basic ingredients. Plus, the decorating process is straightforward, and you can have fun adding your personal touch with sprinkles or other fun toppings.
When you’re new to baking or cake decorating, the idea of working with frosting, cake balls, and chocolate coatings can seem overwhelming. But this recipe breaks it all down into manageable steps that anyone can follow, whether you’re an experienced baker or a total beginner. This recipe will build your confidence in the kitchen, allowing you to enjoy the process and, of course, the sweet reward at the end!
Ingredients and Preparation
Before you start, make sure you have all the ingredients on hand. This recipe calls for a simple set of ingredients that you may already have in your kitchen. You’ll be baking a vanilla cake from a boxed cake mix, then combining it with a delicious homemade frosting, and finishing it off by dipping the cake pops in melted white chocolate and adding sprinkles.
For the Cake:
- 1 box (15.25 oz) vanilla cake mix: Using a boxed cake mix takes the guesswork out of baking. All you need is the mix and the required ingredients (usually water, oil, and eggs) as specified on the box.
- Ingredients for the cake mix: These typically include water, vegetable oil, and eggs. Check the back of your box for specific measurements.
For the Frosting:
- 4 tablespoons salted butter, softened: The butter gives the frosting a rich, creamy texture. You can also substitute with unsalted butter if that’s what you have on hand.
- 1 cup powdered sugar: Powdered sugar is the main ingredient in the frosting, providing sweetness and thickness. It blends easily into the butter for a smooth consistency.
- 1 tablespoon heavy cream or milk: This helps to loosen the frosting, giving it the right consistency for mixing with the crumbled cake.
- ½ teaspoon vanilla extract: Vanilla adds a lovely depth of flavor to the frosting, complementing the vanilla cake.
For Decorating:
- 24 cake pop sticks: These are the sticks you’ll insert into the cake balls. You can find these at most grocery or craft stores. Alternatively, wooden skewers can work in a pinch.
- 12 ounces white chocolate: White chocolate is the classic coating for cake pops, but you can use dark or milk chocolate if you prefer. You’ll divide this into two portions: 4 oz for dipping the sticks and 8 oz for dipping the cake pops.
- Sprinkles: Decorate your cake pops with colorful sprinkles for a festive look. You can also use different types of decorations such as colored sugar or edible glitter to make your cake pops extra special.
Alternative Ingredient Suggestions:
- Chocolate Cake Mix: If you prefer chocolate cake pops, you can easily substitute the vanilla cake mix for chocolate cake mix. The rest of the recipe will remain the same.
- Dairy-Free Options: For a dairy-free version, you can swap the butter for a dairy-free margarine and use almond milk or another plant-based milk instead of the heavy cream or regular milk.
- Gluten-Free: If you need gluten-free cake pops, try using a gluten-free cake mix and making sure your chocolate and frosting ingredients are also gluten-free.
Step-by-Step Instructions
Now that you have all your ingredients ready, it’s time to get started. Don’t worry if this is your first time making cake pops—this recipe breaks down each step for you to follow.
Step 1: Bake the Cake
Preheat your oven according to the instructions on the cake mix package. Typically, you’ll need to set the oven to 350°F (175°C) for a standard cake mix. Prepare a cake pan by greasing it with butter or non-stick spray. You can also line the pan with parchment paper to prevent the cake from sticking.
Follow the directions on the cake mix box, usually mixing the cake mix with the water, oil, and eggs. Stir until the batter is smooth and well-combined, then pour it into the prepared pan. Bake according to the package instructions, usually around 25-30 minutes, depending on the size of your pan.
Once the cake is done, remove it from the oven and allow it to cool completely. This is important because you don’t want the cake to be warm when you crumble it—it could make the frosting too runny.
Step 2: Crumble the Cake
Once the cake is cool, it’s time to crumble it. Using your hands or two forks, break the cake into small crumbs. It’s okay if there are a few larger pieces, but try to get most of the cake crumbled into fine, even bits.
Step 3: Make the Frosting
In a medium-sized bowl, beat the softened butter with a hand mixer until it’s light and fluffy. This will usually take about 2-3 minutes. Add the powdered sugar slowly and continue mixing until the frosting becomes smooth. Next, add the vanilla extract and heavy cream (or milk), and beat the mixture for another minute. The goal is to achieve a frosting that’s thick but spreadable—similar to the consistency of peanut butter. If the frosting is too stiff, add a teaspoon of milk at a time to thin it out. If it’s too runny, add more powdered sugar to thicken it.
Step 4: Combine the Cake and Frosting
Now it’s time to combine the crumbled cake with the frosting. Start by adding 3 tablespoons of frosting to the crumbled cake and mix it together until the texture is uniform. The mixture should hold together when you squeeze it into a ball, but not be too wet. If the mixture is too dry, add an extra tablespoon of frosting at a time until the consistency is just right.
Step 5: Roll the Cake Balls
Using a small cookie scoop or a tablespoon, scoop out about 2 tablespoons of cake mixture. Roll it into a ball using your hands. Repeat this step until all the mixture is used up. If you have a cake pop press, you can use that to shape the balls as well.
Step 6: Insert the Cake Pop Sticks
In a small microwave-safe bowl, melt 4 oz of the white chocolate for about 45 seconds. Dip the tip of each cake pop stick into the melted chocolate, then insert the stick into the center of each cake ball about halfway. The melted chocolate will help the stick stay in place once the cake pop is dipped. After inserting the sticks, place the cake pops on a tray lined with parchment paper.
Step 7: Chill the Cake Pops
Place the tray of cake pops into the freezer for about 1 hour, or the fridge for 2 hours. This step is essential for helping the cake balls firm up, making it easier to dip them into the chocolate without them falling apart.
Step 8: Melt the Remaining White Chocolate
While the cake pops are chilling, melt the remaining 8 oz of white chocolate in a microwave-safe bowl or mug. Heat in 30-second intervals at 50% power, stirring between each interval, until the chocolate is fully melted and smooth.
Step 9: Dip the Cake Pops
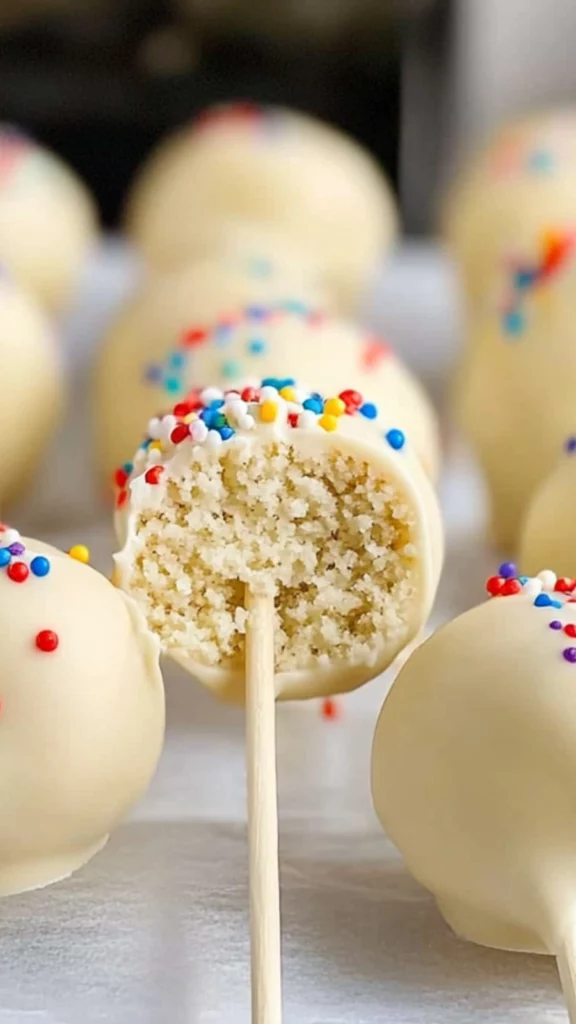
Carefully dip each cake pop into the melted white chocolate, allowing any excess chocolate to drip off. You can use a spoon to help coat the cake pop evenly if needed. Immediately after dipping, sprinkle the cake pops with colorful sprinkles or other decorations of your choice.
Step 10: Let the Chocolate Harden
Place the decorated cake pops back onto the parchment-lined tray or into a styrofoam block to allow the chocolate to set. You can also stick the cake pops in a box with holes punched into it. Let them cool and harden at room temperature for a few minutes, then refrigerate them until ready to serve.
Beginner Tips and Notes
- If your cake pops are too crumbly and won’t hold together, add a little more frosting. The frosting acts as a binder, helping the cake stick together.
- If your melted chocolate starts to thicken and become difficult to work with, reheat it in the microwave for 10-15 seconds to make it easier to dip the cake pops.
- If you’re having trouble with the chocolate coating, try dipping the cake pop in chocolate and gently tapping it on the edge of the bowl to remove excess chocolate.
- For a fun twist, experiment with different flavor combinations. You can use chocolate cake with chocolate frosting and dark chocolate coating for a decadent treat.
Serving Suggestions
Cake pops make an excellent party treat, but they’re also perfect for casual gatherings, afternoon snacks, or as a fun dessert for your family. They can be paired with a variety of beverages like hot cocoa, milk, or a sweet iced tea. If you want to make them even more festive, consider making cake pops in different colors for various holidays or themes—red, white, and blue for the Fourth of July, pastel colors for Easter, or vibrant colors for a birthday party.
Storage Tips for Leftovers
If you have leftover cake pops (which is unlikely!), store them in an airtight container at room temperature for up to 3 days. For longer storage, keep them in the fridge for up to a week. Cake pops can also be frozen. Wrap each pop individually in plastic wrap and store them in a freezer-safe bag. When you’re ready to enjoy them, just let them thaw at room temperature for about 30 minutes.
Conclusion
Making cake pops from scratch has never been easier, especially with this beginner-friendly recipe using cake mix! You don’t have to be a seasoned baker to create these delicious, fun treats. Whether you’re preparing them for a special occasion or just enjoying a sweet treat at home, this easy cake pop recipe will guide you step-by-step toward creating cake pops that look as good as they taste. So grab your cake mix, cake pop sticks, and sprinkles, and start baking today!


