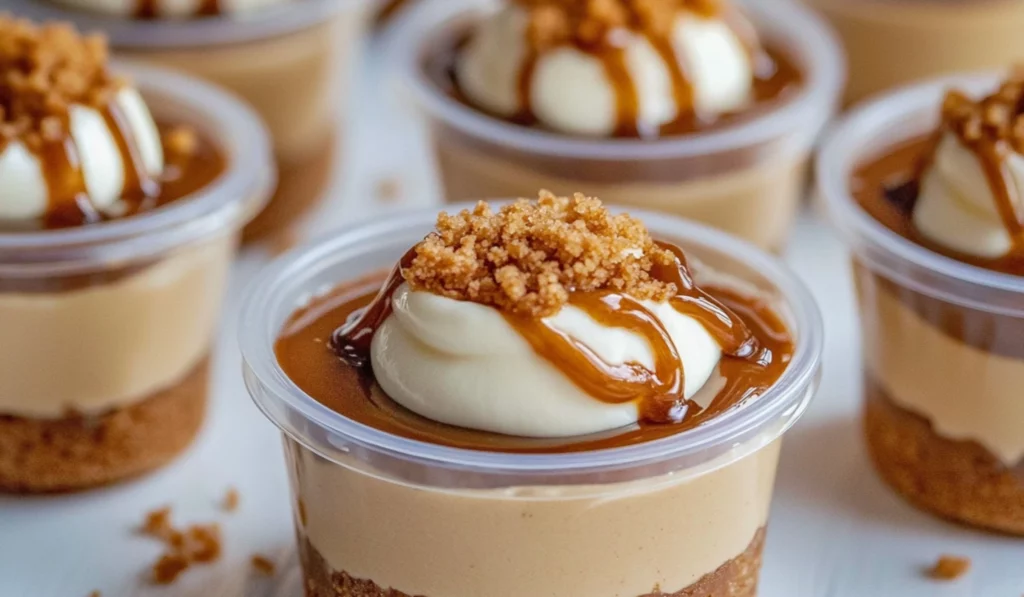
Have you ever had a spoonful of Biscoff cookie butter and instantly thought, “How can I make this even more irresistible?” Well, I did just that when I created these Biscoff Dessert Cups, and let me tell you, they are everything you could ever dream of and more. The smooth, caramelized flavor of Biscoff cookie butter combined with a rich and fluffy cheesecake filling, topped with extra cookie butter and crunchy cookie crumbs—what’s not to love?
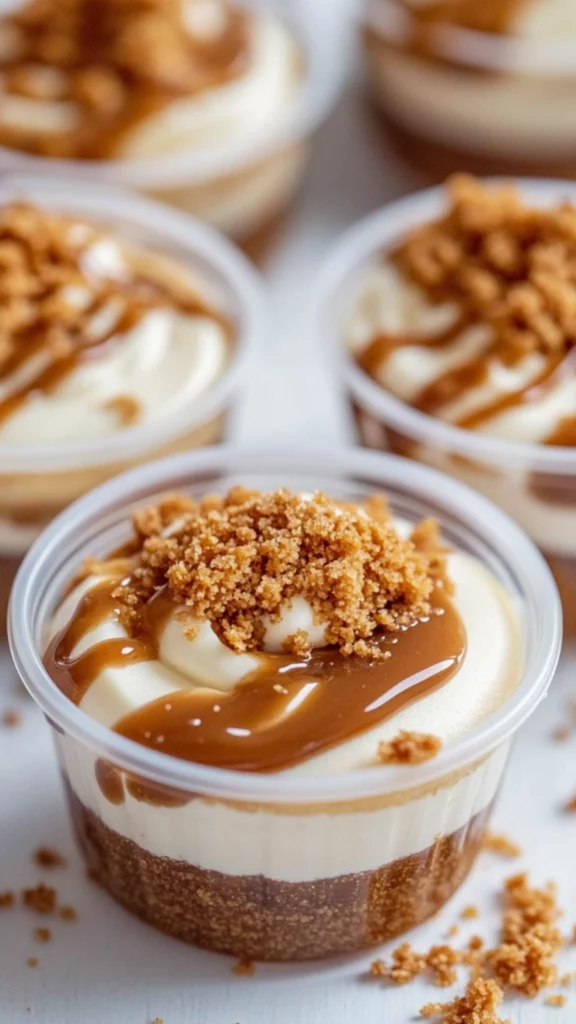
Indulge in Biscoff Dessert Cups: The Perfect Treat for Cookie Butter Lovers
Craving a sweet, no-bake treat? These Biscoff Dessert Cups are the answer! With a buttery cookie crust and creamy cheesecake filling made from cookie butter, they’re easy to make, perfect for beginners, and full of irresistible flavor. Whether for a party or a snack, these cups are sure to satisfy any cookie butter fan!
- Prep Time: 45 minutes
- Cook Time: 10 mins
- Total Time: 55 mins
- Yield: 28 2-ounce cups 1x
- Category: Dessert
- Method: No-Bake
- Cuisine: American
- Diet: Vegetarian
Ingredients
Biscoff Cookie Crust:
- 2 cups Biscoff cookie crumbs
- ¼ cup unsalted butter, melted
Cookie Butter Filling:
- 8 ounces cream cheese, room temperature
- ¾ cup granulated sugar
- 1 teaspoon vanilla extract
- ¾ cup Biscoff spread (cookie butter)
- 1 ½ cups heavy cream
Toppings:
- 2 tablespoons Biscoff spread (cookie butter), slightly melted
- ¼ cup Biscoff cookie crumbs
Instructions
Step 1: Prepare the Biscoff Cookie Crust
First, you need to prepare the base of your Biscoff Dessert Cups—the crust. In a small bowl, combine the Biscoff cookie crumbs with the melted butter. You want the mixture to be moist but not too wet, so make sure the crumbs are evenly coated with the butter. This helps the crust stick together once you press it into the cups.
Next, portion the cookie crumbs into 28 2-ounce plastic cups. A small cookie scoop or spoon works best for this, as it allows you to divide the crumbs evenly. After filling each cup, take one of the plastic cups and press the crumbs firmly into the bottom. The goal is to create a solid, compact crust that will hold the creamy cheesecake filling.
Step 2: Make the Cookie Butter Cheesecake Filling
The next part of this recipe is the cream cheese filling, and this is where the magic happens. In a large mixing bowl, beat the cream cheese, granulated sugar, and vanilla extract together until smooth. This will take about 2 to 3 minutes of mixing, and you want to make sure there are no lumps of cream cheese left. A hand mixer or stand mixer works best for this, as it ensures a smooth, creamy texture.
Once the cream cheese mixture is smooth, add the Biscoff spread into the bowl and mix until well combined. The Biscoff spread adds a rich, caramelized flavor that perfectly complements the cream cheese.
Next, you’ll need to whip the heavy cream. In a separate bowl, pour the heavy cream and whip it on medium-high speed until soft peaks form. This step takes around 3-5 minutes, so be patient and keep an eye on it. You want the cream to be fluffy but not over-whipped. If you whip it too much, it could turn into butter, and your filling will lose its light texture.
Once the whipped cream is ready, gently fold it into the cream cheese and Biscoff spread mixture. Be careful not to deflate the whipped cream too much—this step is crucial for ensuring the filling remains light and airy.
Step 3: Pipe the Filling into the Cups
Now it’s time to assemble the dessert! Transfer the Biscoff cheesecake filling into a piping bag. If you don’t have a piping bag, you can use a plastic sandwich bag and simply snip off one corner to create your own piping tool.
Pipe the filling into each cup, filling them about ¾ full. Don’t worry about making them perfect, as the beauty of these cups is that they’re individually portioned, and they look great no matter how you fill them.
Step 4: Add the Toppings
Once the filling is piped into the cups, it’s time to add the finishing touches. Take the remaining Biscoff spread and place it into a microwave-safe bowl. Heat it in the microwave for about 10 seconds to soften it, making it easier to drizzle over the top of the cups.
Pour the melted Biscoff spread into a piping bag or squeeze bottle, and drizzle it over the top of each dessert cup. You want a nice, even drizzle that coats the top of the filling. For extra crunch and flavor, sprinkle Biscoff cookie crumbs on top of the melted spread. This adds a delightful texture to the dessert and enhances the Biscoff flavor.
Step 5: Chill the Dessert Cups
Now that you’ve assembled your cups, it’s time to let them set. Seal each cup with a lid and refrigerate for at least 2 hours. The chilling time allows the flavors to meld together and the filling to set properly. If you’re short on time, you can chill the cups for 1 hour, but the longer they sit, the more delicious they become.
Notes
- Cream Cheese Softening: It’s important to let your cream cheese come to room temperature before using it in the filling. If it’s too cold, it will be difficult to beat the mixture smoothly, and you might end up with lumps in your filling. To speed up the process, you can cut the cream cheese into smaller cubes and leave them out for about 10-15 minutes before using.
- Whipping Cream: When whipping the heavy cream, keep a close eye on it. Once you see soft peaks form, stop whipping! If you continue to whip, the cream can turn into butter, and your filling will lose its lightness.
- Piping Bags: If you’re new to using a piping bag, don’t stress! You can use a simple plastic sandwich bag. Just cut off one corner to create your own piping bag and enjoy the ease of piping without any fancy equipment.
- Chilling Time: Be patient and allow your dessert cups to chill for the full 2 hours, or even longer. While you might be tempted to dive in sooner, letting them set ensures the flavors meld together and the filling firms up nicely.
This dessert brings together the perfect balance of creamy, crunchy, and sweet, all in a bite-sized cup that makes it easy to serve and enjoy. Whether you’re preparing a treat for a dinner party, looking for a fun no-bake dessert to whip up with the kids, or simply craving something sweet for yourself, these Biscoff Dessert Cups check all the boxes.
The beauty of these dessert cups is not just in their delicious flavor, but also in their simplicity. With just a few ingredients, you can create a decadent treat that will have everyone asking for the recipe. And, for those of us who might be beginner cooks, these cups are perfect! There’s no complicated baking, and the steps are straightforward. The result is a showstopper of a dessert that’s as easy to make as it is to eat.
Ingredients and Preparation
Now that you’re excited to dive in, let’s go over the ingredients and how you can prepare them. The best part? Most of these ingredients are likely ones you already have in your pantry or are easy to find in your local grocery store.
Biscoff Cookie Crust:
- 2 cups Biscoff cookie crumbs
- ¼ cup unsalted butter, melted
Cookie Butter Filling:
- 8 ounces cream cheese, room temperature
- ¾ cup granulated sugar
- 1 teaspoon vanilla extract
- ¾ cup Biscoff spread (cookie butter)
- 1 ½ cups heavy cream
Toppings:
- 2 tablespoons Biscoff spread (cookie butter), slightly melted
- ¼ cup Biscoff cookie crumbs
Now that you have the ingredients, let’s talk about how to prepare them. If you’re looking for any alternatives to these ingredients, I’ve got you covered!
- Biscoff cookies: If you can’t find Biscoff cookies, you can easily substitute them with other cookie options. Speculoos cookies are a great alternative, as they have a similar spice profile and texture. If you’re unable to find those, graham crackers will work in a pinch, though the flavor won’t be quite as rich.
- Cream Cheese: Cream cheese is the base of this filling, but if you’re trying to reduce fat or make a lighter version, you can swap it for reduced-fat cream cheese. The taste will be slightly less rich, but still delicious.
- Heavy Cream: Heavy cream creates a light and fluffy filling, but if you’re looking for a lower-fat version, you can use whipped topping. However, do keep in mind that using whipped topping will change the texture of the cheesecake filling.
- Biscoff spread (cookie butter): This spread is what gives the dessert its signature flavor, but if you can’t find Biscoff, you can use other types of cookie butter such as Lotus or even Nutella for a different, but still yummy, flavor. You could also experiment with peanut butter for a fun twist.
Step-by-Step Instructions
Let’s get into the heart of the recipe—the step-by-step instructions. Don’t worry if you’re new to making desserts—this recipe is straightforward and easy to follow, with minimal tools required.
Step 1: Prepare the Biscoff Cookie Crust
First, you need to prepare the base of your Biscoff Dessert Cups—the crust. In a small bowl, combine the Biscoff cookie crumbs with the melted butter. You want the mixture to be moist but not too wet, so make sure the crumbs are evenly coated with the butter. This helps the crust stick together once you press it into the cups.
Next, portion the cookie crumbs into 28 2-ounce plastic cups. A small cookie scoop or spoon works best for this, as it allows you to divide the crumbs evenly. After filling each cup, take one of the plastic cups and press the crumbs firmly into the bottom. The goal is to create a solid, compact crust that will hold the creamy cheesecake filling.
Step 2: Make the Cookie Butter Cheesecake Filling
The next part of this recipe is the cream cheese filling, and this is where the magic happens. In a large mixing bowl, beat the cream cheese, granulated sugar, and vanilla extract together until smooth. This will take about 2 to 3 minutes of mixing, and you want to make sure there are no lumps of cream cheese left. A hand mixer or stand mixer works best for this, as it ensures a smooth, creamy texture.
Once the cream cheese mixture is smooth, add the Biscoff spread into the bowl and mix until well combined. The Biscoff spread adds a rich, caramelized flavor that perfectly complements the cream cheese.
Next, you’ll need to whip the heavy cream. In a separate bowl, pour the heavy cream and whip it on medium-high speed until soft peaks form. This step takes around 3-5 minutes, so be patient and keep an eye on it. You want the cream to be fluffy but not over-whipped. If you whip it too much, it could turn into butter, and your filling will lose its light texture.
Once the whipped cream is ready, gently fold it into the cream cheese and Biscoff spread mixture. Be careful not to deflate the whipped cream too much—this step is crucial for ensuring the filling remains light and airy.
Step 3: Pipe the Filling into the Cups
Now it’s time to assemble the dessert! Transfer the Biscoff cheesecake filling into a piping bag. If you don’t have a piping bag, you can use a plastic sandwich bag and simply snip off one corner to create your own piping tool.
Pipe the filling into each cup, filling them about ¾ full. Don’t worry about making them perfect, as the beauty of these cups is that they’re individually portioned, and they look great no matter how you fill them.
Step 4: Add the Toppings
Once the filling is piped into the cups, it’s time to add the finishing touches. Take the remaining Biscoff spread and place it into a microwave-safe bowl. Heat it in the microwave for about 10 seconds to soften it, making it easier to drizzle over the top of the cups.
Pour the melted Biscoff spread into a piping bag or squeeze bottle, and drizzle it over the top of each dessert cup. You want a nice, even drizzle that coats the top of the filling. For extra crunch and flavor, sprinkle Biscoff cookie crumbs on top of the melted spread. This adds a delightful texture to the dessert and enhances the Biscoff flavor.
Step 5: Chill the Dessert Cups
Now that you’ve assembled your cups, it’s time to let them set. Seal each cup with a lid and refrigerate for at least 2 hours. The chilling time allows the flavors to meld together and the filling to set properly. If you’re short on time, you can chill the cups for 1 hour, but the longer they sit, the more delicious they become.
Beginner Tips and Notes
- Cream Cheese Softening: It’s important to let your cream cheese come to room temperature before using it in the filling. If it’s too cold, it will be difficult to beat the mixture smoothly, and you might end up with lumps in your filling. To speed up the process, you can cut the cream cheese into smaller cubes and leave them out for about 10-15 minutes before using.
- Whipping Cream: When whipping the heavy cream, keep a close eye on it. Once you see soft peaks form, stop whipping! If you continue to whip, the cream can turn into butter, and your filling will lose its lightness.
- Piping Bags: If you’re new to using a piping bag, don’t stress! You can use a simple plastic sandwich bag. Just cut off one corner to create your own piping bag and enjoy the ease of piping without any fancy equipment.
- Chilling Time: Be patient and allow your dessert cups to chill for the full 2 hours, or even longer. While you might be tempted to dive in sooner, letting them set ensures the flavors meld together and the filling firms up nicely.
Serving Suggestions
These Biscoff Dessert Cups are perfect on their own, but if you want to make them even more indulgent, consider pairing them with these options:
- Whipped Cream: Top each cup with a dollop of fresh whipped cream for added creaminess.
- Vanilla Ice Cream: Serve alongside a scoop of vanilla ice cream to add a cold, creamy contrast to the warm flavors of the cookie butter.
- Fresh Fruit: To balance the richness, serve these cups with a side of fresh berries or a light fruit salad. The freshness of the fruit will help cut through the sweetness and add a refreshing touch.
Storage Tips
These Biscoff Dessert Cups are best served chilled, and they will keep in the refrigerator for 2-3 days. The flavors will continue to develop, making them even more delicious the longer they sit. If you want to make them in advance, these dessert cups are perfect for meal prepping. Simply make them ahead of time, refrigerate, and enjoy when you’re ready.
Conclusion
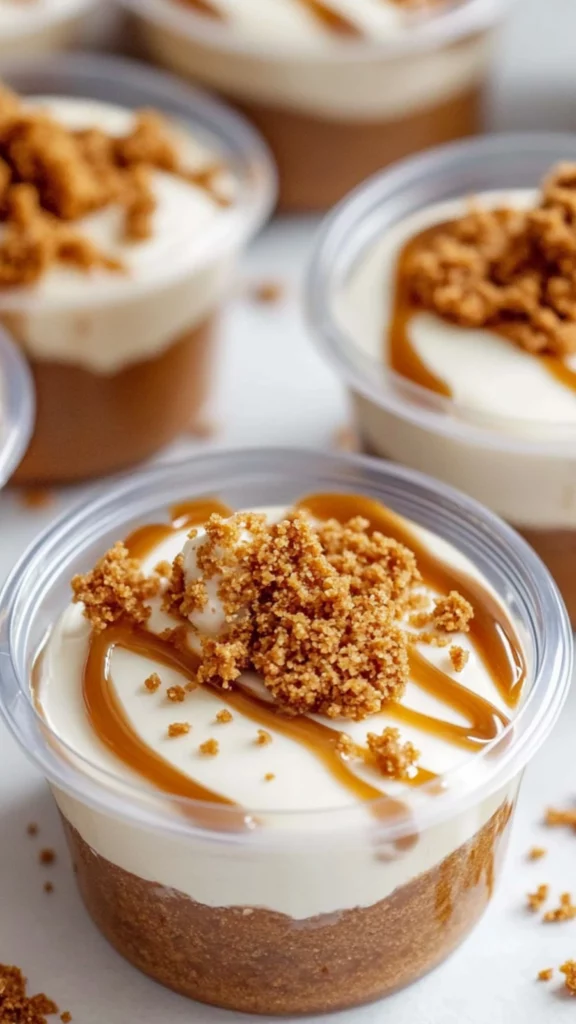
Biscoff Dessert Cups are the perfect treat for cookie butter lovers and anyone looking to create an impressive yet easy dessert. With a no-bake cheesecake filling, a crunchy Biscoff cookie crust, and a drizzle of rich cookie butter, they’re sure to be a crowd favorite at any gathering. Whether you’re a beginner cook or a seasoned baker, this recipe is straightforward and fun to make, and the end result is always a winner.
So, what are you waiting for? Grab your ingredients and start making these delectable Biscoff Dessert Cups today. Don’t forget to share your creations in the comments below—we’d love to hear how you made these cups your own! Happy baking!
