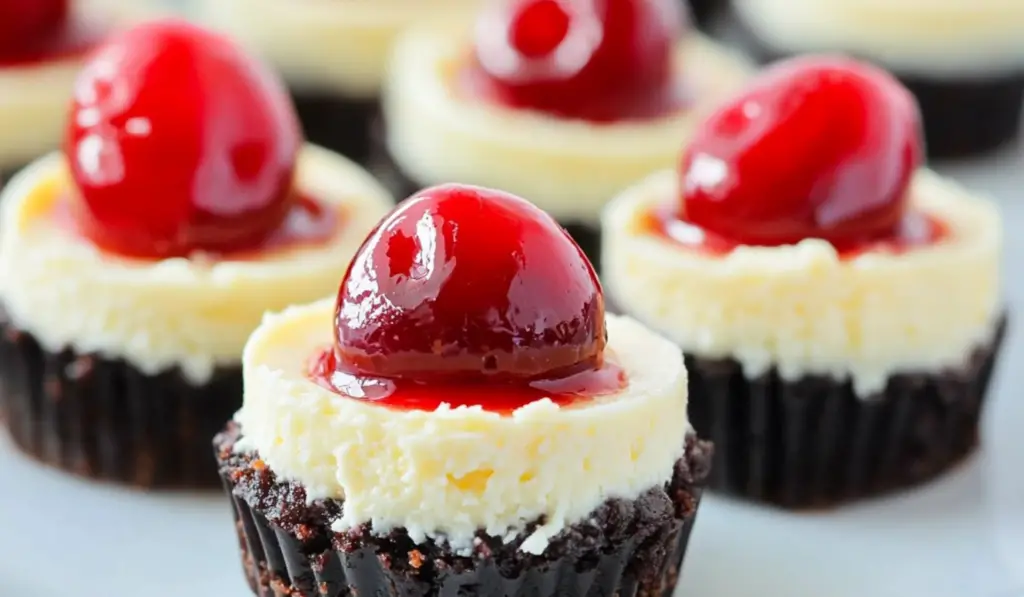
Mini Cherry Cheesecakes are a dessert that packs a big punch of flavor into a small package. With their velvety cheesecake filling, rich Oreo crust, and a topping of vibrant cherry pie filling, these bite-sized treats are as delightful to look at as they are to eat. Perfect for parties, holidays, or even a sweet indulgence at the end of a long day, these little cheesecakes are a guaranteed crowd-pleaser. Their convenience, versatility, and irresistible taste make them a must-try for any dessert lover.
PrintMini Cherry Cheesecakes: A Bite-Sized Delight for Any Occasion
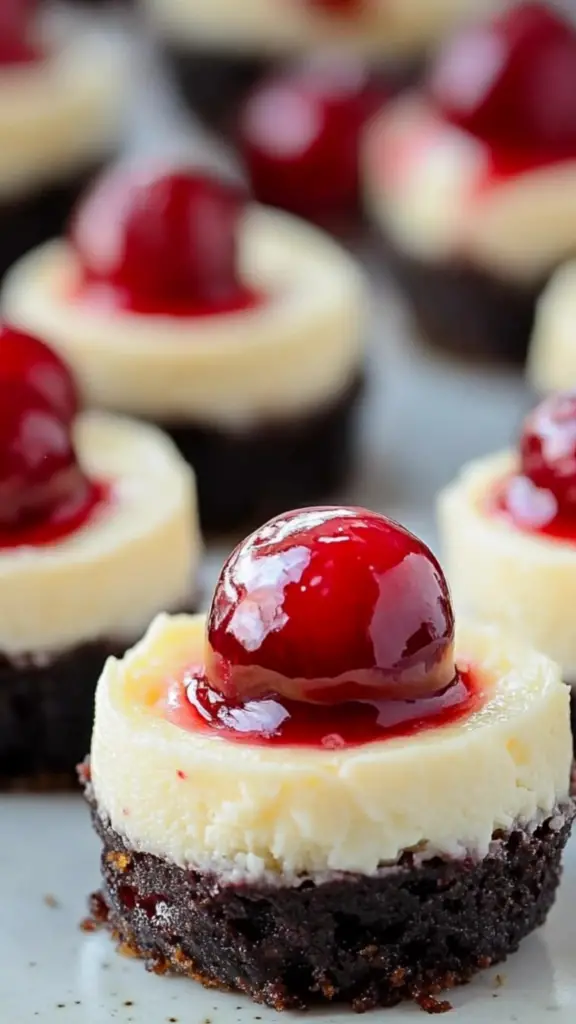
Mini Cherry Cheesecakes are a dessert that packs a big punch of flavor into a small package. With their velvety cheesecake filling, rich Oreo crust, and a topping of vibrant cherry pie filling, these bite-sized treats are as delightful to look at as they are to eat. Perfect for parties, holidays, or even a sweet indulgence at the end of a long day, these little cheesecakes are a guaranteed crowd-pleaser. Their convenience, versatility, and irresistible taste make them a must-try for any dessert lover.
- Prep Time: 15 minutes
- Cook Time: 25 minutes
- Total Time: 2 hours 40 minutes
- Yield: 12 servings
- Category: Dessert
- Method: Baking
- Cuisine: American
- Diet: Vegetarian
Ingredients
- Oreo Cookies (10 pieces): These provide the base for the crust. Their deep chocolate flavor complements the creamy filling, while their crumbly texture creates the perfect foundation.
- Melted Butter (2 tablespoons): This binds the Oreo crumbs together, ensuring the crust holds its shape.
- Cream Cheese (8 oz, softened): The star of the cheesecake filling, cream cheese delivers the rich, tangy flavor and smooth texture that define this dessert.
- Heavy Whipping Cream (2 tablespoons): This adds creaminess to the filling, helping achieve that signature velvety consistency.
- Egg (1 large): Acts as a binder, giving the filling structure while maintaining its smooth texture.
- Sugar (1/4 cup): Balances the tanginess of the cream cheese, adding just the right amount of sweetness.
- Vanilla Extract (2 teaspoons): Enhances the overall flavor with its warm, aromatic notes.
- Cherry Pie Filling (1 cup): A vibrant topping that provides a sweet, fruity contrast to the creamy filling.
Instructions
Step 1: Prepare Your Equipment and Oven
Preheat your oven to 325°F (163°C). Lightly grease a mini cheesecake pan or line a muffin tin with paper liners. This step ensures your cheesecakes release easily after baking.
Step 2: Make the Oreo Crust
Place the Oreo cookies in a zip-top bag and crush them into fine crumbs using a rolling pin or a food processor. Transfer the crumbs to a mixing bowl and stir in the melted butter until the mixture resembles wet sand. Scoop about one tablespoon of the crumb mixture into each cavity of your mini cheesecake pan and press it down firmly to form an even crust. The back of a spoon or a small glass works well for this.
Step 3: Prepare the Cheesecake Filling
In a large mixing bowl, beat the softened cream cheese on medium speed until smooth and creamy. Add the heavy whipping cream and mix until fully combined, stopping to scrape down the sides of the bowl as needed. Crack the egg into the bowl and mix until incorporated. Gradually add the sugar while mixing, ensuring it dissolves evenly. Finally, add the vanilla extract and beat the mixture for an additional minute to ensure a silky, lump-free filling.
Step 4: Assemble and Bake
Using a small scoop or spoon, divide the cheesecake filling evenly among the prepared crusts, filling each cavity about three-quarters full. Smooth the tops with the back of a spoon if needed. Place the pan in the preheated oven and bake for 25 minutes, or until the centers are set. They should jiggle slightly when the pan is gently shaken but not appear liquid. Remove the cheesecakes from the oven and let them cool in the pan for 10 minutes before transferring them to a wire rack to cool completely.
Step 5: Chill and Top
Once the cheesecakes have cooled to room temperature, transfer them to the refrigerator to chill for at least two hours. Chilling allows the flavors to meld and the filling to firm up. Before serving, top each cheesecake with a spoonful of cherry pie filling. The vibrant red cherries add a burst of fruity sweetness and create a striking visual contrast against the creamy filling.
Notes
- Room-Temperature Ingredients: Allow your cream cheese, egg, and heavy whipping cream to come to room temperature before mixing. This ensures a smooth, cohesive batter.
- Don’t Overmix: Overmixing can incorporate too much air into the batter, causing the cheesecakes to rise and then sink as they cool. Mix just until the ingredients are combined.
- Use a Water Bath Alternative: While these mini cheesecakes don’t require a traditional water bath, placing a pan of water on the lower oven rack can help create a moist baking environment, reducing the risk of cracks.
- Chill Thoroughly: Patience is key when it comes to cheesecake. Chilling them for the full two hours ensures they set properly and develop their best flavor.
Cheesecake has been a cherished dessert for centuries, with variations spanning cultures and cuisines. From dense New York-style cheesecakes to lighter European versions, this dessert has captured hearts worldwide. Mini cheesecakes take the classic treat and shrink it into an adorable, single-serving format. Not only do they eliminate the need for slicing, but they’re also incredibly portable and customizable. Whether you’re hosting a large gathering or simply treating yourself, these Mini Cherry Cheesecakes are an excellent choice. Let’s explore what makes these tiny treats so special and learn how to create them step by step.
The Appeal of Mini Desserts
Miniature desserts have a charm all their own. They’re easy to serve, portioned for individual enjoyment, and incredibly versatile. Mini cheesecakes, in particular, offer the richness and luxury of a full-sized cheesecake without the commitment of a larger portion. For hosts, they simplify the dessert course, eliminating the need for cutting and plating. For guests, they’re a convenient and satisfying treat.
Mini cheesecakes also offer a unique opportunity for creativity. With each serving being a blank canvas, you can experiment with different crusts, fillings, and toppings. This flexibility allows you to cater to various tastes and dietary preferences in a single batch. For example, you could make half with a classic cherry topping and the other half with a decadent chocolate ganache or fresh fruit.
Beyond their practicality and versatility, mini cheesecakes are a joy to make. They come together quickly, bake evenly, and cool faster than their full-sized counterparts. They’re also less prone to cracking, making them an excellent choice for beginners. Whether you’re new to baking or a seasoned pro, these Mini Cherry Cheesecakes are a recipe you’ll want to add to your repertoire.
Ingredients Breakdown
The key to any great dish lies in the quality of its ingredients. Here’s a detailed look at what you’ll need to make these Mini Cherry Cheesecakes:
- Oreo Cookies (10 pieces): These provide the base for the crust. Their deep chocolate flavor complements the creamy filling, while their crumbly texture creates the perfect foundation.
- Melted Butter (2 tablespoons): This binds the Oreo crumbs together, ensuring the crust holds its shape.
- Cream Cheese (8 oz, softened): The star of the cheesecake filling, cream cheese delivers the rich, tangy flavor and smooth texture that define this dessert.
- Heavy Whipping Cream (2 tablespoons): This adds creaminess to the filling, helping achieve that signature velvety consistency.
- Egg (1 large): Acts as a binder, giving the filling structure while maintaining its smooth texture.
- Sugar (1/4 cup): Balances the tanginess of the cream cheese, adding just the right amount of sweetness.
- Vanilla Extract (2 teaspoons): Enhances the overall flavor with its warm, aromatic notes.
- Cherry Pie Filling (1 cup): A vibrant topping that provides a sweet, fruity contrast to the creamy filling.
Step-by-Step Instructions
Creating Mini Cherry Cheesecakes is a straightforward process that yields stunning results. Follow these steps to bring your cheesecakes to life:
Step 1: Prepare Your Equipment and Oven
Preheat your oven to 325°F (163°C). Lightly grease a mini cheesecake pan or line a muffin tin with paper liners. This step ensures your cheesecakes release easily after baking.
Step 2: Make the Oreo Crust
Place the Oreo cookies in a zip-top bag and crush them into fine crumbs using a rolling pin or a food processor. Transfer the crumbs to a mixing bowl and stir in the melted butter until the mixture resembles wet sand. Scoop about one tablespoon of the crumb mixture into each cavity of your mini cheesecake pan and press it down firmly to form an even crust. The back of a spoon or a small glass works well for this.
Step 3: Prepare the Cheesecake Filling
In a large mixing bowl, beat the softened cream cheese on medium speed until smooth and creamy. Add the heavy whipping cream and mix until fully combined, stopping to scrape down the sides of the bowl as needed. Crack the egg into the bowl and mix until incorporated. Gradually add the sugar while mixing, ensuring it dissolves evenly. Finally, add the vanilla extract and beat the mixture for an additional minute to ensure a silky, lump-free filling.
Step 4: Assemble and Bake
Using a small scoop or spoon, divide the cheesecake filling evenly among the prepared crusts, filling each cavity about three-quarters full. Smooth the tops with the back of a spoon if needed. Place the pan in the preheated oven and bake for 25 minutes, or until the centers are set. They should jiggle slightly when the pan is gently shaken but not appear liquid. Remove the cheesecakes from the oven and let them cool in the pan for 10 minutes before transferring them to a wire rack to cool completely.
Step 5: Chill and Top
Once the cheesecakes have cooled to room temperature, transfer them to the refrigerator to chill for at least two hours. Chilling allows the flavors to meld and the filling to firm up. Before serving, top each cheesecake with a spoonful of cherry pie filling. The vibrant red cherries add a burst of fruity sweetness and create a striking visual contrast against the creamy filling.
The Magic of Flavor and Texture
The beauty of Mini Cherry Cheesecakes lies in their harmonious blend of flavors and textures. The Oreo crust is slightly crumbly yet firm, offering a deep cocoa flavor that perfectly complements the creamy filling. The cheesecake itself is rich and velvety, with a subtle tanginess that’s balanced by the sweetness of the sugar and vanilla. The cherry pie filling adds a fruity brightness, with its syrupy cherries providing a juicy contrast to the dense cheesecake. Together, these elements create a dessert that’s indulgent yet balanced, satisfying every layer of your taste buds.
Tips for Success
To ensure your Mini Cherry Cheesecakes turn out perfectly every time, keep these tips in mind:
- Room-Temperature Ingredients: Allow your cream cheese, egg, and heavy whipping cream to come to room temperature before mixing. This ensures a smooth, cohesive batter.
- Don’t Overmix: Overmixing can incorporate too much air into the batter, causing the cheesecakes to rise and then sink as they cool. Mix just until the ingredients are combined.
- Use a Water Bath Alternative: While these mini cheesecakes don’t require a traditional water bath, placing a pan of water on the lower oven rack can help create a moist baking environment, reducing the risk of cracks.
- Chill Thoroughly: Patience is key when it comes to cheesecake. Chilling them for the full two hours ensures they set properly and develop their best flavor.
Variations and Substitutions
Mini Cherry Cheesecakes are incredibly versatile, allowing you to experiment with different flavors and ingredients. Here are some ideas to inspire you:
- Alternative Crusts: Swap the Oreo crust for graham crackers, ginger snaps, or even pretzels for a salty-sweet twist.
- Different Fillings: Try swapping the cherry pie filling for blueberry, strawberry, or apple pie filling. You can also use fresh fruit or a drizzle of chocolate or caramel.
- Flavor Enhancements: Add a teaspoon of almond extract to the filling for a nutty flavor, or fold in mini chocolate chips for added texture.
- Dairy-Free Option: Use dairy-free cream cheese and heavy cream to make the recipe suitable for those with dietary restrictions.
Serving Suggestions
Mini Cherry Cheesecakes are as versatile in presentation as they are in flavor. For casual occasions, serve them straight from the pan or muffin liners. For more formal settings, remove the liners and arrange them on a decorative platter. Garnish with fresh mint leaves or a dusting of powdered sugar for an elegant touch. Pair them with coffee, tea, or a light dessert wine for a complete treat.
Storage and Make-Ahead Tips
These cheesecakes can be stored in an airtight container in the refrigerator for up to three days. If you’re making them ahead for a special occasion, you can prepare the crust and filling the day before, bake them, and refrigerate overnight. Add the cherry topping just before serving to keep the presentation fresh and vibrant.
Conclusion: A Delightful Dessert for Any Occasion
Mini Cherry Cheesecakes are more than just a dessert—they’re a celebration of flavor, texture, and the joy of baking. Their bite-sized format makes them perfect for sharing, while their rich, creamy filling and vibrant topping make them irresistibly indulgent. Whether you’re looking to impress guests at a party or treat yourself to something special, these little cheesecakes are a fantastic choice. So grab your ingredients, preheat your oven, and prepare to create a dessert that’s as delightful to make as it is to eat. These Mini Cherry Cheesecakes are sure to become a favorite in your recipe collection, bringing sweetness and joy to any occasion.