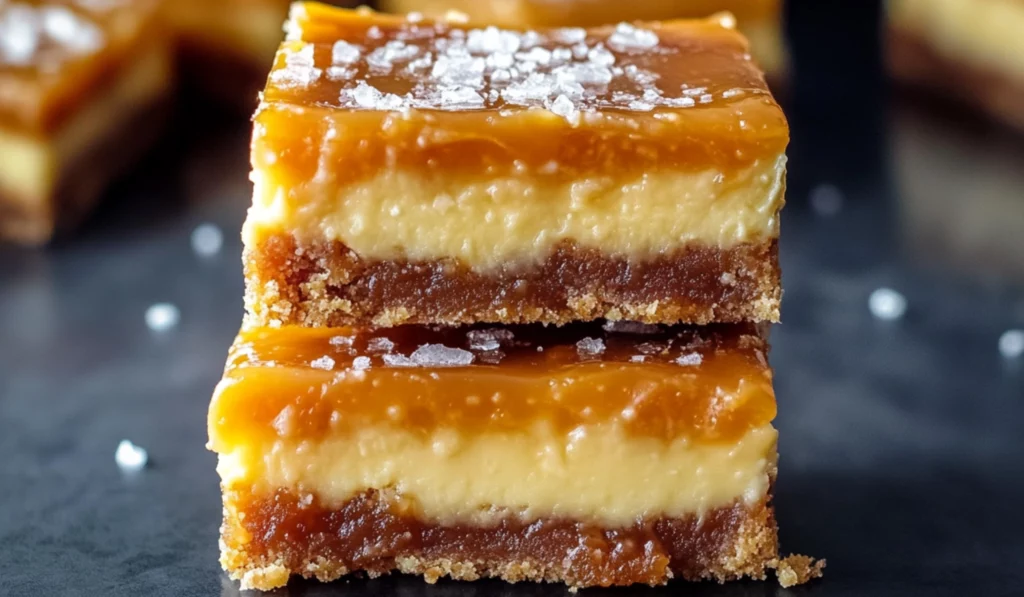
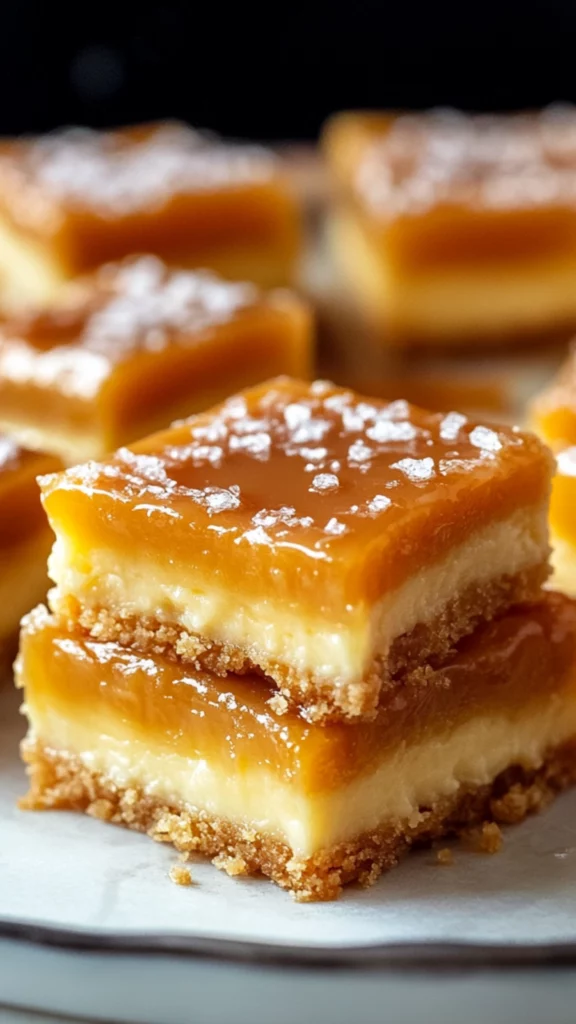
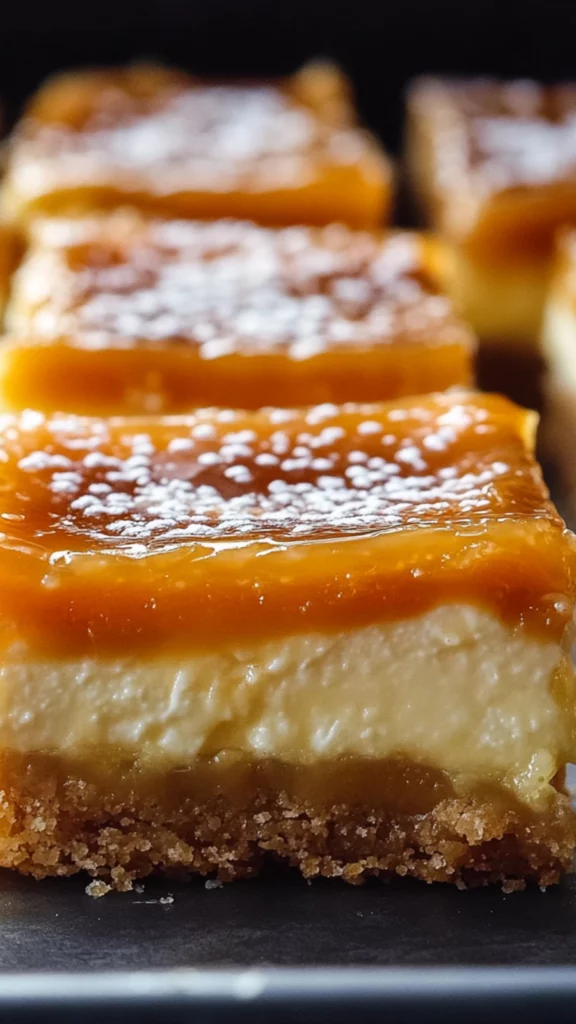
When it comes to desserts, there’s something truly magical about a combination of rich caramel, smooth cream cheese, and a buttery crust that melts in your mouth. If you’re looking for a dessert that’s both indulgent and surprisingly simple to make, then look no further than these Ooey Gooey Salted Caramel Butter Cake Bars. The name alone is enough to make your taste buds tingle with excitement!
Ooey Gooey Salted Caramel Butter Cake Bars: The Ultimate Dessert for Beginners

Craving a dessert that’s both indulgent and easy to make? These Ooey Gooey Salted Caramel Butter Cake Bars are the answer. With a buttery crust, rich salted caramel, and a creamy filling, they’re a sweet treat that everyone will love. Best of all, this recipe is beginner-friendly—no complicated steps, just simple ingredients and easy-to-follow instructions. Whether you’re hosting a gathering or treating yourself, these bars are sure to impress. Let’s get baking!
- Prep Time: 20 minutes
- Cook Time: 35 minutes
- Total Time: 55 minutes
- Yield: 12 servings 1x
- Category: Dessert
- Method: Baking
- Cuisine: American
- Diet: Vegetarian
Ingredients
For the Crust:
- 1 box of Butter Yellow Cake mix (or any alternative cake mix you prefer): The box cake mix is the shortcut to a delicious, buttery crust. It provides a solid foundation for the dessert and requires no extra work—just combine it with a few ingredients to create the base layer.
- ½ cup of butter (melted): Butter brings richness and flavor to the crust, and when melted, it binds everything together seamlessly. You’ll love the deep buttery taste it adds to every bite.
- 1 egg: The egg helps bring the crust together and ensures it holds its shape during baking. It’s the binding agent that keeps the crust from falling apart.
For the Salted Caramel Layer:
- ½ cup of salted caramel topping: The salted caramel topping is the star of this recipe. You can use store-bought salted caramel sauce to save time, or if you’re feeling adventurous, you can make your own caramel sauce at home. The sweetness of the caramel, combined with the salty kick, is what makes this layer so irresistible. Adjust the amount of caramel to suit your preferences, as more caramel equals more gooey goodness.
For the Cream Cheese Layer:
- 8 oz of cream cheese (softened): Cream cheese is key to creating a smooth, creamy layer that adds a rich texture to the dessert. Ensure the cream cheese is softened to room temperature before mixing—it will blend much better this way.
- 2 eggs: Eggs create a smooth consistency in the cream cheese layer and help it set as it bakes.
- 2 cups of powdered sugar: Powdered sugar, also known as confectioner’s sugar, gives this layer the right level of sweetness while ensuring it’s smooth and not too gritty.
- 1 teaspoon of vanilla extract: Vanilla extract adds depth and warmth to the cream cheese layer, balancing out the sweetness and complementing the caramel and buttery crust.
Instructions
- Preheat the Oven: Begin by preheating your oven to 350°F (175°C). This ensures that your bars bake evenly and come out with that perfectly golden, slightly crispy top.
- Prepare the Crust: In a medium-sized mixing bowl, combine the Butter Yellow Cake mix, melted butter, and egg. Stir the mixture together until it forms a uniform dough-like consistency. Don’t worry if it’s a little sticky—it should be. This is the base that will hold everything together.
- Spread the Crust: Grease a 9×9-inch baking pan with cooking spray or a little butter. Transfer your cake mixture into the pan, and use a spatula to spread it evenly across the bottom. Be sure to cover the entire base so that every bite has that rich, buttery flavor.
- Add the Salted Caramel: Once the crust is spread out, drizzle the salted caramel topping evenly over the crust. If the caramel sauce is too thick, simply microwave it for 10-15 seconds to loosen it up. You can adjust the amount of caramel to your liking; some prefer a thicker caramel layer, while others like a thinner drizzle.
- Make the Cream Cheese Layer: In a separate medium-sized mixing bowl, use an electric mixer or whisk to cream the softened cream cheese until smooth. Then, beat in the eggs one at a time, mixing well after each addition. Add in the powdered sugar and vanilla extract, and continue mixing until everything is fully combined into a smooth, creamy mixture.
- Assemble and Bake: Pour the cream cheese mixture evenly over the caramel layer. Place the pan in the preheated oven and bake for about 35-40 minutes. It’s important not to overbake, so keep an eye on it during the last few minutes. The top should be set and lightly golden, while the center will still be slightly wobbly. This wobbly center is key to getting that ooey-gooey texture that makes these bars so irresistible.
- Cool and Slice: Once the bars are done, remove them from the oven and let them cool to room temperature. This cooling period allows the layers to set and ensures the bars hold their shape when sliced. Once they’ve cooled, slice them into squares or rectangles, and get ready to indulge!
Notes
- Don’t Overbake: It can be tempting to leave the bars in the oven longer, but it’s important not to overbake them. The key to achieving that perfect gooey center is knowing when to pull them out of the oven. The edges should be golden, and the center should still jiggle slightly when you tap the pan.
- Use Softened Cream Cheese: For a smooth, lump-free filling, make sure your cream cheese is softened to room temperature before mixing. Cold cream cheese can create lumps that are difficult to smooth out, so take it out of the fridge about 30 minutes before you start baking.
- Prep Efficiently: Take a few minutes to measure out all your ingredients before you start. This will make the process faster and smoother, especially when you’re working with multiple layers.
- Adjust the Caramel: If you like a sweeter, more indulgent dessert, feel free to increase the amount of salted caramel topping. You can go up to 1 cup if you like it extra gooey!
- Let Cool Completely: Let the bars cool fully before slicing them. This allows the layers to firm up and ensures that each slice holds together perfectly.
This dessert is the result of my love for creating treats that taste amazing but don’t require hours of slaving away in the kitchen. As someone who believes that the best desserts are often the simplest, I created these cake bars as a way to indulge without overwhelming myself with complicated steps. The caramel is sweet, but the salty kick perfectly balances it, creating a perfect combination of flavors. The cream cheese layer? It’s light, smooth, and creamy—addictive to say the least.
What’s even better? This recipe is made for beginners. If you’ve never baked before, this is a fantastic place to start! With just a handful of ingredients and easy-to-follow steps, you’ll have a crowd-pleasing dessert ready in less than an hour. So, whether you’re hosting a family gathering, need a last-minute dessert, or simply want to treat yourself to something sweet, these Ooey Gooey Salted Caramel Butter Cake Bars will fit the bill perfectly.
Why This Recipe Is Perfect for Beginners
There’s no need to feel intimidated by the idea of baking a dessert. In fact, this recipe is designed to take you step-by-step through the process, giving you a delicious outcome even if you’re still finding your way around the kitchen. The ingredients are minimal, the instructions are clear, and the result is simply irresistible. Plus, these cake bars come together with just a few simple layers, meaning no complicated techniques or ingredients. If you can stir and pour, you can make these!
Additionally, this dessert doesn’t require any special equipment. All you need is a mixing bowl, a baking pan, and your trusty oven. For a beginner baker, this is as easy as it gets. The process of preparing and baking is quick and straightforward, with minimal cleanup. After just 20 minutes of prep time, you can kick back and relax while the oven works its magic. Trust me, this is one of those recipes that will quickly become a go-to for all kinds of occasions.
Ingredients and Preparation
Let’s talk about the ingredients. As with most beginner-friendly recipes, you’ll be working with everyday items that are easy to find at your local grocery store. The beauty of this recipe is its simplicity—the ingredients list is short but sweet, and each element brings something unique to the table.
For the Crust:
- 1 box of Butter Yellow Cake mix (or any alternative cake mix you prefer): The box cake mix is the shortcut to a delicious, buttery crust. It provides a solid foundation for the dessert and requires no extra work—just combine it with a few ingredients to create the base layer.
- ½ cup of butter (melted): Butter brings richness and flavor to the crust, and when melted, it binds everything together seamlessly. You’ll love the deep buttery taste it adds to every bite.
- 1 egg: The egg helps bring the crust together and ensures it holds its shape during baking. It’s the binding agent that keeps the crust from falling apart.
For the Salted Caramel Layer:
- ½ cup of salted caramel topping: The salted caramel topping is the star of this recipe. You can use store-bought salted caramel sauce to save time, or if you’re feeling adventurous, you can make your own caramel sauce at home. The sweetness of the caramel, combined with the salty kick, is what makes this layer so irresistible. Adjust the amount of caramel to suit your preferences, as more caramel equals more gooey goodness.
For the Cream Cheese Layer:
- 8 oz of cream cheese (softened): Cream cheese is key to creating a smooth, creamy layer that adds a rich texture to the dessert. Ensure the cream cheese is softened to room temperature before mixing—it will blend much better this way.
- 2 eggs: Eggs create a smooth consistency in the cream cheese layer and help it set as it bakes.
- 2 cups of powdered sugar: Powdered sugar, also known as confectioner’s sugar, gives this layer the right level of sweetness while ensuring it’s smooth and not too gritty.
- 1 teaspoon of vanilla extract: Vanilla extract adds depth and warmth to the cream cheese layer, balancing out the sweetness and complementing the caramel and buttery crust.
Alternative Ingredient Suggestions:
- If you’re looking to make a variation of this recipe, you can swap out the Butter Yellow Cake mix for other flavors. A vanilla cake mix would work well too, or you could go with something like chocolate for a richer flavor.
- If you’re trying to make the recipe dairy-free, you could opt for dairy-free cream cheese and butter substitutes. Coconut milk or almond milk-based options can help maintain the texture and richness without using dairy.
- For a twist, you can experiment with different toppings. Use chocolate sauce, berry compote, or even a dollop of whipped cream on top for added indulgence.
Step-by-Step Instructions
The process is simple and straightforward. I’ll break it down for you in detail, so even if this is your first time baking, you can follow along without a hitch.
- Preheat the Oven: Begin by preheating your oven to 350°F (175°C). This ensures that your bars bake evenly and come out with that perfectly golden, slightly crispy top.
- Prepare the Crust: In a medium-sized mixing bowl, combine the Butter Yellow Cake mix, melted butter, and egg. Stir the mixture together until it forms a uniform dough-like consistency. Don’t worry if it’s a little sticky—it should be. This is the base that will hold everything together.
- Spread the Crust: Grease a 9×9-inch baking pan with cooking spray or a little butter. Transfer your cake mixture into the pan, and use a spatula to spread it evenly across the bottom. Be sure to cover the entire base so that every bite has that rich, buttery flavor.
- Add the Salted Caramel: Once the crust is spread out, drizzle the salted caramel topping evenly over the crust. If the caramel sauce is too thick, simply microwave it for 10-15 seconds to loosen it up. You can adjust the amount of caramel to your liking; some prefer a thicker caramel layer, while others like a thinner drizzle.
- Make the Cream Cheese Layer: In a separate medium-sized mixing bowl, use an electric mixer or whisk to cream the softened cream cheese until smooth. Then, beat in the eggs one at a time, mixing well after each addition. Add in the powdered sugar and vanilla extract, and continue mixing until everything is fully combined into a smooth, creamy mixture.
- Assemble and Bake: Pour the cream cheese mixture evenly over the caramel layer. Place the pan in the preheated oven and bake for about 35-40 minutes. It’s important not to overbake, so keep an eye on it during the last few minutes. The top should be set and lightly golden, while the center will still be slightly wobbly. This wobbly center is key to getting that ooey-gooey texture that makes these bars so irresistible.
- Cool and Slice: Once the bars are done, remove them from the oven and let them cool to room temperature. This cooling period allows the layers to set and ensures the bars hold their shape when sliced. Once they’ve cooled, slice them into squares or rectangles, and get ready to indulge!
Beginner Tips and Notes
Even though this recipe is beginner-friendly, there are a few tips and tricks that can help you get the best results:
- Don’t Overbake: It can be tempting to leave the bars in the oven longer, but it’s important not to overbake them. The key to achieving that perfect gooey center is knowing when to pull them out of the oven. The edges should be golden, and the center should still jiggle slightly when you tap the pan.
- Use Softened Cream Cheese: For a smooth, lump-free filling, make sure your cream cheese is softened to room temperature before mixing. Cold cream cheese can create lumps that are difficult to smooth out, so take it out of the fridge about 30 minutes before you start baking.
- Prep Efficiently: Take a few minutes to measure out all your ingredients before you start. This will make the process faster and smoother, especially when you’re working with multiple layers.
- Adjust the Caramel: If you like a sweeter, more indulgent dessert, feel free to increase the amount of salted caramel topping. You can go up to 1 cup if you like it extra gooey!
- Let Cool Completely: Let the bars cool fully before slicing them. This allows the layers to firm up and ensures that each slice holds together perfectly.
Serving Suggestions
These Ooey Gooey Salted Caramel Butter Cake Bars are perfect on their own, but here are a few ideas to elevate your dessert experience:
- Serve with Ice Cream: Add a scoop of vanilla ice cream or salted caramel ice cream on the side for an extra indulgent treat.
- Drizzle with Extra Caramel Sauce: If you want to take these bars over the top, drizzle some extra salted caramel sauce on top before serving. It’ll make the dessert even more indulgent!
- Pair with Fresh Berries: The sweetness of the bars pairs beautifully with the tartness of fresh berries. Try raspberries, strawberries, or blueberries for a refreshing contrast to the rich dessert.
- Add Whipped Cream: A dollop of whipped cream adds a light, fluffy element that balances the richness of the bars. You can even top it with a sprinkle of sea salt for an extra salty-sweet touch.
Storage Tips for Leftovers:
If you manage to have any leftovers (which is highly unlikely!), here’s how to store them:
- Room Temperature: Keep the bars in an airtight container at room temperature for up to 3 days. They will stay soft and delicious for a few days.
- Refrigeration: You can refrigerate them for up to a week. Just be sure to store them in an airtight container to prevent them from drying out.
- Freezing: For longer storage, freeze the bars. Wrap them tightly in plastic wrap and place them in a freezer-safe container for up to 2 months. To serve, thaw at room temperature for a few hours or microwave for a few seconds to warm them up.
Conclusion
If you’re ready to give this recipe a try, I’d love to hear how it turns out! Have you made any adjustments or tried a different topping? Drop a comment below and let me know. Baking is all about experimenting and making recipes your own, so I’d love to hear about your experience.
If you’re happy with your Ooey Gooey Salted Caramel Butter Cake Bars, be sure to share them with friends and family—you’ll have them asking for the recipe in no time. And if you enjoyed this dessert, feel free to explore more beginner-friendly recipes on the blog. Whether it’s a simple cake, cookies, or another indulgent treat, there’s always a new recipe waiting for you.


