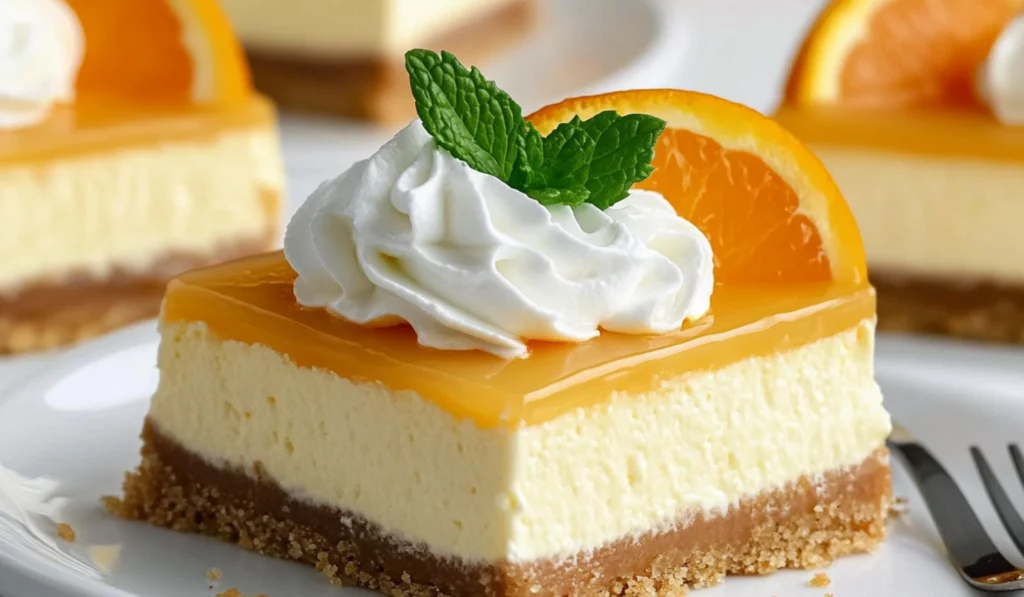
There’s something magical about the combination of orange and cream that instantly takes you back to the carefree days of summer. For many, the familiar taste of an orange creamsicle on a hot day is a nostalgic treat, reminding us of simpler times. Now, imagine that delicious flavor transformed into a no-bake cheesecake bar—perfect for satisfying your summer cravings without turning on the oven. These Orange Creamsicle Cheesecake Bars are just that! With a buttery graham cracker crust, a creamy orange cheesecake filling, and a decadent homemade orange curd topping, these bars offer a refreshing, citrusy twist on a classic dessert. Whether you’re hosting a summer barbecue, enjoying a picnic in the park, or simply treating yourself to something sweet on a warm afternoon, these cheesecake bars are bound to become your new go-to dessert. They’re easy to make, full of bright, zesty flavors, and sure to impress your friends and family. This recipe is beginner-friendly, making it perfect for those who are new to baking or want to avoid the fuss of baking altogether. So, let’s dive into how to create these irresistible Orange Creamsicle Cheesecake Bars that are as delightful to look at as they are to eat. These cheesecake bars are the perfect way to enjoy the flavors of a creamsicle in a new, exciting form. They’re light, refreshing, and incredibly satisfying—ideal for any occasion, especially when you want to keep things simple but delicious.

Orange Creamsicle Cheesecake Bars: A Refreshing and Irresistible Summer Delight
If you love the classic orange creamsicle, you’ll adore these Orange Creamsicle Cheesecake Bars! This simple no-bake recipe combines a buttery graham cracker crust, a creamy orange cheesecake filling, and a tangy orange curd topping. Perfect for beginners, it’s quick to make, refreshing, and packed with nostalgic flavors. Whether it’s for a summer gathering or a sweet treat, these bars are sure to impress!
- Prep Time: 30 minutes
- Cook Time: 5 minutes
- Total Time: 35 minutes
- Yield: 12 bars 1x
- Category: Dessert
- Method: No-Bake
- Cuisine: American
- Diet: Vegetarian
Ingredients
Graham Cracker Crust:
- 1 3/4 cups finely crushed graham crackers
- 2 tablespoons light brown sugar
- 6 tablespoons melted butter
Orange Cheesecake Filling:
- 3 oz. sweetened orange-flavored gelatin (like Jell-O)
- 1/2 cup boiling water
- 1/2 cup iced water
- 8 oz. cream cheese (softened)
- 1/4 cup granulated sugar
- 1 (14 oz.) can sweetened condensed milk
- 1/4 cup freshly squeezed orange juice
- 1 1/2 cups whipped cream (either store-bought Cool Whip or homemade whipped cream)
- Orange food coloring (optional)
Orange Curd Topping:
- 3 tablespoons butter
- 1/3 cup freshly squeezed orange juice
- 1 1/2 teaspoons orange zest
- 1/3 cup sugar
- 1 egg and 1 egg yolk (slightly whisked with a fork)
- Orange food coloring (optional)
For Serving:
- Whipped cream
- Orange wedges
- Mint leaves (for garnish)
Instructions
Step 1: Prepare the Graham Cracker Crust
Start by lining a 9 x 9 x 2-inch pan with aluminum foil or plastic wrap, leaving an overhang on the sides for easy removal later. Lightly grease the pan with cooking spray to prevent sticking. In a small bowl, combine the graham cracker crumbs and light brown sugar. Add the melted butter and stir until the crumbs are evenly moistened. Once the mixture is well combined, press it firmly into the bottom of the prepared pan. Use the back of a spoon or the bottom of a glass to make sure the crust is compact. Place the pan in the fridge for about 10-15 minutes to firm up while you prepare the filling.
The graham cracker crust is the foundation of this dessert, providing a crunchy texture that contrasts beautifully with the creamy filling. It’s important to press the crust mixture down firmly to create a solid base that will hold together when sliced. Don’t skip the chilling step—it helps the crust firm up and ensures the bars will be easier to slice later.
Step 2: Make the Orange Cheesecake Filling
To make the orange-flavored cheesecake filling, begin by dissolving the orange Jell-O in the boiling water. Stir for about two minutes until it’s completely dissolved, then add the iced water and stir again. Set this aside to cool.
In a large mixing bowl, beat the softened cream cheese and granulated sugar together until smooth and creamy. Gradually add the sweetened condensed milk and continue mixing until fully incorporated. Slowly pour in the freshly squeezed orange juice and mix until everything is well combined.
Once the Jell-O mixture has cooled, pour it into the cream cheese mixture and mix until smooth. Add a few drops of orange food coloring, if desired, to intensify the orange hue. Finally, fold in the whipped cream until the filling is light and fluffy. Carefully spread this filling over the graham cracker crust, making sure it’s even.
Place the pan in the fridge and let the cheesecake bars chill for at least a few hours, or preferably overnight, so the filling can firm up and set.
The key to a creamy filling is to mix the ingredients slowly and thoroughly. Make sure the cream cheese is softened before mixing so that it combines smoothly with the other ingredients. The whipped cream adds a light, airy texture to the filling, making it incredibly smooth and creamy. Patience is key when it comes to setting the bars—giving them enough time to chill will ensure the texture is just right.
Step 3: Make the Orange Curd Topping
While the cheesecake bars are chilling, you can make the orange curd topping. In a small saucepan, melt the butter over medium heat. Once melted, remove the pan from the heat and whisk in the sugar, orange zest, and orange juice. Add the slightly whisked egg and egg yolk, then return the saucepan to medium heat.
Stir constantly for about 5 minutes or until the curd thickens and coats the back of a spoon. You’ll know it’s done when the curd is smooth and glossy. Remove from heat and add a few drops of orange food coloring if you want a deeper orange color. Transfer the curd into a small bowl, cover it with plastic wrap, and let it cool to room temperature.
The orange curd adds a tangy layer on top of the creamy cheesecake filling, intensifying the citrus flavor and making the bars even more irresistible. If you find the curd isn’t thickening as quickly as expected, continue to cook it for a few more minutes, stirring constantly. Just be sure not to overcook it, or the curd may become too thick.
Step 4: Assemble the Cheesecake Bars
Once the cheesecake filling has fully set, use the overhang of the foil to lift the cheesecake from the pan and transfer it onto a cutting board. Spread the cooled orange curd over the top of the cheesecake in an even layer. If desired, garnish with whipped cream, orange wedges, and fresh mint leaves for a pop of color.
To serve, cut the cheesecake into squares or bars. Be sure to use a sharp knife for clean cuts, and if necessary, run the knife under hot water and wipe it dry between each cut to keep the slices neat and tidy. The combination of the creamy filling, crunchy crust, and tangy orange curd makes these bars a showstopper dessert that will wow your guests.
Notes
- Make Ahead: These cheesecake bars are perfect for preparing ahead of time. Make them a day before your event and store them in the refrigerator for up to 2-3 days. The flavors will only get better as they sit.
- Customization: You can easily adjust the sweetness of the filling or the orange flavor to suit your preferences. If you like it more tart, add a little extra lemon juice or zest. You can also experiment with different flavor variations, such as adding a bit of vanilla extract or swapping the orange curd for lemon curd.
- Storage: Keep the bars in an airtight container in the refrigerator. They should stay fresh for up to 3 days. You can also freeze them for up to 2 months, but be sure to wrap them tightly in plastic wrap and foil to prevent freezer burn.
Why You’ll Love These Orange Creamsicle Cheesecake Bars
This recipe has it all—freshness, simplicity, and indulgence. If you love creamsicles, you’ll immediately fall for this dessert because it captures that same combination of tangy citrus and creamy sweetness. But it’s not just about the flavor—it’s also about the ease of preparation. With no baking required, you can whip these up in a fraction of the time compared to traditional cheesecakes. The no-bake nature of this recipe makes it ideal for beginners who are still mastering their kitchen skills but want to create something impressive. These cheesecake bars are also customizable. You can adjust the level of sweetness, tweak the orange flavor to your liking, and even play with the toppings. Best of all, the dessert is incredibly versatile. It can be served for any occasion, whether it’s a summer party, a family gathering, or a simple evening treat. This dessert is perfect for anyone who enjoys a fruity and creamy dessert without the hassle of baking. The no-bake approach makes it especially great for those hot summer months when you don’t want to turn on the oven. Plus, the ingredients are simple and easy to find, making this an approachable recipe for beginners. Whether you’re making it for a special event or simply as a sweet treat to share with loved ones, you’ll find that it’s as fun to make as it is to eat. There’s something satisfying about serving a dessert that’s not only delicious but also effortless to prepare, and these Orange Creamsicle Cheesecake Bars hit all the right notes.
Ingredients and Preparation: What You’ll Need
To create these Orange Creamsicle Cheesecake Bars, you’ll need to gather a few basic ingredients. The key components of this dessert include a crunchy graham cracker crust, a smooth and creamy cheesecake filling, and a luscious orange curd topping. Here’s what you’ll need to get started:
Graham Cracker Crust:
- 1 3/4 cups finely crushed graham crackers
- 2 tablespoons light brown sugar
- 6 tablespoons melted butter
Orange Cheesecake Filling:
- 3 oz. sweetened orange-flavored gelatin (like Jell-O)
- 1/2 cup boiling water
- 1/2 cup iced water
- 8 oz. cream cheese (softened)
- 1/4 cup granulated sugar
- 1 (14 oz.) can sweetened condensed milk
- 1/4 cup freshly squeezed orange juice
- 1 1/2 cups whipped cream (either store-bought Cool Whip or homemade whipped cream)
- Orange food coloring (optional)
Orange Curd Topping:
- 3 tablespoons butter
- 1/3 cup freshly squeezed orange juice
- 1 1/2 teaspoons orange zest
- 1/3 cup sugar
- 1 egg and 1 egg yolk (slightly whisked with a fork)
- Orange food coloring (optional)
For Serving:
- Whipped cream
- Orange wedges
- Mint leaves (for garnish)
Each ingredient plays a crucial role in achieving the perfect balance of flavor and texture. The graham cracker crust provides a crumbly base that complements the creamy filling, while the orange gelatin and freshly squeezed orange juice bring out that refreshing citrus flavor. The orange curd adds a rich, tangy layer on top, enhancing the overall flavor profile of the bars. With these ingredients, you can create a dessert that’s both refreshing and indulgent—perfect for any occasion.
Step-by-Step Instructions: Making Orange Creamsicle Cheesecake Bars
This recipe may look long, but don’t be intimidated! The steps are simple and straightforward. Let’s break them down into manageable tasks so you can make these cheesecake bars with ease.
Step 1: Prepare the Graham Cracker Crust
Start by lining a 9 x 9 x 2-inch pan with aluminum foil or plastic wrap, leaving an overhang on the sides for easy removal later. Lightly grease the pan with cooking spray to prevent sticking. In a small bowl, combine the graham cracker crumbs and light brown sugar. Add the melted butter and stir until the crumbs are evenly moistened. Once the mixture is well combined, press it firmly into the bottom of the prepared pan. Use the back of a spoon or the bottom of a glass to make sure the crust is compact. Place the pan in the fridge for about 10-15 minutes to firm up while you prepare the filling.
The graham cracker crust is the foundation of this dessert, providing a crunchy texture that contrasts beautifully with the creamy filling. It’s important to press the crust mixture down firmly to create a solid base that will hold together when sliced. Don’t skip the chilling step—it helps the crust firm up and ensures the bars will be easier to slice later.
Step 2: Make the Orange Cheesecake Filling
To make the orange-flavored cheesecake filling, begin by dissolving the orange Jell-O in the boiling water. Stir for about two minutes until it’s completely dissolved, then add the iced water and stir again. Set this aside to cool.
In a large mixing bowl, beat the softened cream cheese and granulated sugar together until smooth and creamy. Gradually add the sweetened condensed milk and continue mixing until fully incorporated. Slowly pour in the freshly squeezed orange juice and mix until everything is well combined.
Once the Jell-O mixture has cooled, pour it into the cream cheese mixture and mix until smooth. Add a few drops of orange food coloring, if desired, to intensify the orange hue. Finally, fold in the whipped cream until the filling is light and fluffy. Carefully spread this filling over the graham cracker crust, making sure it’s even.
Place the pan in the fridge and let the cheesecake bars chill for at least a few hours, or preferably overnight, so the filling can firm up and set.
The key to a creamy filling is to mix the ingredients slowly and thoroughly. Make sure the cream cheese is softened before mixing so that it combines smoothly with the other ingredients. The whipped cream adds a light, airy texture to the filling, making it incredibly smooth and creamy. Patience is key when it comes to setting the bars—giving them enough time to chill will ensure the texture is just right.
Step 3: Make the Orange Curd Topping
While the cheesecake bars are chilling, you can make the orange curd topping. In a small saucepan, melt the butter over medium heat. Once melted, remove the pan from the heat and whisk in the sugar, orange zest, and orange juice. Add the slightly whisked egg and egg yolk, then return the saucepan to medium heat.
Stir constantly for about 5 minutes or until the curd thickens and coats the back of a spoon. You’ll know it’s done when the curd is smooth and glossy. Remove from heat and add a few drops of orange food coloring if you want a deeper orange color. Transfer the curd into a small bowl, cover it with plastic wrap, and let it cool to room temperature.
The orange curd adds a tangy layer on top of the creamy cheesecake filling, intensifying the citrus flavor and making the bars even more irresistible. If you find the curd isn’t thickening as quickly as expected, continue to cook it for a few more minutes, stirring constantly. Just be sure not to overcook it, or the curd may become too thick.
Step 4: Assemble the Cheesecake Bars
Once the cheesecake filling has fully set, use the overhang of the foil to lift the cheesecake from the pan and transfer it onto a cutting board. Spread the cooled orange curd over the top of the cheesecake in an even layer. If desired, garnish with whipped cream, orange wedges, and fresh mint leaves for a pop of color.
To serve, cut the cheesecake into squares or bars. Be sure to use a sharp knife for clean cuts, and if necessary, run the knife under hot water and wipe it dry between each cut to keep the slices neat and tidy. The combination of the creamy filling, crunchy crust, and tangy orange curd makes these bars a showstopper dessert that will wow your guests.
Beginner Tips and Notes: Making the Most of Your Orange Creamsicle Cheesecake Bars
- Make Ahead: These cheesecake bars are perfect for preparing ahead of time. Make them a day before your event and store them in the refrigerator for up to 2-3 days. The flavors will only get better as they sit.
- Customization: You can easily adjust the sweetness of the filling or the orange flavor to suit your preferences. If you like it more tart, add a little extra lemon juice or zest. You can also experiment with different flavor variations, such as adding a bit of vanilla extract or swapping the orange curd for lemon curd.
- Storage: Keep the bars in an airtight container in the refrigerator. They should stay fresh for up to 3 days. You can also freeze them for up to 2 months, but be sure to wrap them tightly in plastic wrap and foil to prevent freezer burn.

Final Thoughts
These Orange Creamsicle Cheesecake Bars are the perfect dessert for anyone who loves the bright, refreshing taste of oranges paired with the smooth, creamy goodness of cheesecake. They’re simple to make, full of flavor, and perfect for any occasion. With their eye-catching appearance and irresistible taste, they’re sure to be a hit at your next gathering. Whether you’re a seasoned cook or a beginner just starting out, this recipe is easy to follow and will leave you with a dessert everyone will love. Don’t be afraid to experiment with different variations and make it your own!


