There’s something magical about pumpkin pie. As soon as the fall season begins, it feels like the comforting flavors of pumpkin, cinnamon, nutmeg, and cloves fill the air, signaling the start of cozy, holiday gatherings. But what if you could enjoy all the deliciousness of pumpkin pie without the hassle of baking an entire pie? That’s where this Pumpkin Pie in a Cup recipe comes in. Imagine all the rich, creamy goodness of traditional pumpkin pie served in individual cups, making it the perfect no-bake treat for any fall occasion.
Pumpkin Pie in a Cup: A Fun and Easy No-Bake Fall Treat
Craving the cozy flavors of pumpkin pie but without the baking? This Pumpkin Pie in a Cup is the perfect solution! With a buttery cookie crust, creamy pumpkin cheesecake filling, and a dollop of whipped cream, it’s a no-bake dessert that captures all the fall goodness. Quick, easy, and made for beginners, this treat is ideal for Halloween, Thanksgiving, or any occasion when you need a festive dessert that’s both delicious and simple to prepare.
- Prep Time: 10 minutes
- Cook Time: 0 minutes
- Total Time: 10 minutes
- Yield: 5 servings 1x
- Category: Dessert
- Method: No-bake, Layering
- Cuisine: American
- Diet: Vegetarian
Ingredients
- 2 cups Biscoff cookie crumbs (from about 30 cookies)
- 6 tablespoons unsalted butter, melted
- 8 ounces cream cheese, softened
- 1/2 cup granulated white sugar
- 1 cup pumpkin puree
- 1 teaspoon pumpkin pie spice
- 6 ounces frozen whipped topping, thawed (plus more for topping)
Instructions
1. Prepare the Cookie Crust
Begin by making the cookie crust. In a small mixing bowl, combine 2 cups of Biscoff cookie crumbs and 6 tablespoons of melted butter. Stir them together until the crumbs are evenly coated with the butter. The mixture should feel slightly damp, but still crumbly. If it seems too dry, you can add a little more butter to help it stick together.
Once the mixture is ready, set it aside while you prepare the rest of the filling. You can also press the crust into the bottoms of the cups at this point, making sure to gently compact it for an even layer.
2. Make the Pumpkin Cheesecake Filling
In a large mixing bowl, beat 8 ounces of softened cream cheese and 1/2 cup of granulated sugar together using an electric mixer. Mix them until the cream cheese becomes smooth and creamy. This should take about 2 minutes. It’s important to soften the cream cheese beforehand so that it blends seamlessly into the other ingredients without any lumps.
Next, add 1 cup of pumpkin puree and 1 teaspoon of pumpkin pie spice. Mix everything together until the pumpkin is fully incorporated into the cream cheese mixture. The pumpkin will add a rich, smooth texture and a vibrant color to the filling.
3. Add the Whipped Topping
Once the pumpkin mixture is ready, fold in the 6 ounces of thawed whipped topping. Gently fold the whipped topping into the pumpkin mixture using a spatula. Be careful not to over-mix, as you want to maintain the light, airy texture of the whipped topping. This step gives the dessert its creamy, fluffy texture.
4. Assemble the Cups
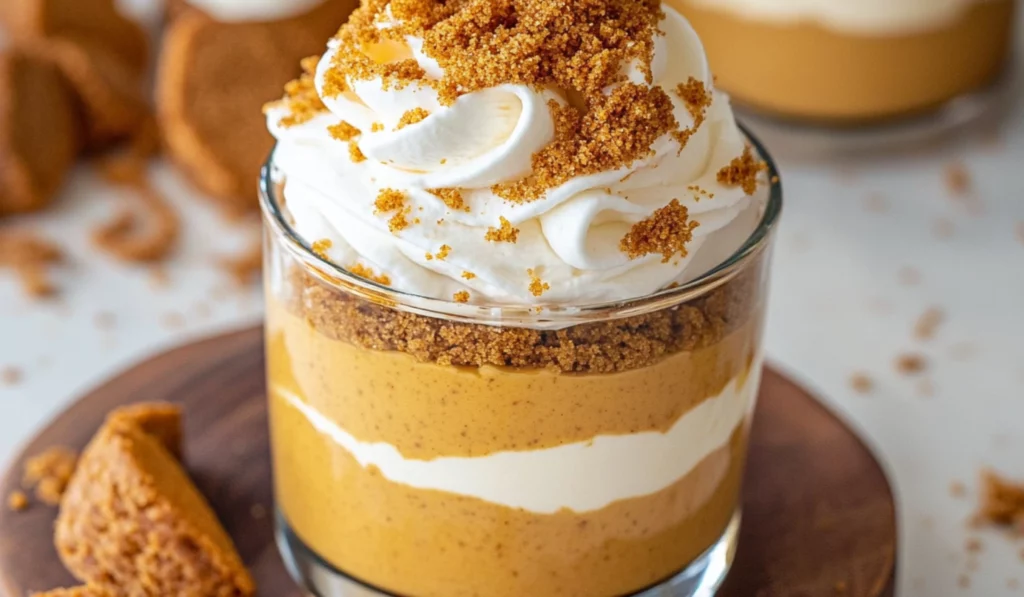
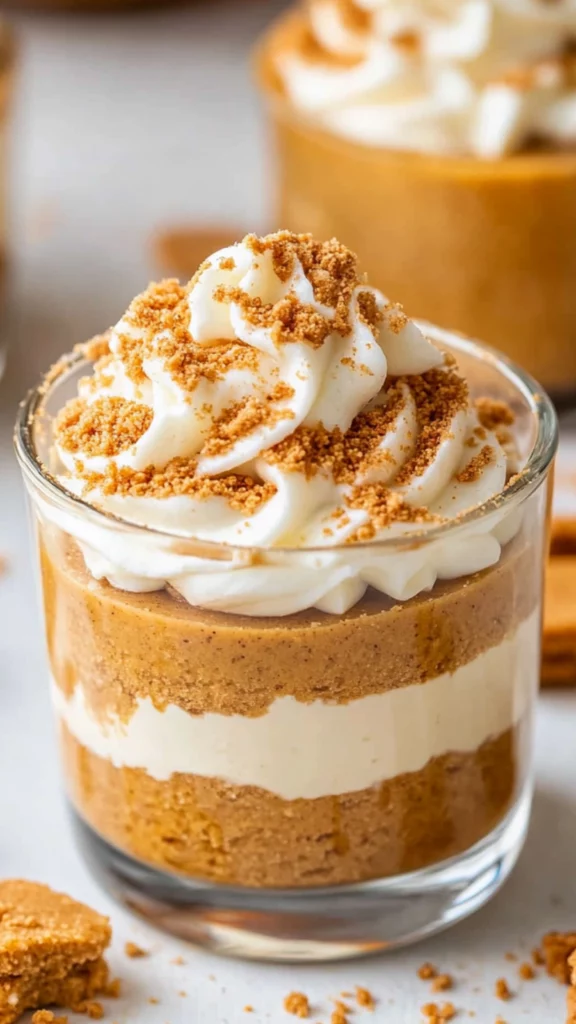
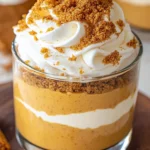
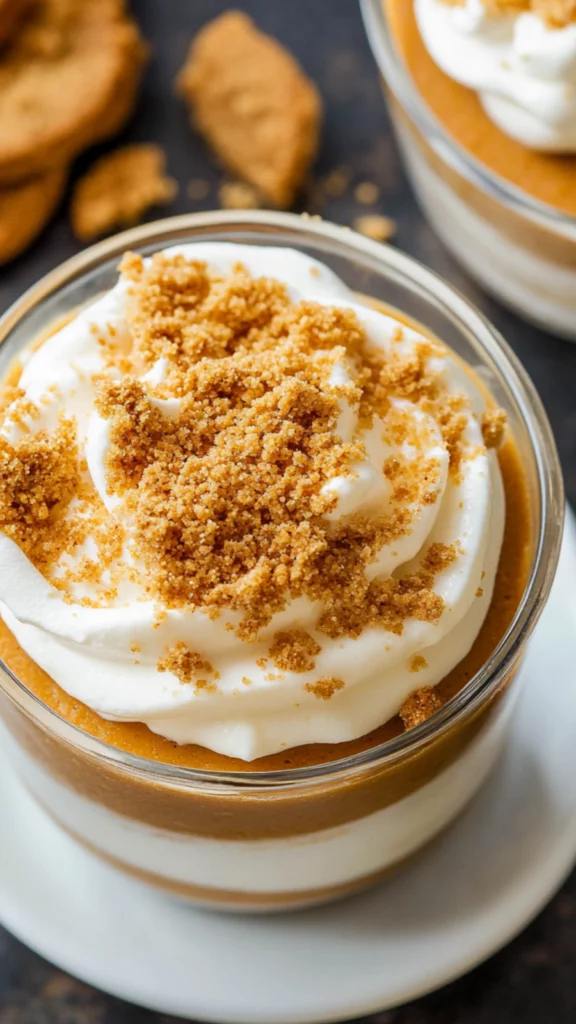
Now it’s time to assemble your Pumpkin Pie in a Cup! Grab your small cups or mason jars, and begin by adding a layer of the cookie crust to the bottom of each cup. Use the back of a spoon to gently press it down so that it’s even. Then, pipe or spoon the pumpkin cheesecake mixture on top of the crust. Repeat the process with another layer of crust and another layer of pumpkin cheesecake filling. You should end up with two layers of crust and two layers of pumpkin cheesecake in each cup.
5. Chill and Set
Once the cups are filled, place them in the refrigerator for at least 1 hour to let the filling firm up and thicken. The chilling time allows the pumpkin cheesecake to set properly and will help the layers hold their shape when you serve them. It also helps the flavors meld together and intensify, making the dessert even more delicious.
6. Serve and Garnish
When you’re ready to serve, top each cup with a dollop of whipped cream and a sprinkle of leftover cookie crumbs. If you’d like to make it even more festive, you can garnish with a dusting of cinnamon or a few chopped pecans. The final touch is a beautiful, indulgent dessert that’s sure to impress your guests.
Notes
- Use softened cream cheese: Make sure your cream cheese is softened before you beat it. This helps it mix in smoothly and prevents lumps.
- Chill the dessert: Don’t skip the chilling step. It’s essential to allow the dessert to firm up in the fridge so that it’s easier to serve and enjoy.
- Be gentle with folding: When folding in the whipped topping, do it gently to keep the mixture airy. Over-mixing can deflate the whipped cream and cause the filling to lose its fluffy texture.
- Layering made easy: If you’re looking for a cleaner and quicker way to layer the pumpkin filling, use a piping bag to pipe the mixture into the cups. This gives you more control over the layers and helps keep everything neat.
Not only does this recipe capture all the flavors of pumpkin pie, but it also simplifies the process. With a quick prep time, minimal ingredients, and no oven required, it’s an excellent choice for beginners who want to impress their friends and family with a homemade dessert. Whether you’re hosting a fall gathering, preparing for a holiday dinner, or just looking for a quick and tasty treat, these pumpkin pie cups are sure to be a hit. The best part? You don’t need any fancy equipment or advanced baking skills to whip them up.
Why This Recipe is Perfect for Beginners
For beginner cooks, the idea of making a pumpkin pie can feel intimidating. From making the crust to ensuring the filling is cooked perfectly, it’s easy to get overwhelmed. But with this Pumpkin Pie in a Cup recipe, all of that stress is eliminated. You don’t need to worry about baking a pie crust or making sure the filling sets just right. These individual servings come together quickly and easily with just a few simple ingredients.
In fact, the most challenging part of this recipe is crushing the cookies for the crust! Once you get that step down, the rest is smooth sailing. Plus, the no-bake nature of the recipe means you can avoid the stress of oven timing, and you won’t have to keep checking to make sure your pie hasn’t overbaked or browned too much.
Another great reason to try this recipe is that it’s customizable. You can adjust the ingredients to fit dietary preferences, swap out flavors, or even make the dessert ahead of time. This flexibility makes it an ideal choice for beginner cooks, especially when you want a fail-proof recipe that’s guaranteed to impress.
Ingredients and Preparation
Now that we know why this Pumpkin Pie in a Cup recipe is a perfect choice for beginner cooks, let’s take a closer look at the ingredients you’ll need. As mentioned, the recipe calls for just a handful of ingredients, most of which are staples that you probably already have in your kitchen.
Ingredients:
- 2 cups Biscoff cookie crumbs (from about 30 cookies)
- 6 tablespoons unsalted butter, melted
- 8 ounces cream cheese, softened
- 1/2 cup granulated white sugar
- 1 cup pumpkin puree
- 1 teaspoon pumpkin pie spice
- 6 ounces frozen whipped topping, thawed (plus more for topping)
Substitutions:
- Biscoff cookies: If you can’t find Biscoff cookies or prefer a different flavor, graham crackers, digestive biscuits, or even ginger snaps work great. The key is to choose a cookie that will provide a slightly sweet and crunchy base for the dessert.
- Cream cheese: For a lighter option, you can use reduced-fat cream cheese, or if you want a dairy-free version, try using vegan cream cheese as a substitute.
- Whipped topping: You can substitute the store-bought whipped topping with homemade whipped cream. Just be sure to whip the cream to soft peaks before folding it into the pumpkin mixture.
Step-by-Step Instructions
Once you’ve gathered all your ingredients, it’s time to get started on making your Pumpkin Pie in a Cup. This recipe is simple to follow, and there’s no need to worry about perfecting complicated techniques. Here’s how to make your own individual pumpkin pie cups from scratch.
1. Prepare the Cookie Crust
Begin by making the cookie crust. In a small mixing bowl, combine 2 cups of Biscoff cookie crumbs and 6 tablespoons of melted butter. Stir them together until the crumbs are evenly coated with the butter. The mixture should feel slightly damp, but still crumbly. If it seems too dry, you can add a little more butter to help it stick together.
Once the mixture is ready, set it aside while you prepare the rest of the filling. You can also press the crust into the bottoms of the cups at this point, making sure to gently compact it for an even layer.
2. Make the Pumpkin Cheesecake Filling
In a large mixing bowl, beat 8 ounces of softened cream cheese and 1/2 cup of granulated sugar together using an electric mixer. Mix them until the cream cheese becomes smooth and creamy. This should take about 2 minutes. It’s important to soften the cream cheese beforehand so that it blends seamlessly into the other ingredients without any lumps.
Next, add 1 cup of pumpkin puree and 1 teaspoon of pumpkin pie spice. Mix everything together until the pumpkin is fully incorporated into the cream cheese mixture. The pumpkin will add a rich, smooth texture and a vibrant color to the filling.
3. Add the Whipped Topping
Once the pumpkin mixture is ready, fold in the 6 ounces of thawed whipped topping. Gently fold the whipped topping into the pumpkin mixture using a spatula. Be careful not to over-mix, as you want to maintain the light, airy texture of the whipped topping. This step gives the dessert its creamy, fluffy texture.
4. Assemble the Cups
Now it’s time to assemble your Pumpkin Pie in a Cup! Grab your small cups or mason jars, and begin by adding a layer of the cookie crust to the bottom of each cup. Use the back of a spoon to gently press it down so that it’s even. Then, pipe or spoon the pumpkin cheesecake mixture on top of the crust. Repeat the process with another layer of crust and another layer of pumpkin cheesecake filling. You should end up with two layers of crust and two layers of pumpkin cheesecake in each cup.
5. Chill and Set
Once the cups are filled, place them in the refrigerator for at least 1 hour to let the filling firm up and thicken. The chilling time allows the pumpkin cheesecake to set properly and will help the layers hold their shape when you serve them. It also helps the flavors meld together and intensify, making the dessert even more delicious.
6. Serve and Garnish
When you’re ready to serve, top each cup with a dollop of whipped cream and a sprinkle of leftover cookie crumbs. If you’d like to make it even more festive, you can garnish with a dusting of cinnamon or a few chopped pecans. The final touch is a beautiful, indulgent dessert that’s sure to impress your guests.
Beginner Tips and Notes
- Use softened cream cheese: Make sure your cream cheese is softened before you beat it. This helps it mix in smoothly and prevents lumps.
- Chill the dessert: Don’t skip the chilling step. It’s essential to allow the dessert to firm up in the fridge so that it’s easier to serve and enjoy.
- Be gentle with folding: When folding in the whipped topping, do it gently to keep the mixture airy. Over-mixing can deflate the whipped cream and cause the filling to lose its fluffy texture.
- Layering made easy: If you’re looking for a cleaner and quicker way to layer the pumpkin filling, use a piping bag to pipe the mixture into the cups. This gives you more control over the layers and helps keep everything neat.
Serving Suggestions
These Pumpkin Pie in a Cup desserts are perfect on their own, but they can also be paired with complementary sides and toppings. Here are a few ideas to elevate your dessert even further:
- Caramel Sauce: A drizzle of caramel sauce will add an extra layer of sweetness and depth to the dessert. The rich, buttery flavor pairs beautifully with the pumpkin and spice.
- Cinnamon Sticks: Garnish with cinnamon sticks for a rustic, fall-inspired presentation.
- Spiced Nuts: Chopped pecans, walnuts, or candied ginger add a crunchy texture and a hint of spice that balances the creaminess of the pumpkin filling.
- Apple Slices: A few thin slices of crisp apple on the side can provide a refreshing contrast to the richness of the pumpkin pie cups.
Leftover Storage Tips
While these individual servings are great for parties or small gatherings, you might end up with some leftovers. Fortunately, they store well in the refrigerator for a couple of days. To store:
- Cover the cups tightly with plastic wrap or a lid.
- Refrigerate for up to 2-3 days.
- You can top them with whipped cream just before serving for a fresh and fluffy touch.
If you want to freeze the pumpkin pie cups, you can store them in an airtight container in the freezer for up to a month. When you’re ready to enjoy them, simply thaw the cups in the refrigerator overnight before serving.
Conclusion
Whether you’re hosting a fall dinner, preparing for Thanksgiving, or simply craving a pumpkin treat, these Pumpkin Pie in a Cup desserts are the perfect solution. They combine all the flavors of pumpkin pie in a quick, no-bake, and beginner-friendly form. With minimal ingredients, simple steps, and easy prep, you’ll be able to create a delicious dessert that’s sure to please any crowd.
This recipe is a great way to introduce beginners to the joys of baking (without turning on the oven) while still providing the warmth and comfort of classic pumpkin pie. You can customize the flavors, adjust the ingredients, and make it your own. So go ahead, grab your cups, and indulge in the fall magic that’s Pumpkin Pie in a Cup!


