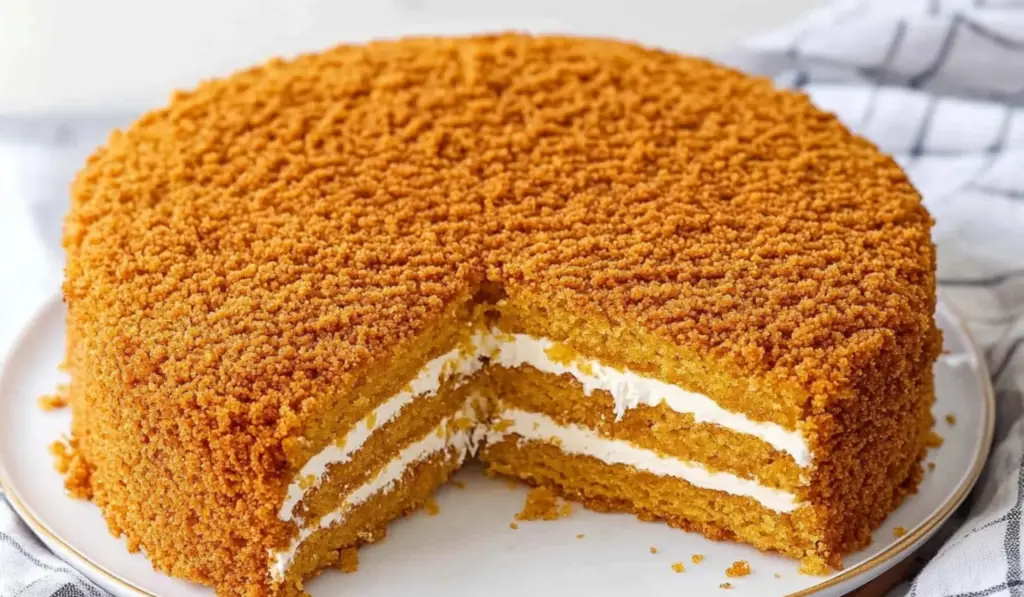
Russian Honey Cake, or Medovik, is a traditional dessert that has become a beloved treat in many Eastern European households. Its delicate layers, infused with the rich flavor of raw honey, are paired with a tangy, creamy frosting that perfectly complements the sweetness of the cake. This dessert is not only delicious but also an impressive addition to any special occasion, offering both a visual and culinary treat. Whether you’re preparing this for a family gathering or a larger celebration, this cake will surely be the star of the show. The process of creating Medovik involves patience and precision, but the results are worth every minute spent in the kitchen.
PrintRussian Medovik Honey Cake: A Creamy, Layered Delight
Russian Honey Cake, or Medovik, is a traditional dessert that has become a beloved treat in many Eastern European households. Its delicate layers, infused with the rich flavor of raw honey, are paired with a tangy, creamy frosting that perfectly complements the sweetness of the cake. This dessert is not only delicious but also an impressive addition to any special occasion, offering both a visual and culinary treat. Whether you’re preparing this for a family gathering or a larger celebration, this cake will surely be the star of the show. The process of creating Medovik involves patience and precision, but the results are worth every minute spent in the kitchen.
- Prep Time: 45 minutes
- Cook Time: 30 minutes
- Total Time: 1 hour 15 minutes
- Yield: 16 slices 1x
- Category: Dessert
- Method: Baking
- Cuisine: Russian
- Diet: Vegetarian
Ingredients
Sponge Cake:
- 3 large eggs
- 1 cup of clover honey (raw honey works best)
- 2 cups of all-purpose flour
- 2 teaspoons of baking soda
- 1 tablespoon of white distilled vinegar
Sour Cream Frosting:
- 8 oz of Cool Whip (thawed)
- 1 cup of sour cream (preferably a full-fat, thick sour cream like Daisy brand)
For the cake assembly:
- Parchment paper to line the baking sheet
- A rolling pin for crushing cake scraps (optional)
- A large cake plate to assemble the finished cake
Instructions
- Preheat and Prepare Your Baking Sheet: Start by preheating your oven to 350°F (175°C). Prepare your 18×13-inch sheet pan by cutting 4 pieces of parchment paper. These pieces will line the inverted pan, with the paper overhanging the edges, which will make it easier to remove the cake layers once they are baked.
- Make the Sponge Cake Batter: In a large mixing bowl, beat the eggs and honey together for about 2 minutes until the mixture is smooth and slightly fluffy. Add the baking soda to the mixture, dissolving it in 1 tablespoon of white distilled vinegar before adding it to the eggs and honey. Mix well. Then, gradually add the all-purpose flour, mixing until just incorporated into the wet ingredients. This batter should be relatively thin but smooth.
- Spread and Bake the Layers: Once your batter is ready, take a small portion—about 1/2 cup—and spread it as thin as possible over the parchment-lined baking sheet. Use a spatula to spread the mixture into the corners of the baking sheet, ensuring an even layer. Bake each layer of cake for about 7 minutes. Repeat this process for all four layers. The cake will bake quickly, so keep a close eye on it to prevent over-baking. The goal is to achieve a golden brown color without the cake becoming too dry.
- Cool and Cut the Layers: Once the layers are baked, allow them to cool completely on the baking sheet. Once cooled, gently peel off the parchment paper. Using a 7-8 inch round plate, cut out two circles from each cake layer to form the final 8 round layers. Don’t discard the cake scraps—they’ll be used for the topping!
- Prepare the Cake Crumbs: For the cake topping, place the leftover cake scraps on a baking sheet and bake them at 275°F (135°C) for 5-8 minutes to dry them out. Once they are completely dry, transfer them to a zip-lock bag and crush them with a rolling pin until they form fine crumbs. Set the crumbs aside for later.
- Make the Frosting: In a large mixing bowl, combine the Cool Whip and sour cream. Mix them together until smooth. The frosting should be on the softer side to allow it to soak into the cake layers. If you prefer a slightly runnier consistency, add an extra tablespoon of sour cream to achieve this. Be careful not to overwhip the mixture to maintain its creamy texture.
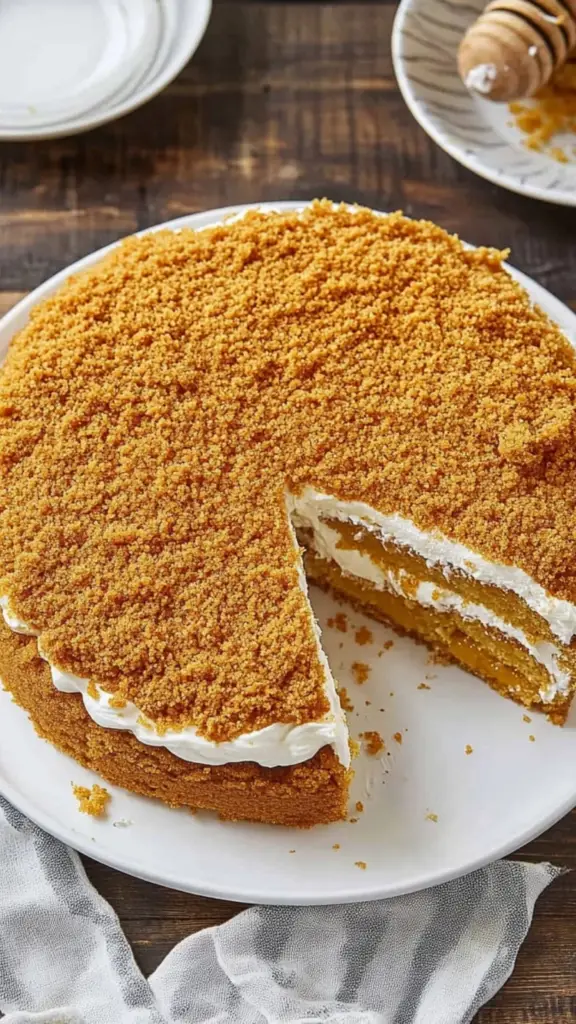
- Assemble the Cake: On a large cake plate, begin assembling your Medovik. Place the first layer of cake and spread a generous amount of the sour cream frosting over it. Continue layering the cake and frosting, making sure to cover the sides of the cake with frosting as well. After all the layers are stacked, use the reserved cake crumbs to cover the top and sides of the cake for decoration. The crumbs will add texture and a beautiful, rustic finish to the dessert.
- Refrigerate and Serve: Allow the assembled cake to rest in the refrigerator for at least 1 hour before serving. If you have the time, letting the cake sit overnight is ideal, as it allows the layers to soak in the frosting and develop a deeper flavor. Serve chilled, and enjoy the indulgent layers of honey cake and creamy frosting.
Notes
- Raw Honey: The key to the distinct flavor of Medovik is the use of raw honey. While store-bought honey can be used in a pinch, raw honey offers a unique richness and depth of flavor that really shines through in this dessert. It also contributes to the moistness of the cake layers.
- Cake Scraps: The cake scraps may seem like a small detail, but they’re essential to the final presentation of the cake. Their crispiness adds a delightful crunch to the creamy layers, and they serve as a simple yet elegant decoration.
- Sour Cream Frosting: If you prefer a slightly less tangy frosting, feel free to adjust the ratio of Cool Whip to sour cream. Some people prefer a more whipped cream-based frosting for a lighter texture, while others enjoy the richer, tangier flavor of sour cream.
- Party Size: If you’re making this cake for a large gathering, you can easily double the recipe. Instead of cutting out individual cake layers, simply layer the entire batch on top of one another in the same 18×13-inch baking sheet to create a sheet pan-style honey cake. This makes serving easier for a crowd.
- Layering Technique: When assembling the cake, don’t rush the process of layering the frosting. Make sure each layer is well-coated with frosting to ensure the layers are properly soaked and flavored. This gives the cake its signature texture and helps bind the layers together.
- Freezing: This cake freezes well, so if you need to prepare it ahead of time, you can freeze the assembled cake (without the crumbs) for up to a month. Thaw it in the fridge overnight before serving.
Medovik cake is often revered for its unique texture, created by the thin layers of honey-flavored sponge cake that are gently soaked in a sour cream filling. The combination of flavors—sweet, sour, and slightly tangy—is a signature feature of this dessert. The cake itself, once completed, is adorned with crumbled cake scraps that add a delightful crunch and a rustic finish to the presentation. Though the process of making this cake is relatively simple, the result is a dessert that exudes elegance and sophistication.
This version of Russian Honey Cake, which I am sharing, is straightforward and can be prepared without much hassle. The cake layers bake quickly, and the sour cream frosting is both easy to make and incredibly indulgent. Whether you want to impress guests at a party or simply treat your family to a traditional dessert, this recipe will not disappoint.
Ingredients Breakdown
To make this Russian Honey Cake, we need two key components: the sponge cake layers and the sour cream frosting. Each layer is meticulously prepared, giving the cake its signature texture and taste. Here’s a breakdown of the ingredients:
Sponge Cake:
- 3 large eggs
- 1 cup of clover honey (raw honey works best)
- 2 cups of all-purpose flour
- 2 teaspoons of baking soda
- 1 tablespoon of white distilled vinegar
Sour Cream Frosting:
- 8 oz of Cool Whip (thawed)
- 1 cup of sour cream (preferably a full-fat, thick sour cream like Daisy brand)
For the cake assembly:
- Parchment paper to line the baking sheet
- A rolling pin for crushing cake scraps (optional)
- A large cake plate to assemble the finished cake
Instructions
- Preheat and Prepare Your Baking Sheet: Start by preheating your oven to 350°F (175°C). Prepare your 18×13-inch sheet pan by cutting 4 pieces of parchment paper. These pieces will line the inverted pan, with the paper overhanging the edges, which will make it easier to remove the cake layers once they are baked.
- Make the Sponge Cake Batter: In a large mixing bowl, beat the eggs and honey together for about 2 minutes until the mixture is smooth and slightly fluffy. Add the baking soda to the mixture, dissolving it in 1 tablespoon of white distilled vinegar before adding it to the eggs and honey. Mix well. Then, gradually add the all-purpose flour, mixing until just incorporated into the wet ingredients. This batter should be relatively thin but smooth.
- Spread and Bake the Layers: Once your batter is ready, take a small portion—about 1/2 cup—and spread it as thin as possible over the parchment-lined baking sheet. Use a spatula to spread the mixture into the corners of the baking sheet, ensuring an even layer. Bake each layer of cake for about 7 minutes. Repeat this process for all four layers. The cake will bake quickly, so keep a close eye on it to prevent over-baking. The goal is to achieve a golden brown color without the cake becoming too dry.
- Cool and Cut the Layers: Once the layers are baked, allow them to cool completely on the baking sheet. Once cooled, gently peel off the parchment paper. Using a 7-8 inch round plate, cut out two circles from each cake layer to form the final 8 round layers. Don’t discard the cake scraps—they’ll be used for the topping!
- Prepare the Cake Crumbs: For the cake topping, place the leftover cake scraps on a baking sheet and bake them at 275°F (135°C) for 5-8 minutes to dry them out. Once they are completely dry, transfer them to a zip-lock bag and crush them with a rolling pin until they form fine crumbs. Set the crumbs aside for later.
- Make the Frosting: In a large mixing bowl, combine the Cool Whip and sour cream. Mix them together until smooth. The frosting should be on the softer side to allow it to soak into the cake layers. If you prefer a slightly runnier consistency, add an extra tablespoon of sour cream to achieve this. Be careful not to overwhip the mixture to maintain its creamy texture.
- Assemble the Cake: On a large cake plate, begin assembling your Medovik. Place the first layer of cake and spread a generous amount of the sour cream frosting over it. Continue layering the cake and frosting, making sure to cover the sides of the cake with frosting as well. After all the layers are stacked, use the reserved cake crumbs to cover the top and sides of the cake for decoration. The crumbs will add texture and a beautiful, rustic finish to the dessert.
- Refrigerate and Serve: Allow the assembled cake to rest in the refrigerator for at least 1 hour before serving. If you have the time, letting the cake sit overnight is ideal, as it allows the layers to soak in the frosting and develop a deeper flavor. Serve chilled, and enjoy the indulgent layers of honey cake and creamy frosting.
Tips for Success
- Raw Honey: The key to the distinct flavor of Medovik is the use of raw honey. While store-bought honey can be used in a pinch, raw honey offers a unique richness and depth of flavor that really shines through in this dessert. It also contributes to the moistness of the cake layers.
- Cake Scraps: The cake scraps may seem like a small detail, but they’re essential to the final presentation of the cake. Their crispiness adds a delightful crunch to the creamy layers, and they serve as a simple yet elegant decoration.
- Sour Cream Frosting: If you prefer a slightly less tangy frosting, feel free to adjust the ratio of Cool Whip to sour cream. Some people prefer a more whipped cream-based frosting for a lighter texture, while others enjoy the richer, tangier flavor of sour cream.
- Party Size: If you’re making this cake for a large gathering, you can easily double the recipe. Instead of cutting out individual cake layers, simply layer the entire batch on top of one another in the same 18×13-inch baking sheet to create a sheet pan-style honey cake. This makes serving easier for a crowd.
- Layering Technique: When assembling the cake, don’t rush the process of layering the frosting. Make sure each layer is well-coated with frosting to ensure the layers are properly soaked and flavored. This gives the cake its signature texture and helps bind the layers together.
- Freezing: This cake freezes well, so if you need to prepare it ahead of time, you can freeze the assembled cake (without the crumbs) for up to a month. Thaw it in the fridge overnight before serving.
Flavor and Texture Profile
The flavor of Russian Honey Cake is a beautiful balance of sweet and tangy. The honey-infused cake layers are subtly sweet with a slightly floral flavor that comes through beautifully in each bite. The sour cream frosting offers a refreshing tang that cuts through the sweetness of the cake, creating a harmonious contrast. The texture is heavenly, with each layer of cake being soft and moist from the frosting. The crunchy cake crumbs on top provide an unexpected contrast, adding a satisfying bite to every forkful.
When you take a bite of Medovik, you’ll experience the perfect balance of sweetness and tang, with the richness of the honey and the light, creamy texture of the frosting enveloping your palate. The crunch of the cake crumbs on top is a pleasant surprise that adds depth to the overall experience.
Conclusion
Russian Honey Cake, or Medovik, is a dessert that’s as satisfying to make as it is to eat. With its layers of honey-infused cake and creamy sour cream frosting, it offers a delightful combination of textures and flavors that will transport you straight to Eastern Europe with every bite. Whether you’re serving it for a family celebration or a more formal gathering, this cake is sure to be a showstopper. Follow the steps carefully, and you’ll be rewarded with a dessert that not only tastes incredible but also looks impressive. Enjoy the process of creating this delicious treat, and savor every bite of this traditional and timeless cake.


