Twix bars have always been a favorite treat, with their perfect combination of crunchy cookie, creamy caramel, and smooth chocolate. But why settle for store-bought when you can easily recreate this iconic candy bar at home with a twist? Enter the Twix Cookie, a fun and delicious homemade dessert that combines the best parts of Twix into a bite-sized, soft, and chewy treat. These cookie cups are made with a sugar cookie base, a layer of gooey caramel, and topped with a smooth chocolate coating. With a burst of flavor in every bite, these cookie cups are sure to become a new favorite.
PrintTwix Cookies: A Homemade Twist on a Classic Candy Bar

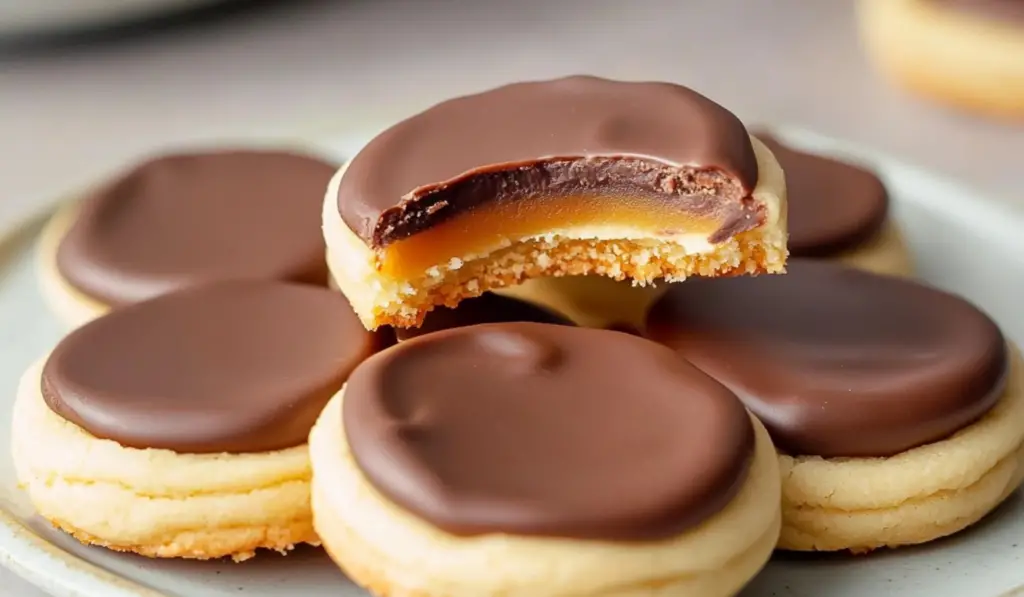
Twix bars have always been a favorite treat, with their perfect combination of crunchy cookie, creamy caramel, and smooth chocolate. But why settle for store-bought when you can easily recreate this iconic candy bar at home with a twist? Enter the Twix Cookies, a fun and delicious homemade dessert that combines the best parts of Twix into a bite-sized, soft, and chewy treat. These cookie cups are made with a sugar cookie base, a layer of gooey caramel, and topped with a smooth chocolate coating. With a burst of flavor in every bite, these cookie cups are sure to become a new favorite.
- Prep Time: 10 minutes
- Cook Time: 10 minutes
- Total Time: 40 minutes (including additional cooling time)
- Yield: 24 cookie cups 1x
- Category: Dessert, Cookies
- Method: Baking, No-Chill
- Cuisine: American
- Diet: Vegetarian
Ingredients
For the Sugar Cookie Crust:
- 1/2 cup butter: The butter helps create a soft and tender cookie base. It also adds a rich, creamy flavor to the crust.
- 1/2 cup granulated sugar: The sugar adds sweetness to the cookie and contributes to its texture.
- 1 tsp vanilla extract: Vanilla enhances the flavor of the cookie and complements the sweetness of the caramel and chocolate.
- 1 egg white: The egg white helps bind the dough and gives the cookies a light, airy texture.
- 1 1/2 cups all-purpose flour: Flour is the main structure of the cookie dough, helping it hold its shape during baking.
- 1 tsp baking powder: This ingredient ensures the cookies rise slightly, making them light and fluffy.
For the Caramel Layer:
- 20 caramels, unwrapped: These soft caramels create the smooth, gooey layer of caramel that makes these cookie cups irresistible.
- 1 tbsp milk: The milk helps to melt the caramels into a smooth and creamy consistency.
For the Chocolate Topping:
- 2 cups milk chocolate chips: These chocolate chips are perfect for melting and spreading on top of the caramel. Their creamy, sweet flavor is the finishing touch that makes these Twix Cookie Cups so decadent.
Instructions
Step 1: Prepare the Cookie Dough
- Preheat the oven to 350°F (175°C).
- Cream together the butter and sugar in a medium-sized bowl or using a stand mixer. Beat until the mixture is light and fluffy, which should take about 1-2 minutes.
- Add the egg white and vanilla extract to the butter and sugar mixture. Continue mixing until everything is well combined.
- Incorporate the dry ingredients: Add the flour and baking powder to the wet mixture. Mix thoroughly until the dough comes together. You should have a smooth dough that’s not too sticky but still soft.
Step 2: Shape and Bake the Cookie Cups
- Roll the dough out on a clean surface to about 1/4 to 1/2 inch thickness. You don’t need it to be too thick; a slightly thinner dough works best for these cookie cups.
- Use a round cookie cutter to cut out circles. These circles will form the base of each Twix cookie cup. If you don’t have a cookie cutter, you can use a glass or any round object that’s about 2-3 inches in diameter.
- Transfer the cookie dough circles onto an ungreased cookie sheet. Arrange them so they’re not touching each other, giving them space to spread slightly as they bake.
- Bake the cookies for 6-8 minutes at 350°F, or until the cookies are puffy and no longer glossy. Keep a close eye on them—don’t overbake! The cookies should be soft in the center and lightly golden on the edges.
- Cool the cookies on a wire rack. Let them cool completely before adding the caramel layer.
Step 3: Make the Caramel Layer
- Melt the caramels: In a microwave-safe bowl, combine the unwrapped caramels and 1 tablespoon of milk. Microwave the mixture for 30-second intervals, stirring in between, until the caramels are fully melted and smooth. This should take about 1 minute total.
- Spoon the caramel onto the cooled cookies: Using a spoon, carefully place a small amount of caramel on each cookie. Spread it out gently until it almost covers the entire surface of the cookie. The caramel should be thick and gooey but not runny.
- Chill the cookies: Place the cookies with the caramel in the refrigerator for 10-15 minutes to cool and set the caramel.
Step 4: Add the Chocolate Topping
- Melt the chocolate chips: In a microwave-safe bowl, microwave the milk chocolate chips in 30-second intervals, stirring after each interval until the chocolate is smooth and fully melted.
- Spread the melted chocolate over the caramel layer. Use a spoon or small spatula to gently spread the chocolate over the caramel, covering it evenly. The chocolate layer will set as it cools.
- Let the chocolate cool: Allow the chocolate to set completely. You can speed up this process by putting the cookie cups back in the fridge for a few minutes.
Step 5: Serve and Enjoy
Once the chocolate has hardened, your Twix Cookie Cups are ready to enjoy! Serve them at room temperature or chilled for a refreshing treat. The combination of the soft sugar cookie, rich caramel, and smooth chocolate creates a melt-in-your-mouth experience that’s sure to satisfy any sweet tooth.
Notes
- Texture tip: If you want your cookies to be extra soft and chewy, avoid overbaking them. The cookies should be slightly puffy and golden but still soft when they come out of the oven.
- Caramel tip: If you want the caramel to be even smoother, you can add a touch more milk while melting the caramels. Just be careful not to make the mixture too runny.
- Chocolate variations: While milk chocolate is the classic choice for Twix flavor, you can experiment with dark chocolate, semi-sweet chocolate, or even white chocolate for a unique twist.
- Gluten-free option: For a gluten-free version of these cookie cups, use a gluten-free flour blend in place of all-purpose flour and check that your caramels are gluten-free.
- Add more toppings: If you want to make these cookie cups even more indulgent, you can sprinkle chopped pecans, sprinkles, or even more caramel on top of the chocolate layer for extra texture and flavor.
Introduction: Why You’ll Love These Twix Cookie Cups
These Twix Cookie Cups are perfect for anyone who loves the flavors of the iconic candy bar but prefers homemade creations. They offer the same beloved combination of caramel, chocolate, and cookie, but with an added twist of creativity. The soft sugar cookie crust serves as the perfect base to hold the rich, buttery caramel, while the final layer of milk chocolate brings everything together in one delicious bite.
What makes this recipe even better is how easy and fun it is to make! With a few simple ingredients and minimal prep time, you can whip up a batch of these homemade Twix cookie cups in no time. They’re perfect for parties, gatherings, or just satisfying that sweet tooth at home. Plus, they are completely customizable—whether you want to adjust the thickness of the caramel or play around with the type of chocolate, this recipe is versatile and forgiving.
If you’re a fan of Twix bars, these cookie cups will quickly become your go-to treat. Let’s dive in and learn how to make them step by step!
Ingredients Breakdown: Simple Ingredients, Big Flavor
The ingredients for these Twix Cookie Cups are simple and easy to find at your local grocery store. Here’s what you’ll need:
For the Sugar Cookie Crust:
- 1/2 cup butter: The butter helps create a soft and tender cookie base. It also adds a rich, creamy flavor to the crust.
- 1/2 cup granulated sugar: The sugar adds sweetness to the cookie and contributes to its texture.
- 1 tsp vanilla extract: Vanilla enhances the flavor of the cookie and complements the sweetness of the caramel and chocolate.
- 1 egg white: The egg white helps bind the dough and gives the cookies a light, airy texture.
- 1 1/2 cups all-purpose flour: Flour is the main structure of the cookie dough, helping it hold its shape during baking.
- 1 tsp baking powder: This ingredient ensures the cookies rise slightly, making them light and fluffy.
For the Caramel Layer:
- 20 caramels, unwrapped: These soft caramels create the smooth, gooey layer of caramel that makes these cookie cups irresistible.
- 1 tbsp milk: The milk helps to melt the caramels into a smooth and creamy consistency.
For the Chocolate Topping:
- 2 cups milk chocolate chips: These chocolate chips are perfect for melting and spreading on top of the caramel. Their creamy, sweet flavor is the finishing touch that makes these Twix Cookie Cups so decadent.
Step-by-Step Instructions: How to Make Twix Cookie Cups
Now that we have all the ingredients, let’s walk through the process of making these mouth-watering Twix Cookie Cups.
Step 1: Prepare the Cookie Dough
- Preheat the oven to 350°F (175°C).
- Cream together the butter and sugar in a medium-sized bowl or using a stand mixer. Beat until the mixture is light and fluffy, which should take about 1-2 minutes.
- Add the egg white and vanilla extract to the butter and sugar mixture. Continue mixing until everything is well combined.
- Incorporate the dry ingredients: Add the flour and baking powder to the wet mixture. Mix thoroughly until the dough comes together. You should have a smooth dough that’s not too sticky but still soft.
Step 2: Shape and Bake the Cookie Cups
- Roll the dough out on a clean surface to about 1/4 to 1/2 inch thickness. You don’t need it to be too thick; a slightly thinner dough works best for these cookie cups.
- Use a round cookie cutter to cut out circles. These circles will form the base of each Twix cookie cup. If you don’t have a cookie cutter, you can use a glass or any round object that’s about 2-3 inches in diameter.
- Transfer the cookie dough circles onto an ungreased cookie sheet. Arrange them so they’re not touching each other, giving them space to spread slightly as they bake.
- Bake the cookies for 6-8 minutes at 350°F, or until the cookies are puffy and no longer glossy. Keep a close eye on them—don’t overbake! The cookies should be soft in the center and lightly golden on the edges.
- Cool the cookies on a wire rack. Let them cool completely before adding the caramel layer.
Step 3: Make the Caramel Layer
- Melt the caramels: In a microwave-safe bowl, combine the unwrapped caramels and 1 tablespoon of milk. Microwave the mixture for 30-second intervals, stirring in between, until the caramels are fully melted and smooth. This should take about 1 minute total.
- Spoon the caramel onto the cooled cookies: Using a spoon, carefully place a small amount of caramel on each cookie. Spread it out gently until it almost covers the entire surface of the cookie. The caramel should be thick and gooey but not runny.
- Chill the cookies: Place the cookies with the caramel in the refrigerator for 10-15 minutes to cool and set the caramel.
Step 4: Add the Chocolate Topping
- Melt the chocolate chips: In a microwave-safe bowl, microwave the milk chocolate chips in 30-second intervals, stirring after each interval until the chocolate is smooth and fully melted.
- Spread the melted chocolate over the caramel layer. Use a spoon or small spatula to gently spread the chocolate over the caramel, covering it evenly. The chocolate layer will set as it cools.
- Let the chocolate cool: Allow the chocolate to set completely. You can speed up this process by putting the cookie cups back in the fridge for a few minutes.
Step 5: Serve and Enjoy
Once the chocolate has hardened, your Twix Cookie Cups are ready to enjoy! Serve them at room temperature or chilled for a refreshing treat. The combination of the soft sugar cookie, rich caramel, and smooth chocolate creates a melt-in-your-mouth experience that’s sure to satisfy any sweet tooth.
Tips for Success and Variations
- Texture tip: If you want your cookies to be extra soft and chewy, avoid overbaking them. The cookies should be slightly puffy and golden but still soft when they come out of the oven.
- Caramel tip: If you want the caramel to be even smoother, you can add a touch more milk while melting the caramels. Just be careful not to make the mixture too runny.
- Chocolate variations: While milk chocolate is the classic choice for Twix flavor, you can experiment with dark chocolate, semi-sweet chocolate, or even white chocolate for a unique twist.
- Gluten-free option: For a gluten-free version of these cookie cups, use a gluten-free flour blend in place of all-purpose flour and check that your caramels are gluten-free.
- Add more toppings: If you want to make these cookie cups even more indulgent, you can sprinkle chopped pecans, sprinkles, or even more caramel on top of the chocolate layer for extra texture and flavor.
Serving Suggestions
These Twix Cookie Cups are perfect for any occasion. Serve them at:
- Birthday parties: Their bite-sized nature makes them perfect for party platters or gift bags.
- Potlucks: Bring a batch of these homemade treats to your next potluck, and watch them disappear quickly!
- Movie nights: Snack on these as a sweet treat during movie marathons or family movie nights.
- Holiday gatherings: With their festive look, these cookie cups are great for holiday parties, including Christmas and Easter.

Conclusion
Twix Cookie Cups bring all the deliciousness of a classic Twix bar into a fun and easy-to-make cookie. Whether you’re baking them for a special occasion or just to enjoy a sweet treat at home, these cookie cups are sure to delight everyone who tries them. The combination of soft sugar cookie, gooey caramel, and smooth milk chocolate will have you coming back for more, making this homemade version of a Twix bar a new favorite in your dessert repertoire.
So, skip the store-bought candy bar and whip up these homemade Twix Cookie Cups today. Happy baking!


