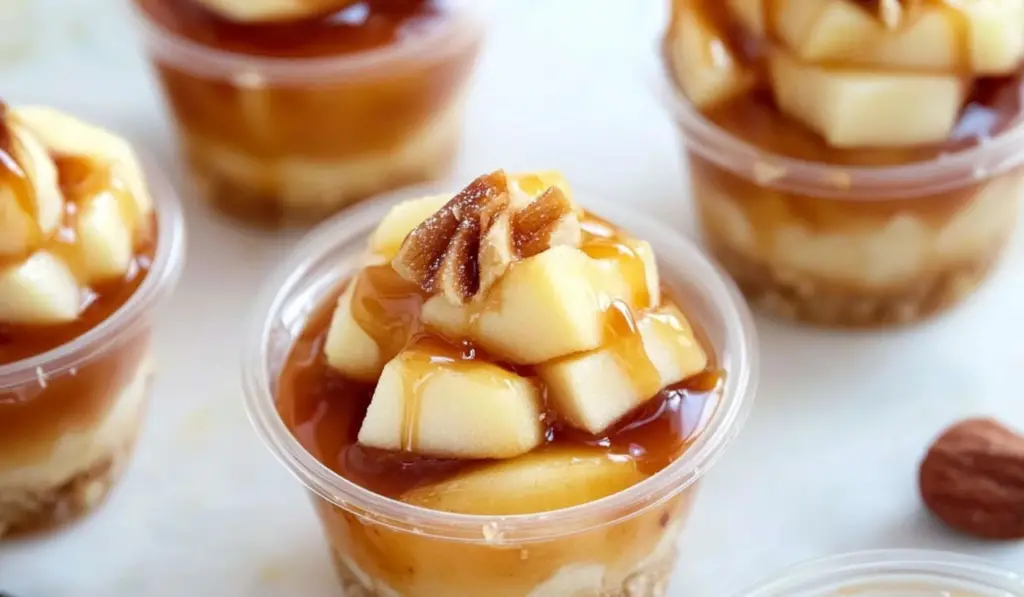
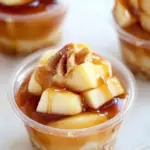
As the air turns crisp and the leaves shift into vibrant hues, autumn brings with it an abundance of flavors that evoke warmth and comfort. Among these, the marriage of caramel and apples stands out as an iconic duo, reminiscent of fairs, harvest festivals, and cozy evenings. For those who love the rich, gooey sweetness of caramel paired with the tartness of apples, Caramel Apple Dessert Cups are the perfect way to indulge.
PrintCaramel Apple Dessert Cups: A Perfectly Sweet and Portable Treat
As the air turns crisp and the leaves shift into vibrant hues, autumn brings with it an abundance of flavors that evoke warmth and comfort. Among these, the marriage of caramel and apples stands out as an iconic duo, reminiscent of fairs, harvest festivals, and cozy evenings. For those who love the rich, gooey sweetness of caramel paired with the tartness of apples, Caramel Apple Dessert Cups are the perfect way to indulge.
- Prep Time: 45 minutes
- Cook Time: 10 minutes
- Total Time: 55 minutes
- Yield: 28 (2-ounce cups) 1x
- Category: Dessert
- Method: No-Bake
- Cuisine: American
- Diet: Vegetarian
Ingredients
Cinnamon Apples
- 4 cups apples (peeled and chopped): Choose apples like Granny Smith for tartness or Fuji for a sweeter flavor. These varieties hold their shape well during cooking, offering a satisfying bite.
- ½ cup light brown sugar: Adds depth and a molasses-like richness to the apples.
- 1 tsp cinnamon: Infuses warmth and spice, balancing the sweetness.
Vanilla Wafer Crust
- 2 cups vanilla wafer crumbs: The base layer, providing a buttery and slightly sweet foundation.
- ¼ cup salted or unsalted butter (melted): Acts as the binding agent for the crust.
Salted Caramel Mousse
- 1 package instant vanilla pudding mix (3.4 ounces): The foundation for the creamy mousse.
- 1 cup milk: Used to prepare the pudding.
- ⅓ cup salted caramel sauce: Brings a rich, sweet-salty flavor to the mousse.
- 1 ½ cups heavy cream: Whipped into the mixture for a light, airy texture.
For Garnish
- Additional caramel sauce for drizzling: Enhances the dessert’s visual appeal and flavor.
Instructions
1. Prepare the Cinnamon Apples
- Peel and Chop: Begin by peeling and chopping the apples into small, bite-sized pieces. Uniform sizes ensure even cooking.
- Cook the Apples: In a medium saucepan, combine the apples, light brown sugar, and cinnamon. Stir over medium heat until the apples soften and release their juices.
- Thicken the Mixture: Continue cooking until the liquid thickens to a syrupy consistency, coating the apples. This process typically takes 8–10 minutes.
- Cool Completely: Remove the apples from the heat and allow them to cool. Set aside for assembly.
2. Make the Vanilla Wafer Crust
- Crush the Wafers: Use a food processor to grind the vanilla wafers into fine crumbs. If you don’t have a processor, place the wafers in a resealable bag and crush them with a rolling pin.
- Mix with Butter: In a mixing bowl, combine the wafer crumbs with melted butter. Stir until the mixture resembles damp sand.
- Portion and Press: Scoop the crumb mixture into the bottom of 28 plastic cups (2-ounce size). Use the back of a small cup to press the crumbs firmly into place, creating a solid crust layer.
3. Prepare the Salted Caramel Mousse
- Make the Pudding Base: In a large mixing bowl, whisk together the instant vanilla pudding mix and milk until smooth. Chill for about 5 minutes to set.
- Incorporate the Caramel Sauce: Add the salted caramel sauce to the pudding base and mix with an electric hand mixer until well combined.
- Whip the Cream: Pour the heavy cream into the mixture and whip on medium-high speed for 3–5 minutes until thick and fluffy. This step creates the mousse’s light, airy texture.
4. Assemble the Dessert Cups
- Layer the Crust: Begin with the prepared vanilla wafer crust as the base layer in each cup.
- Add the Mousse: Transfer the salted caramel mousse into a piping bag and pipe a generous layer over the crust.
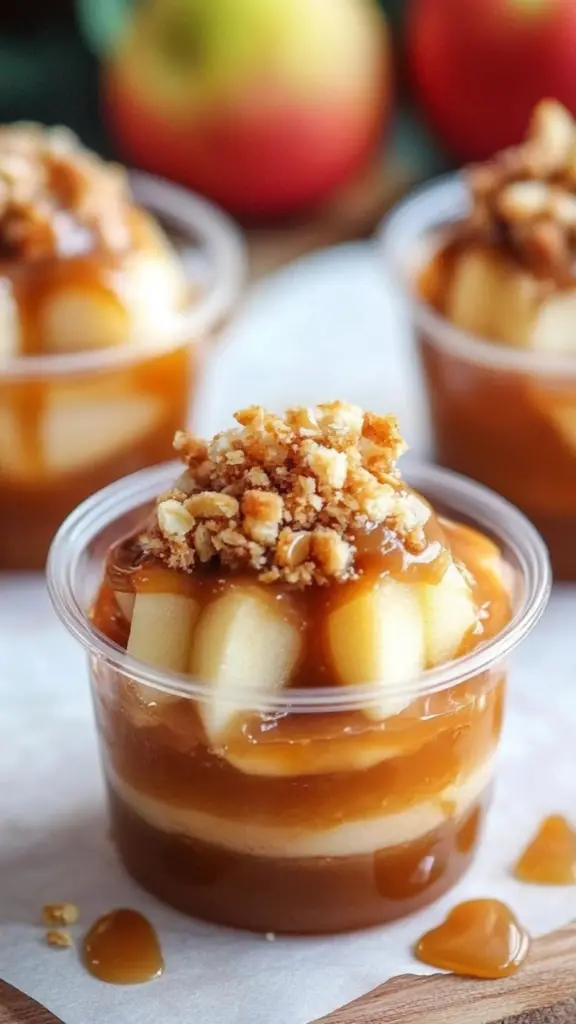
- Top with Apples: Spoon the cooled cinnamon apples onto the mousse layer.
- Finish with Caramel: Drizzle additional caramel sauce over the top for a glossy, flavorful finish.
5. Chill and Serve
- Seal and Chill: Cover each cup with a lid and refrigerate for at least 2–3 hours, allowing the layers to set and the flavors to meld.
- Serve and Enjoy: Present these dessert cups straight from the fridge for a refreshing, indulgent treat.
Notes
- Choose the Right Apples: Tart apples like Granny Smith balance the sweetness of the caramel, while sweeter varieties like Honeycrisp create a more indulgent dessert.
- Chill Thoroughly: Proper chilling ensures that the mousse sets firmly and the flavors develop fully.
- Use a Cookie Scoop: For consistent portions of crust and apples, use a small cookie scoop.
- Whip Carefully: Overwhipping the cream can result in a grainy mousse, so watch closely as you mix.
This no-bake dessert combines the ease of preparation with the sophistication of layered flavors and textures. Imagine buttery vanilla wafer crusts, fluffy salted caramel mousse, spiced cinnamon apples, and a luscious drizzle of caramel sauce—all nestled together in adorable, portable cups. They’re not just a treat for the taste buds but also a feast for the eyes.
These dessert cups are versatile enough to be served at a casual family gathering or as a stunning centerpiece for a party dessert table. Let’s take a closer look at how to create these delightful treats, from the selection of ingredients to the step-by-step assembly process.
Ingredients: The Essentials for Perfection
Great desserts begin with the right ingredients. For Caramel Apple Dessert Cups, every layer contributes to the overall flavor and texture. Here’s a breakdown of what you’ll need:
Cinnamon Apples
- 4 cups apples (peeled and chopped): Choose apples like Granny Smith for tartness or Fuji for a sweeter flavor. These varieties hold their shape well during cooking, offering a satisfying bite.
- ½ cup light brown sugar: Adds depth and a molasses-like richness to the apples.
- 1 tsp cinnamon: Infuses warmth and spice, balancing the sweetness.
Vanilla Wafer Crust
- 2 cups vanilla wafer crumbs: The base layer, providing a buttery and slightly sweet foundation.
- ¼ cup salted or unsalted butter (melted): Acts as the binding agent for the crust.
Salted Caramel Mousse
- 1 package instant vanilla pudding mix (3.4 ounces): The foundation for the creamy mousse.
- 1 cup milk: Used to prepare the pudding.
- ⅓ cup salted caramel sauce: Brings a rich, sweet-salty flavor to the mousse.
- 1 ½ cups heavy cream: Whipped into the mixture for a light, airy texture.
For Garnish
- Additional caramel sauce for drizzling: Enhances the dessert’s visual appeal and flavor.
Step-by-Step Instructions
Creating these dessert cups involves three primary components: preparing the cinnamon apples, crafting the vanilla wafer crust, and whipping up the salted caramel mousse. Here’s how to bring it all together:
1. Prepare the Cinnamon Apples
- Peel and Chop: Begin by peeling and chopping the apples into small, bite-sized pieces. Uniform sizes ensure even cooking.
- Cook the Apples: In a medium saucepan, combine the apples, light brown sugar, and cinnamon. Stir over medium heat until the apples soften and release their juices.
- Thicken the Mixture: Continue cooking until the liquid thickens to a syrupy consistency, coating the apples. This process typically takes 8–10 minutes.
- Cool Completely: Remove the apples from the heat and allow them to cool. Set aside for assembly.
2. Make the Vanilla Wafer Crust
- Crush the Wafers: Use a food processor to grind the vanilla wafers into fine crumbs. If you don’t have a processor, place the wafers in a resealable bag and crush them with a rolling pin.
- Mix with Butter: In a mixing bowl, combine the wafer crumbs with melted butter. Stir until the mixture resembles damp sand.
- Portion and Press: Scoop the crumb mixture into the bottom of 28 plastic cups (2-ounce size). Use the back of a small cup to press the crumbs firmly into place, creating a solid crust layer.
3. Prepare the Salted Caramel Mousse
- Make the Pudding Base: In a large mixing bowl, whisk together the instant vanilla pudding mix and milk until smooth. Chill for about 5 minutes to set.
- Incorporate the Caramel Sauce: Add the salted caramel sauce to the pudding base and mix with an electric hand mixer until well combined.
- Whip the Cream: Pour the heavy cream into the mixture and whip on medium-high speed for 3–5 minutes until thick and fluffy. This step creates the mousse’s light, airy texture.
4. Assemble the Dessert Cups
- Layer the Crust: Begin with the prepared vanilla wafer crust as the base layer in each cup.
- Add the Mousse: Transfer the salted caramel mousse into a piping bag and pipe a generous layer over the crust.
- Top with Apples: Spoon the cooled cinnamon apples onto the mousse layer.
- Finish with Caramel: Drizzle additional caramel sauce over the top for a glossy, flavorful finish.
5. Chill and Serve
- Seal and Chill: Cover each cup with a lid and refrigerate for at least 2–3 hours, allowing the layers to set and the flavors to meld.
- Serve and Enjoy: Present these dessert cups straight from the fridge for a refreshing, indulgent treat.
Pro Tips for Success
- Choose the Right Apples: Tart apples like Granny Smith balance the sweetness of the caramel, while sweeter varieties like Honeycrisp create a more indulgent dessert.
- Chill Thoroughly: Proper chilling ensures that the mousse sets firmly and the flavors develop fully.
- Use a Cookie Scoop: For consistent portions of crust and apples, use a small cookie scoop.
- Whip Carefully: Overwhipping the cream can result in a grainy mousse, so watch closely as you mix.
Creative Variations
- Chocolate Twist: Add a drizzle of melted chocolate over the top for a decadent touch.
- Nutty Delight: Sprinkle toasted pecans or walnuts between the mousse and apples for added crunch.
- Spiced Apples: Include a pinch of nutmeg or allspice in the cinnamon apples for extra warmth.
- Gingersnap Base: Swap the vanilla wafer crumbs for crushed gingersnap cookies to introduce a spicy, aromatic element.
Why You’ll Love This Recipe
1. Effortless Elegance: With minimal cooking and no baking required for the mousse, these dessert cups are both simple and stunning.
2. Perfectly Portable: Their individual size makes them ideal for events, picnics, or even packed lunches.
3. Fall-Inspired Flavor: Combining cinnamon, caramel, and apples, these cups capture the essence of autumn in every bite.
4. Family-Friendly: Kids and adults alike will love the layered textures and flavors, making these cups a hit for gatherings of all kinds.
Serving Suggestions
Serve Caramel Apple Dessert Cups as part of a dessert buffet or alongside a warm cup of apple cider. Their light and creamy texture also pairs wonderfully with a steaming cup of coffee or tea.
For a festive presentation, garnish with a dollop of whipped cream and a sprinkle of cinnamon. Add a cinnamon stick or caramel candy as a decorative touch for special occasions.
Final Thoughts
Caramel Apple Dessert Cups are everything you want in a fall dessert—rich, creamy, and bursting with seasonal flavors. Whether you’re treating yourself, entertaining guests, or looking for an easy make-ahead recipe, these cups are sure to delight.
So, grab your apples and caramel, and let the magic begin. With this recipe in hand, you’ll be savoring a taste of autumn in no time!


