Nothing beats waking up to the smell of fresh, homemade donuts. If you’ve ever indulged in a Krispy Kreme donut, you know how light, fluffy, and irresistible they are. But did you know that you can recreate that same melt-in-your-mouth experience right in your own kitchen? Yes, you can! With this Copycat Krispy Kreme Glazed Donuts recipe, you’ll bring the iconic taste of Krispy Kreme to your home, minus the long drive to the store. This recipe is perfect for beginners looking to try their hand at donut-making, as it focuses on simple ingredients, easy-to-follow instructions, and a bit of patience to achieve the perfect result.
How to Make Copycat Krispy Kreme Glazed Donuts: A Step-by-Step Guide for Beginners

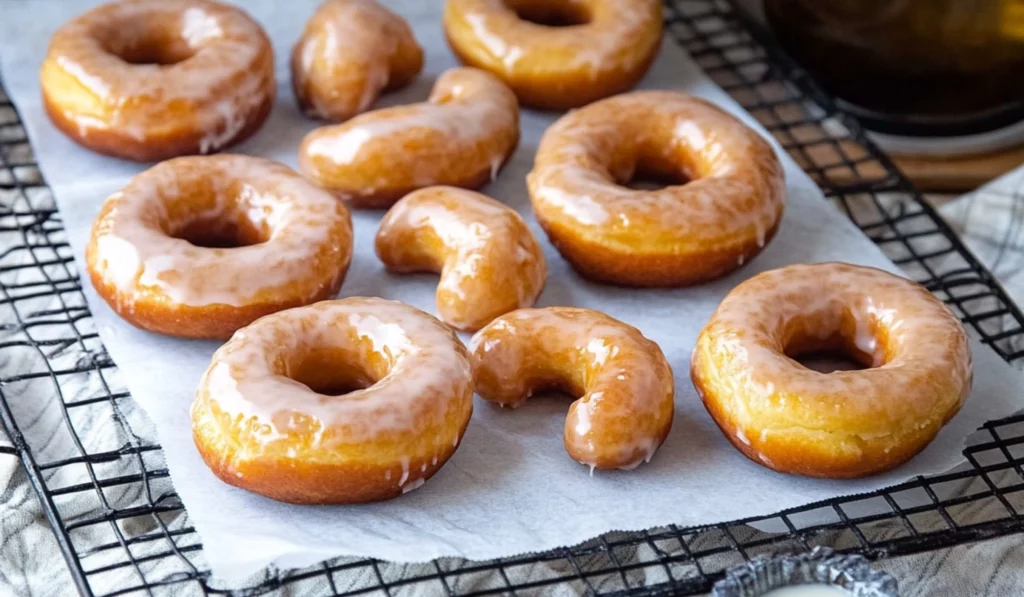
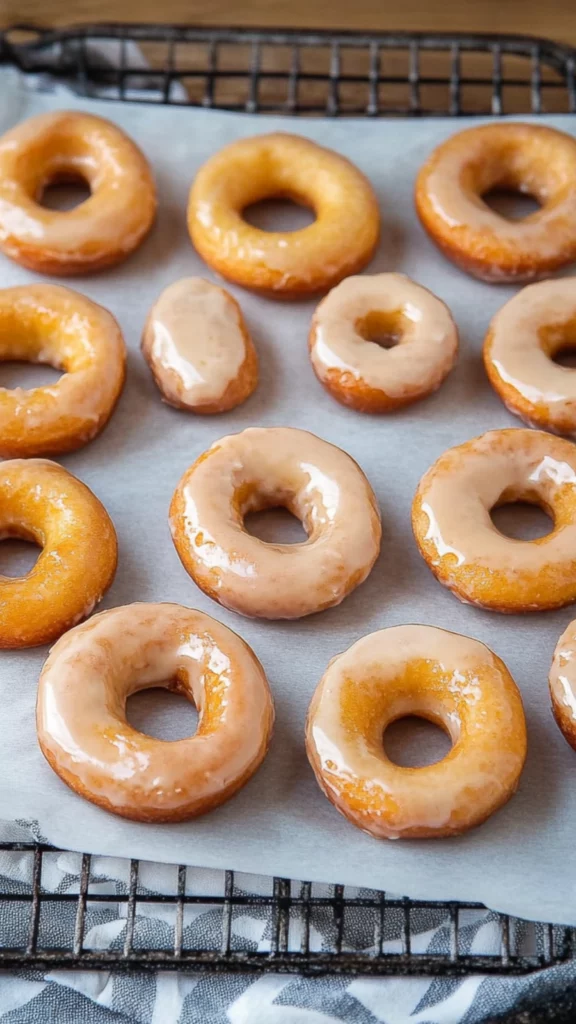
Craving the melt-in-your-mouth goodness of Krispy Kreme donuts? Now you can make them at home! This Copycat Krispy Kreme Glazed Donuts recipe is perfect for beginners, offering a simple step-by-step guide to recreating those soft, sweet donuts with a golden, crispy glaze. Whether it’s for a cozy breakfast or a special treat, these homemade donuts are sure to delight. Let’s get baking!
- Prep Time: 30 minutes
- Cook Time: 1 hour
- Total Time: 1 hour 30 minutes
- Yield: 18 donuts 1x
- Category: Breakfast, Dessert
- Method: Frying, Baking
- Cuisine: American
- Diet: Vegetarian
Ingredients
For the Donuts:
- 1 ¼ cups whole milk (300 milliliters)
- 2 ¼ teaspoons instant yeast (7 grams, or one packet)
- 2 large eggs
- 8 tablespoons unsalted butter (113 grams), melted and cooled
- ¼ cup granulated sugar (50 grams)
- 1 teaspoon salt
- 4 ¼ cups bread flour (535 grams), plus more for rolling out the dough
- Oil (for frying)
For the Glaze:
- 4 cups powdered sugar (500 grams)
- ½ cup milk (120 milliliters)
- 1 pinch salt
Instructions
Step 1: Prepare the Yeast Mixture
The first step in making these donuts is activating the yeast. Pour the warm milk into a medium bowl (about 45 seconds in the microwave should do the trick). Be sure the milk is just warm to the touch—too hot and it will kill the yeast. Sprinkle the instant yeast into the warm milk and stir gently to combine. Let the mixture sit for about 5 minutes, allowing the yeast to activate and foam up. This is how you know the yeast is working.
Step 2: Mix the Dough
In the bowl of your stand mixer, add the activated yeast mixture, eggs, melted butter, sugar, and salt. Using a dough hook, mix the ingredients together until they are fully combined. Gradually add in about half of the flour and mix until incorporated. Then add the remaining flour and continue mixing. If the dough seems too sticky or wet, add flour one tablespoon at a time until it reaches the right consistency. You want the dough to be soft but not overly sticky.
Once the dough is mixed, cover the bowl with a large kitchen towel and place it in a warm spot to rise. Allow the dough to rise for about 1 hour, or until it has doubled in size. This is where the magic happens—the yeast works its magic, making the dough light and fluffy.
Step 3: Roll Out and Cut the Donuts
Once the dough has risen, gently punch it down to release any air bubbles. Transfer it to a well-floured surface and roll it out to about ½-inch thickness. Use a donut cutter, or if you don’t have one, use two round cookie cutters (one large and one small) to cut the donuts and donut holes. The large cutter should be about 3 inches in diameter. Don’t worry if you don’t have a donut cutter—two round cutters will do the job just fine. Collect the donut holes and set them aside for frying too.
After cutting the donuts, knead the dough scraps together, being careful not to overwork the dough. Roll it out again, and continue cutting until all the dough has been used.
Step 4: Let the Donuts Rise Again
Once your donuts are cut, place them on pieces of parchment paper. Make sure there’s enough space between each donut to allow for expansion as they rise. Cover them with a kitchen towel and let them rise for an additional 45 minutes or so, until they have puffed up and doubled in size. This second rise ensures the donuts will be light and airy.
Step 5: Heat the Oil
While the donuts are rising, heat the oil in a deep fryer or a large, heavy-bottomed pot to 375°F (190°C). It’s important to keep the oil at the right temperature for frying. If the oil is too hot, the donuts will brown too quickly on the outside and remain raw on the inside. If the oil is too cool, they will absorb too much oil and become greasy. Use a thermometer to monitor the oil temperature and make sure it stays consistent.
Step 6: Fry the Donuts
Once the oil is hot and the donuts have risen, it’s time to fry! Carefully lower the donuts into the oil, a few at a time, using parchment paper to transfer them. Fry the donuts for about 45 seconds on one side, until golden brown, then flip them over using a spatula and fry the other side for another 45 seconds. Donut holes will cook much faster, so keep an eye on them and remove them from the oil when golden.
Once fried, use a slotted spoon or tongs to remove the donuts from the oil and place them on a cooling rack lined with paper towels or parchment paper to drain.
Step 7: Make the Glaze
While the donuts are cooling, it’s time to prepare the glaze. In a large bowl, whisk together the powdered sugar, milk, and pinch of salt until smooth and glossy. If you prefer a thinner glaze, add more milk, one teaspoon at a time, until you achieve the desired consistency.
Step 8: Glaze the Donuts
Once the donuts have cooled for a minute or two but are still warm, it’s time to glaze them! Dip one side of each donut into the glaze and let the excess drip off. Flip the donut over using a fork and transfer it to a cooling rack. Allow the glaze to set as it slowly drips off the donut. Repeat with the remaining donuts.
Notes
- Yeast Activation: It’s essential to ensure the yeast activates properly in the warm milk. If your yeast doesn’t foam up, it could be expired, and the dough might not rise.
- Frying Donuts: Be cautious when frying—don’t overcrowd the pot. Frying in batches ensures each donut gets evenly cooked and doesn’t stick together.
- Donut Texture: If your donuts feel too dense after frying, it’s likely the dough didn’t rise long enough. Make sure both rises are completed to give your donuts the perfect texture.
Whether you’re making these donuts for a special breakfast, a weekend brunch, or simply a fun treat for yourself or your family, they are guaranteed to impress. So let’s get started with this beginner-friendly recipe, and in no time, you’ll be enjoying homemade donuts that are just as light and airy as those from your favorite donut shop!
The Joy of Homemade Donuts
Who doesn’t love the deliciously sweet smell of freshly fried donuts wafting through the house? Homemade donuts are the ultimate treat, and there’s nothing quite like biting into one that’s warm, soft, and glazed to perfection. When you make your own donuts at home, you have the freedom to customize them to your liking, whether you prefer a thicker glaze, a light dusting of powdered sugar, or something else entirely. But today, we’re focusing on recreating the classic Krispy Kreme donut—light, fluffy, and topped with a glossy, sweet glaze that will make you want to eat a dozen at once.
For many, Krispy Kreme donuts bring back fond memories of spontaneous breakfast runs, indulgent treats shared with loved ones, and the simple joy of biting into a perfectly glazed donut. Now, you can bring that experience home without the need to drive to the nearest Krispy Kreme store. This recipe is designed to be approachable and fun, with a detailed, step-by-step guide that ensures even beginners will have success.
The key to these donuts is patience. You need to allow the dough to rise, and you’ll also need to let the glaze set just right. But don’t worry—once you get the hang of it, you’ll be making these delicious donuts again and again. Whether you’re an experienced baker or a beginner who’s just starting out, this recipe will guide you through the entire process.
Ingredients and Preparation
To get started on your journey to making the perfect Krispy Kreme glazed donuts, here’s everything you’ll need. Fortunately, you likely already have many of these ingredients in your kitchen!
For the Donuts:
- 1 ¼ cups whole milk (300 milliliters)
- 2 ¼ teaspoons instant yeast (7 grams, or one packet)
- 2 large eggs
- 8 tablespoons unsalted butter (113 grams), melted and cooled
- ¼ cup granulated sugar (50 grams)
- 1 teaspoon salt
- 4 ¼ cups bread flour (535 grams), plus more for rolling out the dough
- Oil (for frying)
For the Glaze:
- 4 cups powdered sugar (500 grams)
- ½ cup milk (120 milliliters)
- 1 pinch salt
Preparation Tips:
- Milk: You can substitute the whole milk with 2% milk or even skim milk if you prefer a lower-fat version. However, whole milk will yield a richer, creamier flavor.
- Flour: While bread flour is recommended for its high protein content, which gives the donuts their chewy texture, you can use all-purpose flour if that’s all you have on hand. The donuts will still turn out delicious but with a slightly softer texture.
- Butter: Make sure the butter is melted and cooled before adding it to the dough. This ensures it mixes evenly with the other ingredients.
- Oil: Choose a neutral oil like vegetable or canola oil for frying. Avoid oils with strong flavors, such as olive oil, as they can alter the taste of the donuts.
Before you begin, make sure you have a stand mixer with a dough hook (or a hand mixer if you don’t have one). The dough needs to be kneaded to develop the gluten, which creates the soft, chewy texture of the donuts.
Step-by-Step Instructions
Step 1: Prepare the Yeast Mixture
The first step in making these donuts is activating the yeast. Pour the warm milk into a medium bowl (about 45 seconds in the microwave should do the trick). Be sure the milk is just warm to the touch—too hot and it will kill the yeast. Sprinkle the instant yeast into the warm milk and stir gently to combine. Let the mixture sit for about 5 minutes, allowing the yeast to activate and foam up. This is how you know the yeast is working.
Step 2: Mix the Dough
In the bowl of your stand mixer, add the activated yeast mixture, eggs, melted butter, sugar, and salt. Using a dough hook, mix the ingredients together until they are fully combined. Gradually add in about half of the flour and mix until incorporated. Then add the remaining flour and continue mixing. If the dough seems too sticky or wet, add flour one tablespoon at a time until it reaches the right consistency. You want the dough to be soft but not overly sticky.
Once the dough is mixed, cover the bowl with a large kitchen towel and place it in a warm spot to rise. Allow the dough to rise for about 1 hour, or until it has doubled in size. This is where the magic happens—the yeast works its magic, making the dough light and fluffy.
Step 3: Roll Out and Cut the Donuts
Once the dough has risen, gently punch it down to release any air bubbles. Transfer it to a well-floured surface and roll it out to about ½-inch thickness. Use a donut cutter, or if you don’t have one, use two round cookie cutters (one large and one small) to cut the donuts and donut holes. The large cutter should be about 3 inches in diameter. Don’t worry if you don’t have a donut cutter—two round cutters will do the job just fine. Collect the donut holes and set them aside for frying too.
After cutting the donuts, knead the dough scraps together, being careful not to overwork the dough. Roll it out again, and continue cutting until all the dough has been used.
Step 4: Let the Donuts Rise Again
Once your donuts are cut, place them on pieces of parchment paper. Make sure there’s enough space between each donut to allow for expansion as they rise. Cover them with a kitchen towel and let them rise for an additional 45 minutes or so, until they have puffed up and doubled in size. This second rise ensures the donuts will be light and airy.
Step 5: Heat the Oil
While the donuts are rising, heat the oil in a deep fryer or a large, heavy-bottomed pot to 375°F (190°C). It’s important to keep the oil at the right temperature for frying. If the oil is too hot, the donuts will brown too quickly on the outside and remain raw on the inside. If the oil is too cool, they will absorb too much oil and become greasy. Use a thermometer to monitor the oil temperature and make sure it stays consistent.
Step 6: Fry the Donuts
Once the oil is hot and the donuts have risen, it’s time to fry! Carefully lower the donuts into the oil, a few at a time, using parchment paper to transfer them. Fry the donuts for about 45 seconds on one side, until golden brown, then flip them over using a spatula and fry the other side for another 45 seconds. Donut holes will cook much faster, so keep an eye on them and remove them from the oil when golden.
Once fried, use a slotted spoon or tongs to remove the donuts from the oil and place them on a cooling rack lined with paper towels or parchment paper to drain.
Step 7: Make the Glaze
While the donuts are cooling, it’s time to prepare the glaze. In a large bowl, whisk together the powdered sugar, milk, and pinch of salt until smooth and glossy. If you prefer a thinner glaze, add more milk, one teaspoon at a time, until you achieve the desired consistency.
Step 8: Glaze the Donuts
Once the donuts have cooled for a minute or two but are still warm, it’s time to glaze them! Dip one side of each donut into the glaze and let the excess drip off. Flip the donut over using a fork and transfer it to a cooling rack. Allow the glaze to set as it slowly drips off the donut. Repeat with the remaining donuts.
Beginner Tips and Notes
- Yeast Activation: It’s essential to ensure the yeast activates properly in the warm milk. If your yeast doesn’t foam up, it could be expired, and the dough might not rise.
- Frying Donuts: Be cautious when frying—don’t overcrowd the pot. Frying in batches ensures each donut gets evenly cooked and doesn’t stick together.
- Donut Texture: If your donuts feel too dense after frying, it’s likely the dough didn’t rise long enough. Make sure both rises are completed to give your donuts the perfect texture.
Serving Suggestions
These Copycat Krispy Kreme Donuts are perfect on their own, but you can also pair them with a hot cup of coffee, a glass of milk, or a fresh fruit salad for a complete breakfast. Want to add a little flair? Try adding toppings like sprinkles, chocolate chips, or even a dusting of cinnamon sugar for an extra touch of sweetness.
Storage Tips for Leftovers
While donuts are best enjoyed fresh, you can store any leftovers in an airtight container for up to 2 days. To keep the donuts from getting soggy, make sure they are completely cool before storing them. If you want to keep them fresh for a longer period, you can freeze the donuts before glazing. Reheat them in the microwave for a few seconds or in a low-temperature oven to bring them back to life.

Conclusion
Making your own Krispy Kreme-inspired glazed donuts at home is an incredibly satisfying experience. The combination of a soft, pillowy donut with a glossy, sweet glaze is nothing short of irresistible. With this easy-to-follow recipe, even beginner cooks can create a batch of these delicious treats in no time.
So what are you waiting for? Roll up your sleeves, gather your ingredients, and treat yourself to a batch of warm, homemade donuts that will rival the famous Krispy Kreme ones. Share your results and experiences in the comments below—I’d love to hear how they turned out!


