Imagine sinking your teeth into a warm, soft tortilla, bursting with all the familiar and beloved flavors of a classic Caesar salad: crisp and refreshing romaine lettuce, tender and juicy chicken, tangy and creamy Caesar dressing, salty and savory Parmesan cheese, and satisfyingly crunchy croutons. Now, imagine that delightful combination, perfectly portioned and portable, ready to be enjoyed anytime, anywhere. That’s the beauty and convenience of Chicken Caesar Wraps, a recipe that takes all the deliciousness of a cherished salad and transforms it into a satisfying and easy-to-eat meal. I can still vividly recall the first time I assembled one of these wraps. I was craving a Caesar salad for lunch, but I wanted something a bit more substantial and portable than a traditional bowl. I had some leftover grilled chicken in the refrigerator, and the idea of combining it with the other Caesar salad staples in a wrap seemed like the perfect solution. It was a revelation! The wrap was so easy to put together – just a matter of layering the ingredients – and it was packed with all the familiar flavors I loved. It quickly became my go-to lunch option, and it’s still a regular on my meal prep list today.

Chicken Caesar Wraps: A Classic Salad, Reinvented as a Delicious and Portable Meal

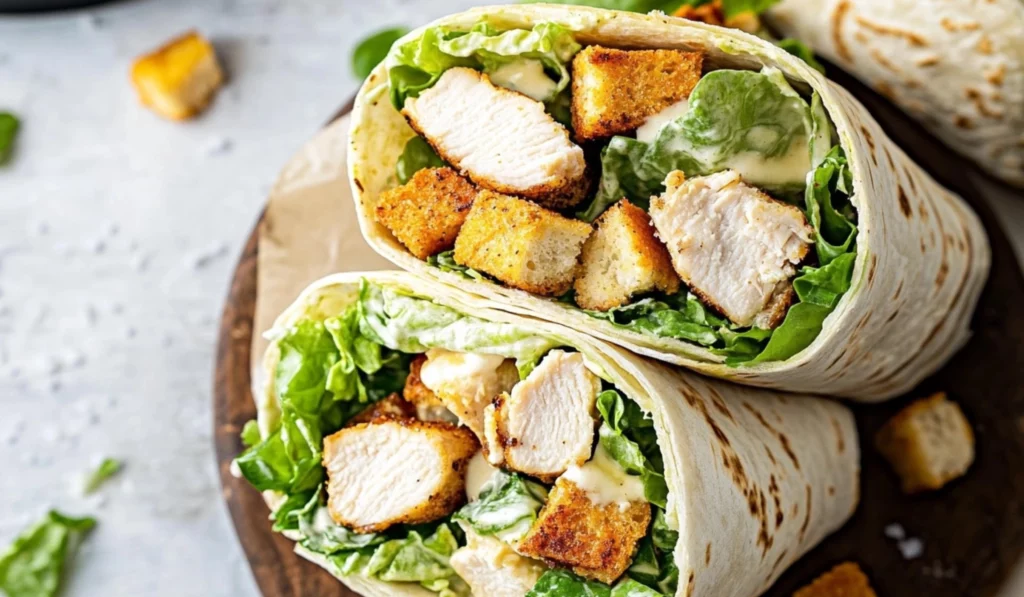
Craving a Caesar salad but want something more satisfying and portable? These Chicken Caesar Wraps are the perfect solution! All the classic flavors, wrapped up in a warm tortilla for a quick and delicious meal.
- Prep Time: 15 minutes
- Cook Time: 0 minutes
- Total Time: 15 minutes
- Yield: 4 servings 1x
- Category: Lunch, Dinner
- Method: Assembling
- Cuisine: American
Ingredients
- 3 cups chopped romaine lettuce
- 1 ½ cups chopped cooked chicken
- ⅓ cup Caesar dressing
- ⅓ cup grated Parmesan cheese
- ½ cup croutons
- Salt and pepper to taste
- 4 (10-inch) flour tortillas
Instructions
- Combine Ingredients: In a large bowl, gently combine the chopped romaine lettuce, chopped cooked chicken, Caesar dressing, Parmesan cheese, and croutons. Beginner Note: Make sure all the ingredients are chopped into bite-sized pieces so they fit easily in the wrap and are easy to eat. Don’t overmix the salad, as this can bruise the lettuce.
- Toss and Season: Use tongs or a large spoon to toss the ingredients well, ensuring that everything is evenly coated in the creamy dressing. Season with kosher salt and freshly ground black pepper to taste. Taste the salad and add more dressing if desired. Beginner Note: Don’t overdress the salad, as this can make the wraps soggy. It’s always better to start with a little dressing and add more as needed.
- Warm Tortillas: In a large pan (a skillet or griddle works well), warm the tortillas over medium heat for about 15 to 30 seconds per side, just until they are pliable and slightly warm to the touch. This will make them much easier to roll without cracking or tearing. Place the warmed tortillas on a plate and cover them with a clean kitchen towel to keep them warm while you assemble the wraps. Alternatively, you can warm them in the microwave in between paper towels for 15 to 30 seconds. Beginner Note: Warming the tortillas is a crucial step for making perfect wraps. Cold tortillas are more likely to break when you try to roll them.
- Assemble Wraps: Place the warmed tortillas on a clean and flat surface. It’s helpful to have a large cutting board or clean countertop to work on. Beginner Note: Make sure you have enough space to spread out your ingredients and roll the wraps comfortably.
- Fill Tortillas: Divide the prepared Caesar salad mixture evenly between the four flour tortillas, placing it in the center of each tortilla. Leave a border around the edges of the tortilla to make it easier to roll. Beginner Note: Don’t overfill the tortillas, or they will be difficult to roll and the filling will spill out. It’s better to use a little less filling and have a neatly wrapped wrap than to have a messy and overflowing one.
- Fold and Roll: Fold in opposite sides of each tortilla, tucking them in slightly to secure the filling. Then, starting from the bottom edge closest to you, tightly roll the tortilla into a wrap, enclosing the filling completely. Beginner Note: Rolling the wraps tightly will help them hold their shape and prevent the filling from spilling out. If the tortilla is tearing, you may need to use a larger tortilla or use less filling.
- Secure (Optional): You can stick a toothpick in the center of each wrap to help keep them closed, especially if you’re taking them on the go or packing them for lunch.
- Serve: Cut the wraps in half diagonally before serving, or serve them whole, depending on your preference. Cutting the wraps in half makes them easier to eat and also looks more appealing, especially if you’re serving them to guests. Beginner Note: Using a sharp knife will make it easier to cut the wraps cleanly.
Notes
- Use rotisserie chicken for a shortcut.
- Warm tortillas for easier rolling.
- Don’t overdress the salad.
This recipe is an absolute dream for beginner cooks. It’s incredibly quick, requires minimal ingredients and prep work, and is a fantastic way to enjoy a healthy and delicious meal or snack without any complicated cooking involved (unless you’re grilling the chicken yourself, of course!). Plus, it’s incredibly versatile – you can easily customize it to your liking, experimenting with different fillings, sauces, and flavor combinations to create your own signature wrap. If you’re looking for a quick, easy, and satisfying lunch or dinner that’s perfect for on-the-go eating, these Chicken Caesar Wraps are the answer you’ve been searching for.
Ingredients and Preparation: The Building Blocks of Wrap Perfection
This recipe utilizes simple, readily accessible ingredients, making it a breeze for even the most inexperienced cooks to assemble.
- 3 cups chopped romaine lettuce (crisp and fresh is best) – Alternative: You can use other types of lettuce, such as iceberg lettuce for a classic crunch, green leaf or red leaf lettuce for a softer texture, or even baby spinach or mixed greens for a more nutritious and vibrant option. You can also use a combination of different lettuces for a more complex flavor and texture.
- 1 ½ cups chopped cooked chicken (grilled, fried, or rotisserie chicken all work well) – Alternative: You can use leftover chicken from any meal, or even canned chicken (drained and rinsed thoroughly to remove excess sodium). For a vegetarian or vegan option, try using grilled halloumi cheese (for a salty and savory option), chickpeas (mashed or whole for a plant-based protein boost), or tofu (pressed and cubed for a versatile protein alternative). You can also use shredded chicken instead of chopped chicken.
- ⅓ cup Caesar dressing (store-bought or homemade, your choice!) – Alternative: You can use other creamy dressings, such as ranch dressing, creamy Italian dressing, or even a light vinaigrette for a healthier option. For a lighter and tangier option, consider a Greek yogurt-based dressing. You can also make your own Caesar dressing using a simple recipe online.
- ⅓ cup freshly grated Parmesan cheese (for a salty and savory flavor) – Alternative: You can use other hard cheeses, such as Pecorino Romano or Grana Padano. You can also use pre-grated Parmesan cheese, but freshly grated cheese will have a much better flavor and texture. For a vegetarian option, ensure the Parmesan cheese is made with vegetarian rennet.
- ½ cup homemade croutons (for added crunch and texture) – Alternative: You can use store-bought croutons (choose your favorite flavor!), or even skip the croutons altogether if you prefer a softer wrap. For a gluten-free option, try using gluten-free croutons or toasted nuts (like walnuts or almonds) for added crunch. You can also make your own croutons by cubing bread, tossing it with olive oil and seasonings, and baking it until golden brown.
- Kosher salt and freshly ground black pepper, to taste (freshly ground pepper adds a more robust flavor)
- 4 flour tortillas or wraps (10-inch size is recommended for easy rolling) – Alternative: You can use whole wheat tortillas for added fiber, spinach tortillas for a vibrant color and subtle flavor, or even lettuce wraps (butter lettuce or romaine lettuce leaves) for a low-carb and refreshing option. You can also use gluten-free tortillas if needed.
Step-by-Step Instructions: Creating Wrap Magic
These easy-to-follow instructions will guide you through each step of creating your delicious and satisfying Chicken Caesar Wraps:
- Combine Ingredients: In a large bowl, gently combine the chopped romaine lettuce, chopped cooked chicken, Caesar dressing, Parmesan cheese, and croutons. Beginner Note: Make sure all the ingredients are chopped into bite-sized pieces so they fit easily in the wrap and are easy to eat. Don’t overmix the salad, as this can bruise the lettuce.
- Toss and Season: Use tongs or a large spoon to toss the ingredients well, ensuring that everything is evenly coated in the creamy dressing. Season with kosher salt and freshly ground black pepper to taste. Taste the salad and add more dressing if desired. Beginner Note: Don’t overdress the salad, as this can make the wraps soggy. It’s always better to start with a little dressing and add more as needed.
- Warm Tortillas: In a large pan (a skillet or griddle works well), warm the tortillas over medium heat for about 15 to 30 seconds per side, just until they are pliable and slightly warm to the touch. This will make them much easier to roll without cracking or tearing. Place the warmed tortillas on a plate and cover them with a clean kitchen towel to keep them warm while you assemble the wraps. Alternatively, you can warm them in the microwave in between paper towels for 15 to 30 seconds. Beginner Note: Warming the tortillas is a crucial step for making perfect wraps. Cold tortillas are more likely to break when you try to roll them.
- Assemble Wraps: Place the warmed tortillas on a clean and flat surface. It’s helpful to have a large cutting board or clean countertop to work on. Beginner Note: Make sure you have enough space to spread out your ingredients and roll the wraps comfortably.
- Fill Tortillas: Divide the prepared Caesar salad mixture evenly between the four flour tortillas, placing it in the center of each tortilla. Leave a border around the edges of the tortilla to make it easier to roll. Beginner Note: Don’t overfill the tortillas, or they will be difficult to roll and the filling will spill out. It’s better to use a little less filling and have a neatly wrapped wrap than to have a messy and overflowing one.
- Fold and Roll: Fold in opposite sides of each tortilla, tucking them in slightly to secure the filling. Then, starting from the bottom edge closest to you, tightly roll the tortilla into a wrap, enclosing the filling completely. Beginner Note: Rolling the wraps tightly will help them hold their shape and prevent the filling from spilling out. If the tortilla is tearing, you may need to use a larger tortilla or use less filling.
- Secure (Optional): You can stick a toothpick in the center of each wrap to help keep them closed, especially if you’re taking them on the go or packing them for lunch.
- Serve: Cut the wraps in half diagonally before serving, or serve them whole, depending on your preference. Cutting the wraps in half makes them easier to eat and also looks more appealing, especially if you’re serving them to guests. Beginner Note: Using a sharp knife will make it easier to cut the wraps cleanly.
Beginner Tips and Notes: Your Kitchen Companion
Even simple recipes can benefit from a few helpful tips and tricks:
- Prep Ingredients Ahead for Efficiency: One of the best ways to save time when making these wraps is to prep your ingredients in advance. You can chop the lettuce, cook the chicken (if you’re grilling or baking it), make the croutons, and even mix the dressing ahead of time and store them in separate airtight containers in the refrigerator. Then, when you’re ready to make the wraps, all you have to do is assemble them!
- Don’t Overdress for Soggy Wraps: Avoid over-dressing the salad, as this can make the wraps soggy and less appealing. It’s always better to start with a little dressing and add more as needed, rather than adding too much at once.
- Warm Tortillas are Key for Pliability: Warming the tortillas is a crucial step for making perfect wraps. Cold tortillas are more likely to crack or tear when you try to roll them. Warming them in the microwave or skillet makes them more pliable and prevents them from breaking.
- Use Quality Ingredients for Best Flavor: Using high-quality ingredients, such as fresh and crisp lettuce, good Parmesan cheese, and a delicious Caesar dressing, will make a big difference in the overall flavor of the wraps.
Serving Suggestions: Completing the Wrap Experience
These Chicken Caesar Wraps are delicious and satisfying on their own, but you can definitely enhance the dining experience with some complementary sides and drinks.
- Side Salad for a Lighter Meal: Serve them with a side salad (such as a mixed green salad, a Caprese salad, or a cucumber and tomato salad) for a lighter and more refreshing meal. The salad will add extra nutrients and balance out the richness of the wrap.
- Fruit for a Sweet and Healthy Addition: Add a side of fresh fruit, such as grapes, berries, melon, or sliced oranges, for a sweet and healthy addition to your meal. The fruit will complement the savory flavors of the wrap and provide a refreshing contrast.
- Chips or Fries for a Casual Meal: Serve them with a side of tortilla chips, potato chips, or French fries for a more substantial and casual meal. This is a great option for a quick lunch or a picnic.
- Soup for a Hearty and Comforting Meal: Pair them with a bowl of soup (such as tomato soup, chicken noodle soup, or vegetable soup) for a heartier and more comforting meal, especially on a cold day. A warm soup and a crisp wrap make a perfect combination.
- Drinks to Quench Your Thirst: Pair your wraps with a refreshing drink, such as iced tea, lemonade, sparkling water, fruit juice, or even a light beer or glass of wine. Choose a drink that complements the flavors of the wrap.

Conclusion: A Wrap Star
These Chicken Caesar Wraps are a quick, easy, and healthy meal that’s perfect for lunch, dinner, or even a snack. They’re incredibly versatile, allowing for endless customization, making them a great option for even the pickiest eaters. I wholeheartedly encourage you to try this recipe and make it your own. Don’t be afraid to experiment with different ingredients and toppings to create your perfect wrap. Perhaps you’ll discover a new favorite combination that you’ll want to share with friends and family. Most importantly, have fun and enjoy the process of creating something delicious! Share your culinary creations and experiences in the comments below – I’d be absolutely thrilled to see your unique variations of this delightful dish! This easy and versatile recipe is a fantastic way to enjoy a healthy and satisfying meal without spending hours in the kitchen. It’s a quick and nutritious option that’s perfect for busy weeknights, packed lunches, picnics, or even a light and flavorful dinner. And the best part? It’s so easy to customize! You can add your favorite vegetables, sauces, and toppings to create a wrap that’s perfectly tailored to your taste and dietary needs. So, go ahead, give it a try! You won’t be disappointed.


