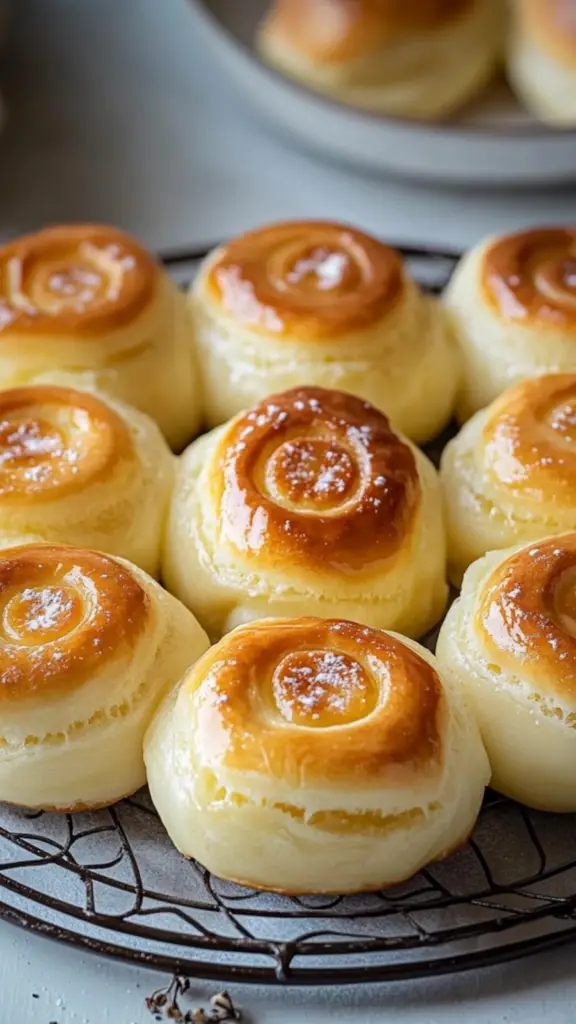
If you’ve ever tasted the soft, pillowy texture of Asian milk bread filled with rich, creamy custard, then you know exactly how special custard buns can be. These sweet buns, often served as snacks or breakfast, offer a combination of smooth, velvety custard filling and a soft, slightly sweetened bread that melts in your mouth. They’re the kind of treat you can enjoy at any time of day, whether as a satisfying breakfast, a light snack, or even as part of an afternoon tea.
Custard Buns: A Sweet, Creamy Delight for Any Occasion
If you’ve ever tasted the soft, pillowy texture of Asian milk bread filled with rich, creamy custard, then you know exactly how special custard buns can be. These sweet buns, often served as snacks or breakfast, offer a combination of smooth, velvety custard filling and a soft, slightly sweetened bread that melts in your mouth. They’re the kind of treat you can enjoy at any time of day, whether as a satisfying breakfast, a light snack, or even as part of an afternoon tea.
- Prep Time: 40 minutes
- Cook Time: 30 minutes
- Total Time: 3 hours 40 minutes (including rise time)
- Yield: 16 buns 1x
- Category: Breakfast, Snack, Dessert
- Method: Baking
- Cuisine: Asian, Fusion
- Diet: Vegetarian
Ingredients
For the Milk Bread:
- 1 tbsp active dry yeast
- ¼ cup warm water (105-115°F)
- 2/3 cup whipping cream
- 2/3 cup warm milk
- 1 large egg
- 1/3 cup sugar
- 1 and 1/2 tsp salt
- 4 cups all-purpose flour (plus up to 5 tbsp extra)
For the Custard Filling:
- 4 egg yolks (lightly beaten)
- 1/3 cup all-purpose flour
- ½ cup sugar
- 1 ¼ cup milk
- 6 tbsp butter
- 1 tsp vanilla extract
For Brushing on the Baked Buns:
- 2 tbsp melted butter
Instructions
Making the Milk Bread
Start by preparing the dough for the milk bread. In the bowl of a stand mixer, combine the warm water and yeast, along with about 1 teaspoon of sugar. Let this sit for about 5 minutes, allowing the yeast to activate and become foamy. You’ll know it’s ready when you see small bubbles forming on the surface. This is a sign that the yeast is alive and active, essential for making the dough rise properly.
Next, add the warm milk, whipping cream, the remaining sugar, egg, and salt into the yeast mixture. Stir to combine, ensuring that all the ingredients are well incorporated. Once this is done, attach the dough hook to the stand mixer and slowly add in the flour, about 3 cups in total. It’s best to add the flour one cup at a time, mixing at low speed to ensure it’s properly incorporated. After adding the first 3 cups, add the remaining flour, continuing to mix at a low speed until the dough comes together.
Once the dough has started to form, gradually increase the speed of the mixer and beat for about 5-8 minutes. The dough should begin to gather around the sides of the bowl. Continue beating for another 5-7 minutes on high speed, until the dough is elastic and smooth. If the dough is too sticky or stuck to the sides of the bowl, you can sprinkle in a little bit of extra flour, up to 3-5 tablespoons, but be careful not to add too much.
When the dough is smooth and elastic, shape it into a ball and place it in a lightly greased bowl. Cover the bowl with a clean kitchen towel and allow the dough to rise for 1 ½ hours, or until it has doubled in size. This step is crucial to getting the soft, airy texture that is characteristic of milk bread. As the dough rises, the yeast works to create air pockets in the dough, giving it that light, fluffy consistency.
Making the Custard Filling
While the dough is rising, you can prepare the custard filling. In a medium saucepan, combine the flour, sugar, and milk. Stir the ingredients together until the mixture is smooth and free of lumps. Cook this mixture over medium heat, stirring constantly to prevent burning, until the edges begin to bubble. This indicates that it’s starting to thicken.
Once the mixture starts bubbling, take about ¼ cup of the heated milk mixture and slowly pour it into the egg yolks, whisking constantly to temper the eggs. This helps prevent the yolks from scrambling when they’re added to the hot mixture. After the yolks have been tempered, slowly pour the egg yolk mixture back into the saucepan, stirring constantly.
Continue cooking the custard over medium heat until it thickens to a paste-like consistency, usually around 5-7 minutes. Once thickened, remove the saucepan from the heat and stir in the butter and vanilla extract, mixing until the butter is fully melted and incorporated. Set the custard aside to cool completely. The custard will continue to thicken as it cools, so it’s important to allow it to cool fully before using it as a filling.
Assembling the Buns
Once the dough has risen and doubled in size, gently deflate it to remove any large air bubbles. Turn the dough out onto a lightly floured surface and shape it into a log. Cut the dough into 16 equal portions, using a sharp knife or dough cutter.
Next, flatten each piece of dough into a round circle using your palms or a rolling pin. Be sure to keep the thickness even to ensure a uniform rise when baking. Spoon about 1-2 tablespoons of the cooled custard into the center of each circle. Carefully fold the edges of the dough over the custard and pinch the seams together, making sure the filling is sealed inside. Twist the dough slightly at the seams to ensure it stays sealed during baking, shaping the dough into smooth balls.
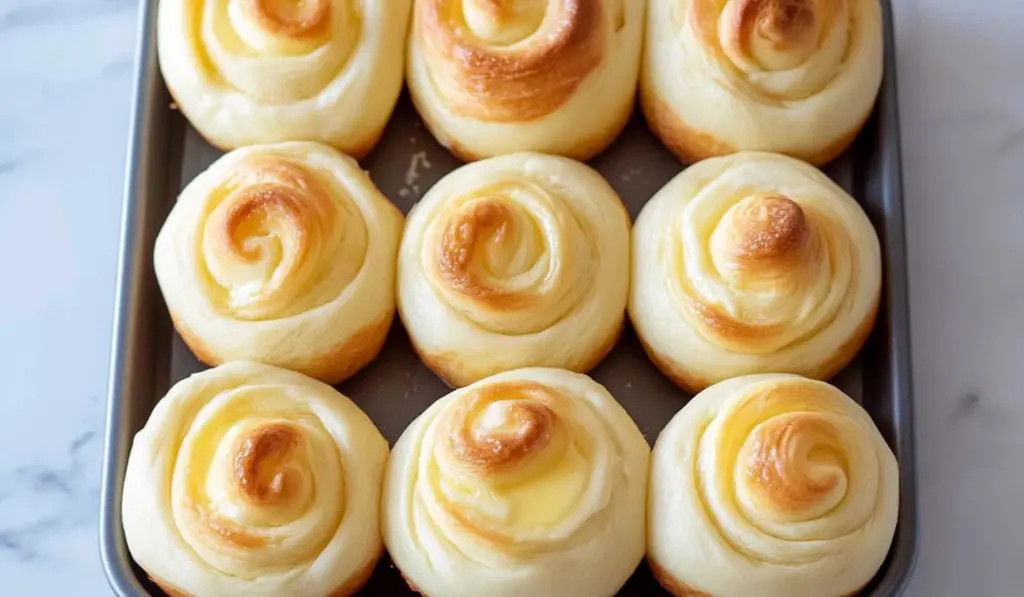
Once all the dough is filled, place the buns into a greased 9×13-inch baking pan lined with parchment paper. Space the buns evenly apart to allow for expansion during the second rise. Cover the pan with a clean kitchen towel and let the dough rise for another 40 minutes to 1 hour, until the buns have expanded and are touching each other.
Baking and Finishing
While the dough is rising, preheat the oven to 350°F (175°C). Once the buns have risen, pipe the remaining custard onto the top of each bun. A spiral design is typical, but you can also create other designs if you prefer. The custard will bake into the buns, creating a lovely, golden swirl on top.
Place the pan in the preheated oven and bake for 25-30 minutes, or until the tops of the buns are lightly golden brown. Once the buns are baked, remove them from the oven and brush them with melted butter to give them a lovely, glossy finish.
Allow the buns to cool for a few minutes before serving. Enjoy them warm for the best experience. The soft, tender bread combined with the rich, creamy custard makes these buns a real treat. The sweet, fragrant aroma will fill your kitchen as they bake, creating an irresistible invitation to dig in.
Notes
- Substituting the Dairy: If you prefer a non-dairy option, you can use coconut milk or almond milk in place of the milk and cream. The texture and flavor may change slightly, but it will still work well in the recipe.
- Make Ahead: These buns can be prepared ahead of time. After shaping and filling the dough, you can cover and refrigerate the buns overnight. The next morning, allow them to come to room temperature before baking. This is a great option for a special breakfast.
- Flavor Variations: Experiment with adding a little zest of lemon or orange to the custard filling for a refreshing twist. Alternatively, you could add a few drops of almond extract or a sprinkle of cinnamon to the dough for a different flavor profile.
- Storage: These buns are best enjoyed fresh, but they can be stored in an airtight container for up to 2 days. Reheat them in the microwave for a few seconds to restore their softness.
Custard buns are beloved in many Asian countries, often found in bakeries, street stalls, and homes alike. Their soft, delicate bread and indulgent custard make them irresistible, and the method for making them is surprisingly straightforward. With just a few key ingredients and some patience, you can recreate these little buns of happiness right in your own kitchen. While the dough rises and bakes, the custard filling thickens to perfection, creating that wonderful contrast between the soft bread and creamy center.
What makes custard buns particularly appealing is their versatility. Whether you prefer a mild sweetness or want to amp up the flavor, the ingredients and method allow for some fun experimentation. The dough is rich and buttery, while the custard is sweet but not overpowering, with just the right amount of vanilla flavor. This balance makes the buns not only delicious but comforting—perfect for sharing with family or serving at gatherings.
In this detailed guide, I’ll walk you through every step of making custard buns, from preparing the dough to crafting the perfect custard filling. Along the way, I’ll provide helpful tips for substitutions and variations, ensuring that you can make these buns to suit your preferences. So, let’s dive into this recipe and discover how to make these delectable custard-filled treasures at home.
Ingredients
For the Milk Bread:
- 1 tbsp active dry yeast
- ¼ cup warm water (105-115°F)
- 2/3 cup whipping cream
- 2/3 cup warm milk
- 1 large egg
- 1/3 cup sugar
- 1 and 1/2 tsp salt
- 4 cups all-purpose flour (plus up to 5 tbsp extra)
For the Custard Filling:
- 4 egg yolks (lightly beaten)
- 1/3 cup all-purpose flour
- ½ cup sugar
- 1 ¼ cup milk
- 6 tbsp butter
- 1 tsp vanilla extract
For Brushing on the Baked Buns:
- 2 tbsp melted butter
Step-by-Step Instructions
Making the Milk Bread
Start by preparing the dough for the milk bread. In the bowl of a stand mixer, combine the warm water and yeast, along with about 1 teaspoon of sugar. Let this sit for about 5 minutes, allowing the yeast to activate and become foamy. You’ll know it’s ready when you see small bubbles forming on the surface. This is a sign that the yeast is alive and active, essential for making the dough rise properly.
Next, add the warm milk, whipping cream, the remaining sugar, egg, and salt into the yeast mixture. Stir to combine, ensuring that all the ingredients are well incorporated. Once this is done, attach the dough hook to the stand mixer and slowly add in the flour, about 3 cups in total. It’s best to add the flour one cup at a time, mixing at low speed to ensure it’s properly incorporated. After adding the first 3 cups, add the remaining flour, continuing to mix at a low speed until the dough comes together.
Once the dough has started to form, gradually increase the speed of the mixer and beat for about 5-8 minutes. The dough should begin to gather around the sides of the bowl. Continue beating for another 5-7 minutes on high speed, until the dough is elastic and smooth. If the dough is too sticky or stuck to the sides of the bowl, you can sprinkle in a little bit of extra flour, up to 3-5 tablespoons, but be careful not to add too much.
When the dough is smooth and elastic, shape it into a ball and place it in a lightly greased bowl. Cover the bowl with a clean kitchen towel and allow the dough to rise for 1 ½ hours, or until it has doubled in size. This step is crucial to getting the soft, airy texture that is characteristic of milk bread. As the dough rises, the yeast works to create air pockets in the dough, giving it that light, fluffy consistency.
Making the Custard Filling
While the dough is rising, you can prepare the custard filling. In a medium saucepan, combine the flour, sugar, and milk. Stir the ingredients together until the mixture is smooth and free of lumps. Cook this mixture over medium heat, stirring constantly to prevent burning, until the edges begin to bubble. This indicates that it’s starting to thicken.
Once the mixture starts bubbling, take about ¼ cup of the heated milk mixture and slowly pour it into the egg yolks, whisking constantly to temper the eggs. This helps prevent the yolks from scrambling when they’re added to the hot mixture. After the yolks have been tempered, slowly pour the egg yolk mixture back into the saucepan, stirring constantly.
Continue cooking the custard over medium heat until it thickens to a paste-like consistency, usually around 5-7 minutes. Once thickened, remove the saucepan from the heat and stir in the butter and vanilla extract, mixing until the butter is fully melted and incorporated. Set the custard aside to cool completely. The custard will continue to thicken as it cools, so it’s important to allow it to cool fully before using it as a filling.
Assembling the Buns
Once the dough has risen and doubled in size, gently deflate it to remove any large air bubbles. Turn the dough out onto a lightly floured surface and shape it into a log. Cut the dough into 16 equal portions, using a sharp knife or dough cutter.
Next, flatten each piece of dough into a round circle using your palms or a rolling pin. Be sure to keep the thickness even to ensure a uniform rise when baking. Spoon about 1-2 tablespoons of the cooled custard into the center of each circle. Carefully fold the edges of the dough over the custard and pinch the seams together, making sure the filling is sealed inside. Twist the dough slightly at the seams to ensure it stays sealed during baking, shaping the dough into smooth balls.
Once all the dough is filled, place the buns into a greased 9×13-inch baking pan lined with parchment paper. Space the buns evenly apart to allow for expansion during the second rise. Cover the pan with a clean kitchen towel and let the dough rise for another 40 minutes to 1 hour, until the buns have expanded and are touching each other.
Baking and Finishing
While the dough is rising, preheat the oven to 350°F (175°C). Once the buns have risen, pipe the remaining custard onto the top of each bun. A spiral design is typical, but you can also create other designs if you prefer. The custard will bake into the buns, creating a lovely, golden swirl on top.
Place the pan in the preheated oven and bake for 25-30 minutes, or until the tops of the buns are lightly golden brown. Once the buns are baked, remove them from the oven and brush them with melted butter to give them a lovely, glossy finish.
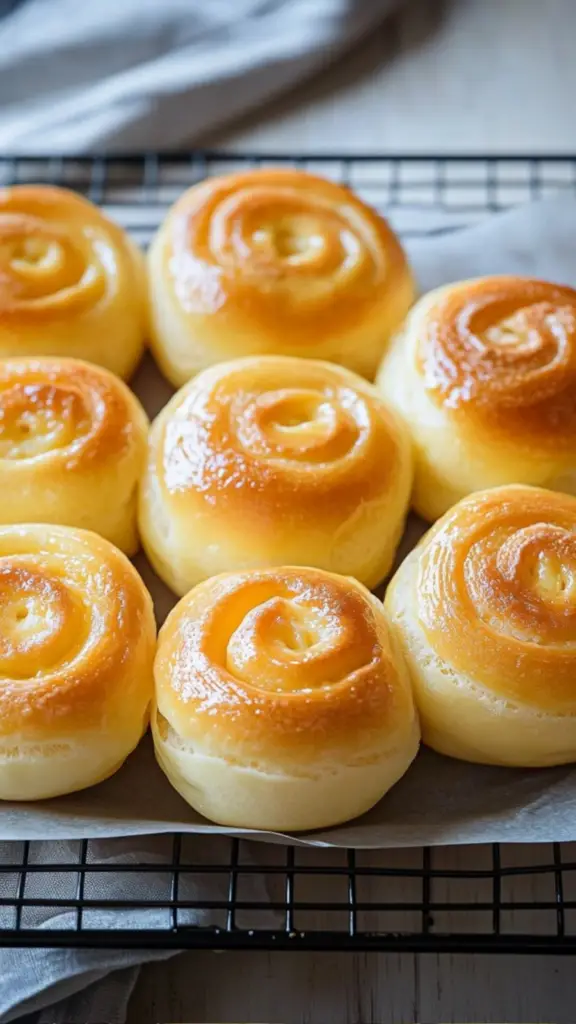
Allow the buns to cool for a few minutes before serving. Enjoy them warm for the best experience. The soft, tender bread combined with the rich, creamy custard makes these buns a real treat. The sweet, fragrant aroma will fill your kitchen as they bake, creating an irresistible invitation to dig in.
Tips and Variations
- Substituting the Dairy: If you prefer a non-dairy option, you can use coconut milk or almond milk in place of the milk and cream. The texture and flavor may change slightly, but it will still work well in the recipe.
- Make Ahead: These buns can be prepared ahead of time. After shaping and filling the dough, you can cover and refrigerate the buns overnight. The next morning, allow them to come to room temperature before baking. This is a great option for a special breakfast.
- Flavor Variations: Experiment with adding a little zest of lemon or orange to the custard filling for a refreshing twist. Alternatively, you could add a few drops of almond extract or a sprinkle of cinnamon to the dough for a different flavor profile.
- Storage: These buns are best enjoyed fresh, but they can be stored in an airtight container for up to 2 days. Reheat them in the microwave for a few seconds to restore their softness.
Serving Suggestions
Custard buns are versatile enough to serve with a variety of beverages. Pair them with a hot cup of tea, coffee, or milk for a comforting breakfast or afternoon snack. They also make a wonderful addition to a brunch spread or a dessert table. Their soft, sweet flavor and creamy filling make them a delightful treat for any occasion.
Why Custard Buns Are Worth Making
Custard buns are the perfect balance of soft, fluffy bread and creamy custard filling. They are comforting, satisfying, and absolutely delicious, making them a must-try for anyone who enjoys baking or simply loves sweet treats. The combination of textures and flavors in these buns is what sets them apart, and once you’ve made them, they will surely become a favorite in your baking repertoire.
By following this simple yet detailed recipe, you can create custard buns that rival those from your favorite bakery. So, why not try making these at home and enjoy the soft, sweet goodness that they bring to the table?


