As a self-proclaimed dessert enthusiast, I’ve always found joy in experimenting with sweet treats that combine elements of comfort and elegance. One of my all-time favorites has to be the Hot Fudge Sundae Brownie Cheesecake. Imagine sinking your fork into a rich, fudgy brownie base, followed by a creamy cheesecake layer, all topped with smooth chocolate ganache and fluffy whipped cream. Each bite feels like a celebration of flavors, and it’s perfect for any occasion. Whether you’re looking to impress guests or simply treat yourself, this dessert is sure to hit the spot. But don’t let the multi-layered complexity fool you—this Hot Fudge Sundae Brownie Cheesecake is actually beginner-friendly, easy to assemble, and full of rich, indulgent flavor. If you’re new to baking or just looking for a dessert that combines multiple elements in a straightforward way, this is the perfect recipe for you. The beauty of this cheesecake lies in its simplicity. While it may look like something you’d find in a fancy bakery, the steps are easy to follow, making it ideal for beginner cooks who want to experience the joy of creating a showstopper dessert.

Hot Fudge Sundae Brownie Cheesecake: A Heavenly Delight for Beginner Cooks

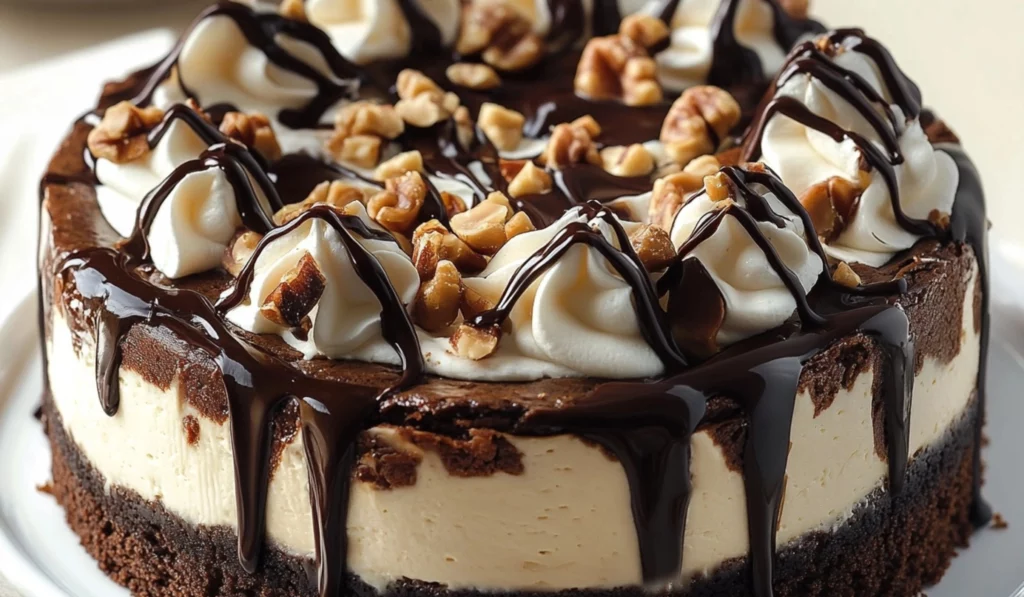
When it comes to indulgent desserts, it’s hard to beat the combination of a fudgy brownie base, creamy cheesecake, smooth chocolate ganache, and fluffy whipped cream. The Hot Fudge Sundae Brownie Cheesecake is a showstopper that combines all these layers into one mouthwatering treat. Each bite is a rich, velvety celebration of flavors that’s perfect for any occasion—whether it’s a family gathering or a special celebration.
- Prep Time: 20 minutes
- Cook Time: 1 hour 40 minutes
- Total Time: 3 hours
- Yield: 8 servings 1x
- Category: Dessert
- Method: Baking
- Cuisine: American
- Diet: Vegetarian
Ingredients
For the Brownie Layer:
-
- 1 box walnut brownie mix (follow the package instructions, including walnuts for extra texture)
For the Cheesecake Layer:
-
- 24 ounces cream cheese (three 8-ounce packages, softened)
-
- 3/4 cup sugar
-
- 3 eggs
-
- 1 teaspoon vanilla extract
For the Chocolate Ganache:
-
- 1/2 cup semi-sweet chocolate chips
-
- 1/4 cup heavy whipping cream
For the Whipped Cream Topping:
-
- 1 cup heavy whipping cream
-
- 1/2 cup powdered sugar
-
- 1 teaspoon vanilla extract
-
- 1/4 cup chopped peanuts (optional)
Instructions
- Preheat and Prepare: Start by preheating your oven to 350°F (175°C). This ensures your brownie layer bakes evenly and that your cheesecake bakes to perfection. Grease a springform pan with non-stick spray or line it with parchment paper to prevent sticking. The springform pan is essential for an easy release, which is important when working with a dessert that has multiple layers.
- Prepare the Brownie Layer: Follow the instructions on your walnut brownie mix. Typically, you’ll combine the dry mix with eggs, oil, and water (check the package for specific amounts). Stir until the batter is smooth. Pour the batter into the prepared springform pan, making sure it’s evenly spread. Bake for 30-40 minutes or until a toothpick inserted into the center comes out mostly clean (a few moist crumbs are okay). Once baked, allow the brownies to cool completely in the pan.
Pro Tip: Let the brownies cool completely before adding the cheesecake layer to avoid mixing the two components while still hot. The brownie base needs to set first so that the cheesecake layer doesn’t melt into it.
- Prepare the Cheesecake Mixture: While your brownie layer cools, it’s time to make the cheesecake. In a stand mixer, beat the softened cream cheese and sugar on medium-high speed until the mixture is light and fluffy. This should take about 2-3 minutes. The mixture will become smooth, and the sugar should dissolve into the cream cheese completely. Add the eggs one at a time, making sure each egg is fully incorporated before adding the next. Finally, mix in the vanilla extract. The cheesecake batter should be smooth and creamy.
- Layering the Cheesecake: Once the brownie base has cooled, pour the cheesecake mixture on top of the brownie layer. Use a spatula to smooth the top evenly. Bake the cheesecake at 350°F (175°C) for about 1 hour or until the center is almost set. The cheesecake will continue to set as it cools. Let it cool to room temperature, then place it in the refrigerator overnight to chill. It’s important to allow the cheesecake to cool fully to room temperature before refrigerating, as this will help it maintain its structure when chilled.
Pro Tip: If you notice that the edges of your cheesecake are getting too brown or starting to crack, try lowering the oven temperature by 25°F next time to prevent overbaking.
- Make the Chocolate Ganache: While your cheesecake is chilling, it’s time to prepare the chocolate ganache. Place the semi-sweet chocolate chips in a microwave-safe bowl. Add the heavy whipping cream and microwave in 45-second intervals, stirring in between, until the chocolate is completely melted and the mixture is smooth. Once ready, let the ganache cool slightly before pouring it over the chilled cheesecake. Refrigerate again for another hour to let the ganache firm up.
- Whipped Cream Topping: Once your cheesecake and ganache are fully set, it’s time for the final touch—whipped cream! In a mixing bowl, beat the heavy whipping cream with powdered sugar and vanilla extract on high speed until stiff peaks form. If you have a piping bag with a star tip, you can pipe the whipped cream around the edges of the cheesecake for a decorative finish. Sprinkle with chopped peanuts (if using) for added crunch and flavor. This final step will not only add texture but also make your cheesecake look professional and ready for any special occasion.
Notes
- Check the Brownies: Don’t open the oven door too often while the brownies are baking, as this can cause them to collapse. When you check for doneness, do it quickly and only once. A toothpick should come out with a few moist crumbs, but not wet batter.
- Room Temperature Cream Cheese: Make sure your cream cheese is softened before mixing it with sugar. Cold cream cheese will cause the batter to be lumpy and difficult to blend smoothly. If you forget to take the cream cheese out ahead of time, you can microwave it for about 10-15 seconds to soften it quickly.
- Be Patient: The key to a perfect cheesecake is patience. Let the cheesecake cool to room temperature before refrigerating it, and don’t rush the chilling process. This ensures the cheesecake sets properly and doesn’t fall apart. Cheesecake needs time to firm up and reach its full flavor potential, so resist the urge to cut into it right away.
- Watch the Ganache: If your ganache seems too thick, you can add a tiny bit more cream. If it’s too thin, let it cool and thicken up before pouring it over the cheesecake. Ganache should have a smooth, glossy finish and should pour easily but not be runny.
Creating a dessert like this is not just about following instructions—it’s about learning the different layers of a dessert and how they come together to create a memorable experience. From the crunchy walnut brownie base to the creamy, melt-in-your-mouth cheesecake, and finally, the smooth chocolate ganache and light whipped cream topping, every bite offers a balance of textures and flavors that will delight your taste buds. While it might sound like an advanced recipe, each step is simple enough to follow even for those just starting to explore the world of baking. In fact, one of the best parts about this recipe is its flexibility. You don’t need to be an expert baker to create a dessert that feels both impressive and satisfying.
Ingredients and Preparation
The beauty of this recipe is that it uses both store-bought and homemade components, so it’s perfect for beginners who want to create something delicious without feeling overwhelmed. Here’s everything you’ll need:
For the Brownie Layer:
- 1 box walnut brownie mix (follow the package instructions, including walnuts for extra texture)
For the Cheesecake Layer:
- 24 ounces cream cheese (three 8-ounce packages, softened)
- 3/4 cup sugar
- 3 eggs
- 1 teaspoon vanilla extract
For the Chocolate Ganache:
- 1/2 cup semi-sweet chocolate chips
- 1/4 cup heavy whipping cream
For the Whipped Cream Topping:
- 1 cup heavy whipping cream
- 1/2 cup powdered sugar
- 1 teaspoon vanilla extract
- 1/4 cup chopped peanuts (optional)
Tools You’ll Need:
- Springform pan (for easy removal of the cheesecake)
- Stand mixer or electric hand mixer
- Piping bag with star tip (optional, for a decorative whipped cream finish)
Ingredient Substitutions:
- Brownie Layer: If you prefer a gluten-free option, you can use a gluten-free brownie mix.
- Cheesecake Layer: Low-fat cream cheese can be used as a substitute for regular cream cheese to reduce the richness.
- Whipped Cream Topping: For a lighter option, you can substitute the heavy whipping cream with whipped topping (like Cool Whip), though the texture may vary slightly.
- Nuts: If you’re not a fan of peanuts, you can use chopped walnuts or almonds for the topping instead.
These ingredients are easy to find at your local grocery store, and the fact that you only need to follow simple instructions for the brownie base and the cheesecake filling makes it a great choice for beginners. In addition, the whipped cream and chocolate ganache are easy to make and provide a finishing touch that makes the dessert look polished and professional.
Step-by-Step Instructions
This cheesecake requires a few steps, but don’t worry, I’ll walk you through each one to ensure your dessert turns out perfectly.
- Preheat and Prepare: Start by preheating your oven to 350°F (175°C). This ensures your brownie layer bakes evenly and that your cheesecake bakes to perfection. Grease a springform pan with non-stick spray or line it with parchment paper to prevent sticking. The springform pan is essential for an easy release, which is important when working with a dessert that has multiple layers.
- Prepare the Brownie Layer: Follow the instructions on your walnut brownie mix. Typically, you’ll combine the dry mix with eggs, oil, and water (check the package for specific amounts). Stir until the batter is smooth. Pour the batter into the prepared springform pan, making sure it’s evenly spread. Bake for 30-40 minutes or until a toothpick inserted into the center comes out mostly clean (a few moist crumbs are okay). Once baked, allow the brownies to cool completely in the pan.
Pro Tip: Let the brownies cool completely before adding the cheesecake layer to avoid mixing the two components while still hot. The brownie base needs to set first so that the cheesecake layer doesn’t melt into it.
- Prepare the Cheesecake Mixture: While your brownie layer cools, it’s time to make the cheesecake. In a stand mixer, beat the softened cream cheese and sugar on medium-high speed until the mixture is light and fluffy. This should take about 2-3 minutes. The mixture will become smooth, and the sugar should dissolve into the cream cheese completely. Add the eggs one at a time, making sure each egg is fully incorporated before adding the next. Finally, mix in the vanilla extract. The cheesecake batter should be smooth and creamy.
- Layering the Cheesecake: Once the brownie base has cooled, pour the cheesecake mixture on top of the brownie layer. Use a spatula to smooth the top evenly. Bake the cheesecake at 350°F (175°C) for about 1 hour or until the center is almost set. The cheesecake will continue to set as it cools. Let it cool to room temperature, then place it in the refrigerator overnight to chill. It’s important to allow the cheesecake to cool fully to room temperature before refrigerating, as this will help it maintain its structure when chilled.
Pro Tip: If you notice that the edges of your cheesecake are getting too brown or starting to crack, try lowering the oven temperature by 25°F next time to prevent overbaking.
- Make the Chocolate Ganache: While your cheesecake is chilling, it’s time to prepare the chocolate ganache. Place the semi-sweet chocolate chips in a microwave-safe bowl. Add the heavy whipping cream and microwave in 45-second intervals, stirring in between, until the chocolate is completely melted and the mixture is smooth. Once ready, let the ganache cool slightly before pouring it over the chilled cheesecake. Refrigerate again for another hour to let the ganache firm up.
- Whipped Cream Topping: Once your cheesecake and ganache are fully set, it’s time for the final touch—whipped cream! In a mixing bowl, beat the heavy whipping cream with powdered sugar and vanilla extract on high speed until stiff peaks form. If you have a piping bag with a star tip, you can pipe the whipped cream around the edges of the cheesecake for a decorative finish. Sprinkle with chopped peanuts (if using) for added crunch and flavor. This final step will not only add texture but also make your cheesecake look professional and ready for any special occasion.
Beginner Tips and Notes
Baking can be intimidating for beginners, but with a few helpful tips, you’ll feel more confident tackling this dessert.
- Check the Brownies: Don’t open the oven door too often while the brownies are baking, as this can cause them to collapse. When you check for doneness, do it quickly and only once. A toothpick should come out with a few moist crumbs, but not wet batter.
- Room Temperature Cream Cheese: Make sure your cream cheese is softened before mixing it with sugar. Cold cream cheese will cause the batter to be lumpy and difficult to blend smoothly. If you forget to take the cream cheese out ahead of time, you can microwave it for about 10-15 seconds to soften it quickly.
- Be Patient: The key to a perfect cheesecake is patience. Let the cheesecake cool to room temperature before refrigerating it, and don’t rush the chilling process. This ensures the cheesecake sets properly and doesn’t fall apart. Cheesecake needs time to firm up and reach its full flavor potential, so resist the urge to cut into it right away.
- Watch the Ganache: If your ganache seems too thick, you can add a tiny bit more cream. If it’s too thin, let it cool and thicken up before pouring it over the cheesecake. Ganache should have a smooth, glossy finish and should pour easily but not be runny.
Serving Suggestions
This Hot Fudge Sundae Brownie Cheesecake is rich enough to stand on its own, but if you want to elevate the experience, here are a few ideas:
- Fresh Fruit: Serve with fresh strawberries, raspberries, or banana slices for a refreshing contrast to the richness of the cheesecake. The acidity of the fruit helps balance out the sweetness and makes for a beautiful presentation.
- Hot Fudge Sauce: For extra indulgence, drizzle additional hot fudge sauce over the top of each slice just before serving. You can even warm it slightly for a melty effect.
- Coffee Pairing: A strong cup of coffee or espresso pairs beautifully with this dessert, balancing out the sweetness and providing a nice contrast to the creamy cheesecake. A dark roast or cappuccino would work particularly well.
- Ice Cream: A scoop of vanilla or chocolate ice cream on the side can take this dessert to the next level. The cold ice cream complements the richness of the cheesecake and creates a delightful contrast in textures.
Storage Tips: This cheesecake keeps well in the fridge for up to 3 days. Be sure to cover it tightly with plastic wrap or store it in an airtight container to maintain its freshness. You can also freeze leftovers for up to a month. Just be sure to thaw it overnight in the fridge before serving. If you freeze it, be sure to wrap it tightly to prevent freezer burn.

Conclusion
This Hot Fudge Sundae Brownie Cheesecake is a showstopper dessert that’s easier to make than it looks, making it ideal for beginner cooks who want to create something impressive. Its layers of rich brownie, creamy cheesecake, decadent ganache, and fluffy whipped cream come together in perfect harmony, offering a satisfying and indulgent treat. Whether you’re celebrating a special occasion or simply craving a sweet, chocolatey delight, this cheesecake is sure to impress. I encourage you to give it a try, and if you do, let me know how it turned out! Don’t forget to share your photos and experiences in the comments below. Happy baking! This recipe is a great example of how easy it can be to make a delicious, layered dessert from scratch, and I’m sure you’ll enjoy the process as much as the final result. So, go ahead and give it a try—you’re going to love the journey and the mouthwatering end result!


