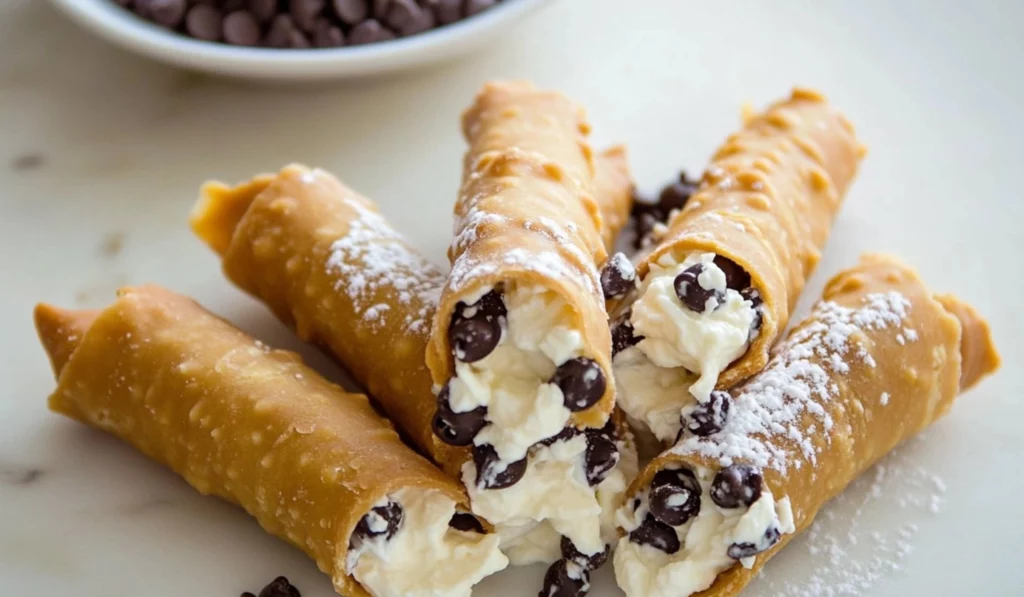
Cannoli, a classic Italian dessert, has become a beloved treat around the world. The crunchy, golden-brown shells filled with a smooth, creamy filling make it one of the most recognizable Italian desserts. While making cannoli might seem daunting to some, particularly with the idea of frying the shells, there’s good news—today’s recipe focuses on the part that makes cannoli so special: the filling. By skipping the frying process and opting for store-bought cannoli shells, we can focus on creating the perfect creamy filling that will make your dessert a hit at any occasion. This easy cannoli filling recipe allows you to enjoy the deliciousness of this dessert with minimal fuss.
How to Make Cannoli Filling: A Beginner’s Guide to the Perfect Italian Dessert

Cannoli are a classic Italian dessert that combines crispy shells with a creamy, sweet filling. While the idea of making cannoli from scratch might seem intimidating, this recipe simplifies it by focusing on the delicious filling. With store-bought shells and easy-to-follow steps, you’ll create a silky, sweet filling with a hint of vanilla and chocolate chips, making this dessert perfect for any occasion. Let’s dive in and make your homemade cannoli filling a breeze!
- Prep Time: 15 minutes
- Cook Time: 0 minutes
- Total Time: 6 hours 15 minutes
- Yield: 8 cannolis
- Category: Dessert
- Method: Mixing, Filling
- Cuisine: Italian, Chocolate
- Diet: Vegetarian
Ingredients
- Ricotta cheese (2 cups): The cornerstone of any good cannoli filling. It’s best to use full-fat ricotta cheese for the richest flavor and the creamiest texture. Drain it well before using to avoid excess moisture in the filling.
- Confectioners’ sugar (1 cup): This ingredient sweetens the filling and helps create a smooth, velvety texture. It dissolves quickly, ensuring your filling remains lump-free.
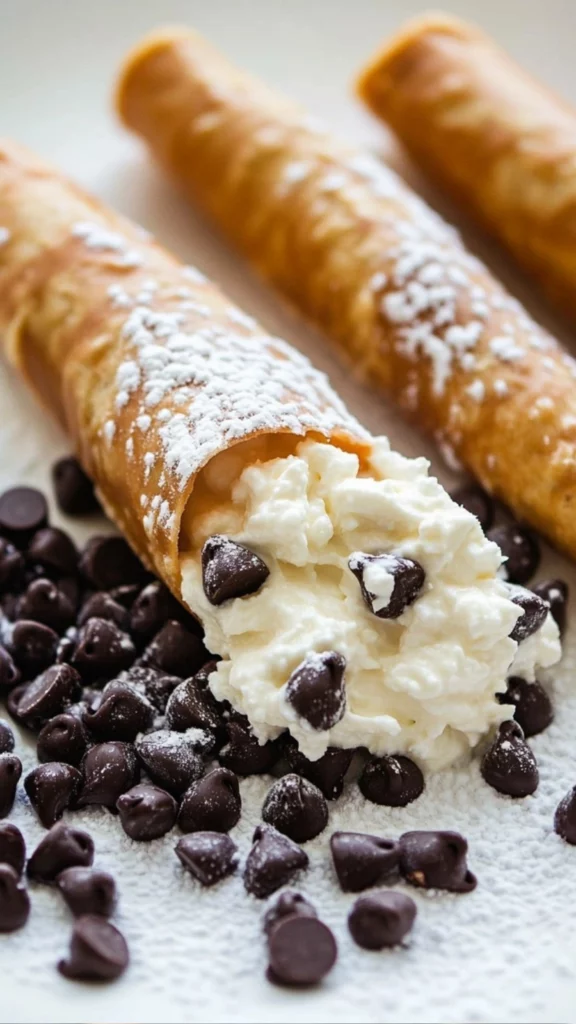
- Mini chocolate chips (3/4 cup, divided): These provide a delightful crunch and a touch of chocolatey goodness to your cannoli filling. You’ll use part of them inside the filling and the rest to garnish the ends of your filled cannoli shells.
- Pure vanilla extract (1 and 1/2 teaspoons): This adds a subtle sweetness and deep flavor to the filling, balancing out the richness of the ricotta and cream.
- Fresh orange zest (optional, 2 teaspoons): Adding orange zest gives the filling a fresh, citrusy note that pairs beautifully with the sweet ricotta and chocolate. It’s optional but highly recommended for extra flavor.
Instructions
1. Prepare the Ricotta Filling:
In a large mixing bowl, combine the drained ricotta cheese, confectioners’ sugar, 1/4 cup of the mini chocolate chips, and the vanilla extract. If you’re using the optional orange zest, add it to the mixture now. Using a spatula or a hand mixer, mix everything together until smooth and well combined. Be sure to scrape the sides of the bowl to ensure all the ingredients are fully incorporated.
2. Pipe the Filling:
Once the ricotta mixture is smooth, you can begin filling the cannoli shells. To do this, place the filling in a pastry bag fitted with a 1/2-inch open tip. If you don’t have a piping bag, you can use a zip-top plastic bag and snip off the corner to create a DIY piping bag.
3. Fill the Cannoli Shells:
Gently pipe the filling into the cannoli shells, filling one side halfway before continuing to the other side. Be careful not to overfill the shells, as they might crack or break under too much pressure. If you don’t have a piping bag, you can also spoon the filling into the shells with a small spoon or spatula. The goal is to fill each shell evenly, without excess spilling out.
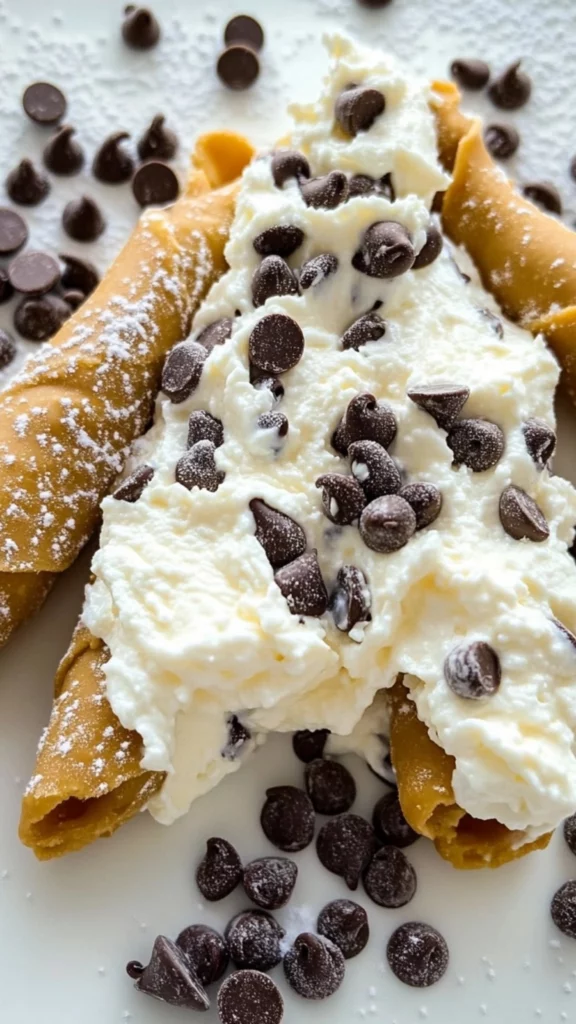
4. Garnish and Serve:
Once all the cannoli shells are filled, take the remaining mini chocolate chips and place them on a small plate. Dip the ends of each cannoli into the chocolate chips so that they stick to the filling. This adds a delightful chocolatey crunch and extra flavor to each bite. Finish by lightly dusting the cannoli with powdered sugar for a beautiful presentation.
Cannoli are best enjoyed immediately after being filled, as the shells can become soggy over time. However, if you’re not serving them right away, you can store the filling and shells separately in the refrigerator for up to 24 hours. Just make sure to fill the shells right before serving to maintain the crisp texture of the shells.
Notes
- Draining the Ricotta: This step is non-negotiable. Ricotta that hasn’t been properly drained can result in a runny filling that won’t hold its shape. If you don’t have a fine mesh strainer, you can also use a cheesecloth or a clean kitchen towel to drain the ricotta.
- Filling the Cannoli: Be gentle when filling the cannoli shells. If you apply too much pressure, the shells may crack. It’s better to pipe in the filling slowly and carefully than to overfill them all at once.
- Flavor Customization: Don’t hesitate to add your own twist to the filling. You can experiment with other flavorings, such as cinnamon, chocolate powder, or even a splash of liqueur like amaretto or marsala wine for an added depth of flavor.
- Leftover Filling: If you have leftover filling (which is rare, as cannoli are so delicious), you can use it as a dip for fruit, graham crackers, or even spread it on toast as a unique breakfast option.
When I first made cannoli filling, I was looking for a way to bring a taste of Italy into my kitchen without the mess and hassle of frying shells. The simplicity of this recipe, along with its rich flavor, won me over instantly. I loved how easy it was to make the filling, and the fact that I could skip the frying process without sacrificing flavor or authenticity made it a win for me. This cannoli filling recipe is perfect for beginners because it’s straightforward, quick, and foolproof, yet the final result is an indulgent and crowd-pleasing dessert.
In this guide, we’ll break down how to make cannoli filling from start to finish. From gathering the ingredients to assembling the cannoli, this tutorial is designed to help you create a dessert that looks and tastes like it’s from an Italian bakery. Let’s dive into the delicious world of cannoli and learn how to make this dessert right at home.
Ingredients and Preparation
Before we begin the fun part of mixing and filling, let’s start by gathering the ingredients. This cannoli filling recipe requires only a few basic ingredients, most of which you likely have in your kitchen already. Here’s what you’ll need:
Ingredients:
- Ricotta cheese (2 cups): The cornerstone of any good cannoli filling. It’s best to use full-fat ricotta cheese for the richest flavor and the creamiest texture. Drain it well before using to avoid excess moisture in the filling.
- Confectioners’ sugar (1 cup): This ingredient sweetens the filling and helps create a smooth, velvety texture. It dissolves quickly, ensuring your filling remains lump-free.
- Mini chocolate chips (3/4 cup, divided): These provide a delightful crunch and a touch of chocolatey goodness to your cannoli filling. You’ll use part of them inside the filling and the rest to garnish the ends of your filled cannoli shells.
- Pure vanilla extract (1 and 1/2 teaspoons): This adds a subtle sweetness and deep flavor to the filling, balancing out the richness of the ricotta and cream.
- Fresh orange zest (optional, 2 teaspoons): Adding orange zest gives the filling a fresh, citrusy note that pairs beautifully with the sweet ricotta and chocolate. It’s optional but highly recommended for extra flavor.
You can find store-bought cannoli shells at most grocery stores, especially in the international foods section. If you prefer to make your own shells, you can follow a recipe that requires frying or baking your shells from scratch, but this version simplifies the process by using pre-made shells, making it quicker and more beginner-friendly.
Preparation:
The preparation process for this recipe is simple, but there is one important step that will make your filling smooth and creamy: draining the ricotta cheese. Here’s how to prepare the ingredients before you start mixing:
- Drain the Ricotta: The key to a perfect cannoli filling is ensuring that the ricotta cheese is as dry as possible. Place the ricotta cheese in a fine mesh strainer and set it over a bowl to catch any excess liquid. Let the ricotta drain in the refrigerator for at least 6 hours, or up to 24 hours. This step is essential because too much moisture in the ricotta can cause the filling to be runny, which will result in a less-than-ideal texture.
- Orange Zest (Optional): If you decide to include the fresh orange zest, use a fine grater to zest the skin of the orange. Make sure to only grate the orange skin, not the bitter white pith underneath. The zest adds a refreshing, aromatic flavor that complements the richness of the ricotta and sugar.
Once your ricotta is well-drained, you’re ready to move on to the next step: mixing the filling!
Step-by-Step Instructions
Making cannoli filling is a straightforward process that even beginners can easily tackle. Here’s how to make the filling, step by step:
1. Prepare the Ricotta Filling:
In a large mixing bowl, combine the drained ricotta cheese, confectioners’ sugar, 1/4 cup of the mini chocolate chips, and the vanilla extract. If you’re using the optional orange zest, add it to the mixture now. Using a spatula or a hand mixer, mix everything together until smooth and well combined. Be sure to scrape the sides of the bowl to ensure all the ingredients are fully incorporated.
2. Pipe the Filling:
Once the ricotta mixture is smooth, you can begin filling the cannoli shells. To do this, place the filling in a pastry bag fitted with a 1/2-inch open tip. If you don’t have a piping bag, you can use a zip-top plastic bag and snip off the corner to create a DIY piping bag.
3. Fill the Cannoli Shells:
Gently pipe the filling into the cannoli shells, filling one side halfway before continuing to the other side. Be careful not to overfill the shells, as they might crack or break under too much pressure. If you don’t have a piping bag, you can also spoon the filling into the shells with a small spoon or spatula. The goal is to fill each shell evenly, without excess spilling out.
4. Garnish and Serve:
Once all the cannoli shells are filled, take the remaining mini chocolate chips and place them on a small plate. Dip the ends of each cannoli into the chocolate chips so that they stick to the filling. This adds a delightful chocolatey crunch and extra flavor to each bite. Finish by lightly dusting the cannoli with powdered sugar for a beautiful presentation.
Cannoli are best enjoyed immediately after being filled, as the shells can become soggy over time. However, if you’re not serving them right away, you can store the filling and shells separately in the refrigerator for up to 24 hours. Just make sure to fill the shells right before serving to maintain the crisp texture of the shells.
Beginner Tips and Notes
Making cannoli filling is a great way to practice your baking skills, and there are a few tips and notes that can help ensure your filling turns out perfect every time:
- Draining the Ricotta: This step is non-negotiable. Ricotta that hasn’t been properly drained can result in a runny filling that won’t hold its shape. If you don’t have a fine mesh strainer, you can also use a cheesecloth or a clean kitchen towel to drain the ricotta.
- Filling the Cannoli: Be gentle when filling the cannoli shells. If you apply too much pressure, the shells may crack. It’s better to pipe in the filling slowly and carefully than to overfill them all at once.
- Flavor Customization: Don’t hesitate to add your own twist to the filling. You can experiment with other flavorings, such as cinnamon, chocolate powder, or even a splash of liqueur like amaretto or marsala wine for an added depth of flavor.
- Leftover Filling: If you have leftover filling (which is rare, as cannoli are so delicious), you can use it as a dip for fruit, graham crackers, or even spread it on toast as a unique breakfast option.
Serving Suggestions
Cannoli can be served on their own, but they also pair wonderfully with a variety of other desserts and beverages. Here are some ways to elevate your cannoli presentation:
- Platter Presentation: Arrange the filled cannoli on a beautiful serving platter with fresh mint leaves or edible flowers for a touch of elegance.
- Pair with Coffee or Espresso: Serve cannoli with a strong cup of espresso or a rich Italian coffee to complement the sweetness of the filling and the crunch of the shell.
- Ice Cream Topping: Crumble leftover cannoli shells and sprinkle them over a scoop of ice cream for an unexpected but delightful topping.
- Festive Serving: Cannoli make an excellent addition to any special occasion, from birthdays to holidays. Pair them with fruit or serve them as part of a dessert spread at a dinner party.
Conclusion
Making cannoli filling is an incredibly rewarding experience that’s perfect for both beginners and seasoned cooks alike. With just a few simple ingredients and a little bit of patience, you can create a dessert that’s rich, creamy, and bursting with Italian flavor. The beauty of this recipe is in its simplicity—you don’t need to fry your own shells, and the filling comes together quickly and easily. Whether you’re preparing cannoli for a holiday celebration, a birthday, or just because, this easy cannoli filling recipe will surely impress everyone who tries it.
Now that you have the recipe, it’s time to give it a try! Get creative with your fillings, and don’t forget to share your results in the comments. We’d love to hear how your cannoli turned out and any fun twists you added to make it your own.


