The sweet memories of summer often come with the tangy taste of an orange popsicle and the creamy texture of its frozen counterpart. The moment you bite into a creamsicle, you’re transported to a place of carefree days, bright sun, and a refreshing treat that quenches your thirst for something sweet and cool. Now, imagine that same iconic flavor wrapped in a buttery, crisp shortbread crust—enter the Jello Creamsicle Pie. This pie isn’t just another dessert; it’s an experience, a burst of citrusy nostalgia in every creamy bite. It’s simple enough for anyone to make, yet it looks and tastes so fancy that your friends and family will be amazed.

Jello Creamsicle Pie: A Delightful Orange Dream for Your Taste Buds

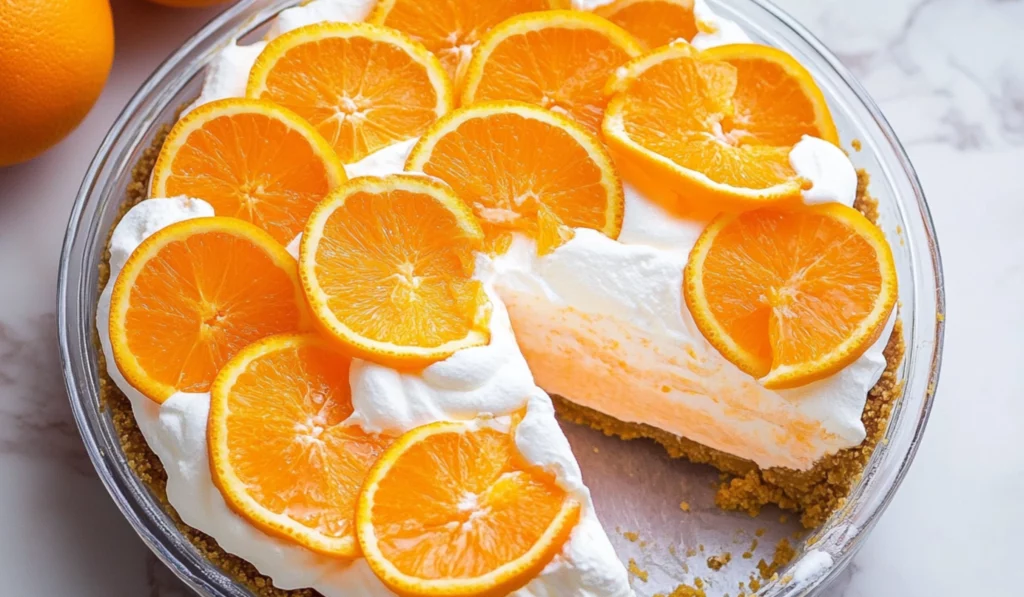
Imagine the refreshing taste of an orange creamsicle—now in pie form! This Jello Creamsicle Pie brings the classic flavor together with a smooth, creamy filling and a buttery shortbread crust. It’s a no-bake dessert that’s as easy as it is delicious, perfect for beginners and anyone craving a light, tangy treat. With minimal prep time and maximum flavor, this pie is sure to be a crowd-pleaser at any gathering.
- Prep Time: 30 minutes
- Cook Time: 0 minutes
- Total Time: 2 hours
- Yield: 8 slices 1x
- Category: Dessert
- Method: No-Bake
- Cuisine: American
- Diet: Vegetarian
Ingredients
For the crust:
- 3 cups shortbread cookies (about one package)
- ¼ cup butter (melted)
For the filling:
- 1 orange, peeled and sliced
- 2 tablespoons orange zest
- 1 teaspoon vanilla extract
- ¼ cup orange juice
- 1 box of orange Jello (3-ounce)
- 12 ounces cream cheese, softened and cubed, divided
- 12 ounces Cool Whip, divided
- 1 can sweetened condensed milk (14-ounce)
For the topping:
- Orange slices for garnish (optional)
Instructions
Step 1: Prepare the Pie Dish
Before diving into the crust, it’s important to prepare your pie dish. Use a non-stick spray to lightly coat the dish, ensuring that the pie will come out cleanly after chilling. This small step helps prevent sticking, which can be a problem when dealing with no-bake crusts.
Step 2: Make the Shortbread Cookie Crust
To create the crust, you’ll need to crush your shortbread cookies. If you have a food processor, it makes this step easy, as you simply pulse the cookies until they reach a fine, sand-like consistency. If you don’t have a food processor, you can use a zip-top bag and a rolling pin to crush the cookies by hand. This method might take a bit longer, but the result will be the same.
Once the cookies are crushed, add the melted butter to the crumbs. Stir everything together until the crumbs are evenly coated with butter. The butter will help the crust hold together when pressed into the pie dish.
Take your pie dish and press the cookie mixture firmly into the bottom and up the sides. This will create a sturdy, crunchy crust. After pressing it into shape, place the dish in the freezer while you prepare the filling. Chilling the crust helps it set and become more firm.
Step 3: Prepare the Orange Flavor Base
Now it’s time to create that signature creamsicle flavor. Using your food processor (or a blender if needed), add the peeled and sliced orange, orange zest, vanilla extract, and orange juice. Blend everything together until smooth. The orange slices provide the refreshing citrusy base, while the zest adds a punch of aromatic flavor that will elevate your pie to the next level. Once blended, set aside.
Step 4: Make the Creamy Filling
For the filling, start by combining 8 ounces of softened cream cheese with the orange Jello powder in a stand mixer. Beat the ingredients together until smooth. The Jello powder will thicken the filling, giving it a nice, firm texture once chilled.
Next, add in the sweetened condensed milk and continue to mix until fully incorporated. This step is crucial as it adds richness and sweetness to the filling. After that, fold in 8 ounces of Cool Whip. This gives the filling its light, fluffy texture, making it perfectly creamy without being too heavy. The combination of cream cheese, sweetened condensed milk, and Cool Whip is what makes this pie irresistibly smooth and indulgent.
Step 5: Add the Orange Puree
Take your freshly made orange puree and beat it into the creamy filling mixture. The vibrant orange flavor will blend seamlessly into the filling, ensuring that every bite of the pie has that refreshing, citrusy kick. Mix until everything is well combined, and the filling is smooth.
Step 6: Assemble the Pie
With the crust chilled and the filling ready, it’s time to assemble the pie. Carefully pour the orange filling into the pie crust, spreading it evenly with a rubber spatula. Be sure to smooth the top of the pie for a clean, polished look. Once assembled, place the pie in the fridge for about 1 to 2 hours. If you prefer a more frozen texture, you can place it in the freezer for about an hour. The longer the pie chills, the firmer the filling will become.
Step 7: Prepare the Topping
While the pie chills, whip together the remaining 4 ounces of cream cheese and Cool Whip until smooth. This whipped topping is what gives the pie its decadent, creamy finish. Once whipped, set it aside in the fridge.
Step 8: Garnish and Serve
After the pie has chilled to your desired consistency, take it out and spread the whipped cream cheese mixture on top of the pie. Use a rubber spatula to smooth it out, making sure to cover the entire surface of the pie. Garnish with fresh orange slices for a burst of color and a hint of freshness. The bright orange slices add the perfect finishing touch to this gorgeous dessert.
Notes
- If your crust is too crumbly: You may not have added enough butter, or you might not have pressed it firmly enough into the dish. Try adding a bit more butter and pressing the crust again for a firmer base.
- If the filling is too runny: Ensure that your cream cheese is softened before mixing. Cold cream cheese doesn’t blend as well and can leave clumps in the filling. If you’re using a hand mixer, make sure to beat the ingredients long enough to create a smooth consistency.
- If the Cool Whip doesn’t whip up properly: Make sure that the Cool Whip is cold and well-chilled before using it in the recipe. If it’s too warm, it may not achieve the right fluffy texture.
Whether you’re new to the kitchen or looking for an easy dessert to impress, this recipe is perfect for beginners. You don’t need complicated baking techniques, just some basic ingredients and a little time to chill. It’s a fantastic way to indulge in a refreshing, light dessert without spending hours in the kitchen. In fact, this pie might just become your go-to for casual summer gatherings, holiday dinners, or when you need something sweet to round off your weeknight meal.
Why This Recipe is Perfect for Beginners
If you’re someone who has never baked a pie before or if you’re just learning the ropes of dessert making, this Jello Creamsicle Pie is the perfect place to start. The beauty of this recipe lies in its simplicity. No baking is involved, and the majority of the prep is just mixing and chilling. Plus, the ingredients are easily accessible, and there’s little room for error. For beginners, that’s a huge plus!
For those who have never attempted a pie before, the most intimidating part might be making the crust. But, don’t worry—this crust is made by crushing shortbread cookies and mixing them with butter, which is far easier than making a traditional pie dough. The rest of the recipe involves making a creamy filling that’s as easy as mixing a few ingredients together. With a stand mixer or even a hand mixer, you can achieve a smooth, fluffy filling without any guesswork. All you need is patience for the chilling time, and the end result will be a pie that looks and tastes like a professional bake.
Additionally, this dessert is a healthier choice compared to traditional pies, as it doesn’t require heavy ingredients like cream or eggs. The use of light Cool Whip, sweetened condensed milk, and low-fat cream cheese ensures you’re indulging in something creamy without going overboard. You still get the rich taste of a decadent pie, but in a lighter, more refreshing form. If you’re looking for a fun and guilt-free treat to serve at a family gathering, this Jello Creamsicle Pie fits the bill perfectly.
Ingredients and Preparation: Everything You Need for a Creamsicle Dream
Before you get started, let’s take a closer look at the ingredients you’ll need to make this irresistible pie. These ingredients come together quickly to create a pie that feels both indulgent and refreshing.
For the crust:
- 3 cups shortbread cookies (about one package)
- ¼ cup butter (melted)
For the filling:
- 1 orange, peeled and sliced
- 2 tablespoons orange zest
- 1 teaspoon vanilla extract
- ¼ cup orange juice
- 1 box of orange Jello (3-ounce)
- 12 ounces cream cheese, softened and cubed, divided
- 12 ounces Cool Whip, divided
- 1 can sweetened condensed milk (14-ounce)
For the topping:
- Orange slices for garnish (optional)
Tools and Equipment:
- Pie dish
- Non-stick cooking spray
- Mixing bowls
- Food processor
- Measuring cups and spoons
- Stand mixer (or hand mixer)
- Rubber spatula
Ingredient Flexibility:
One of the best things about this recipe is how flexible it can be. Don’t hesitate to tweak the ingredients based on your taste or what’s available in your pantry. For instance, if you’re out of shortbread cookies, you can easily substitute them with graham crackers or any other crunchy cookies you have on hand. The flavor will change slightly, but the crunch and sweetness will remain. If you prefer a gluten-free version, gluten-free cookies can work in place of the regular shortbread.
For the filling, you could swap the sweetened condensed milk for a lighter version or substitute it with half-and-half or heavy cream if you prefer. If you’re not a fan of orange flavor, you could experiment with lemon or lime Jello for a citrus twist. The Cool Whip can also be replaced with whipped cream if you’d like a more natural option, though the texture might be slightly different.
Step-by-Step Instructions: Making Your Jello Creamsicle Pie
The magic of this pie lies in the simplicity of the steps. Once you have your ingredients ready, you can begin to assemble your dessert. Here’s how:
Step 1: Prepare the Pie Dish
Before diving into the crust, it’s important to prepare your pie dish. Use a non-stick spray to lightly coat the dish, ensuring that the pie will come out cleanly after chilling. This small step helps prevent sticking, which can be a problem when dealing with no-bake crusts.
Step 2: Make the Shortbread Cookie Crust
To create the crust, you’ll need to crush your shortbread cookies. If you have a food processor, it makes this step easy, as you simply pulse the cookies until they reach a fine, sand-like consistency. If you don’t have a food processor, you can use a zip-top bag and a rolling pin to crush the cookies by hand. This method might take a bit longer, but the result will be the same.
Once the cookies are crushed, add the melted butter to the crumbs. Stir everything together until the crumbs are evenly coated with butter. The butter will help the crust hold together when pressed into the pie dish.
Take your pie dish and press the cookie mixture firmly into the bottom and up the sides. This will create a sturdy, crunchy crust. After pressing it into shape, place the dish in the freezer while you prepare the filling. Chilling the crust helps it set and become more firm.
Step 3: Prepare the Orange Flavor Base
Now it’s time to create that signature creamsicle flavor. Using your food processor (or a blender if needed), add the peeled and sliced orange, orange zest, vanilla extract, and orange juice. Blend everything together until smooth. The orange slices provide the refreshing citrusy base, while the zest adds a punch of aromatic flavor that will elevate your pie to the next level. Once blended, set aside.
Step 4: Make the Creamy Filling
For the filling, start by combining 8 ounces of softened cream cheese with the orange Jello powder in a stand mixer. Beat the ingredients together until smooth. The Jello powder will thicken the filling, giving it a nice, firm texture once chilled.
Next, add in the sweetened condensed milk and continue to mix until fully incorporated. This step is crucial as it adds richness and sweetness to the filling. After that, fold in 8 ounces of Cool Whip. This gives the filling its light, fluffy texture, making it perfectly creamy without being too heavy. The combination of cream cheese, sweetened condensed milk, and Cool Whip is what makes this pie irresistibly smooth and indulgent.
Step 5: Add the Orange Puree
Take your freshly made orange puree and beat it into the creamy filling mixture. The vibrant orange flavor will blend seamlessly into the filling, ensuring that every bite of the pie has that refreshing, citrusy kick. Mix until everything is well combined, and the filling is smooth.
Step 6: Assemble the Pie
With the crust chilled and the filling ready, it’s time to assemble the pie. Carefully pour the orange filling into the pie crust, spreading it evenly with a rubber spatula. Be sure to smooth the top of the pie for a clean, polished look. Once assembled, place the pie in the fridge for about 1 to 2 hours. If you prefer a more frozen texture, you can place it in the freezer for about an hour. The longer the pie chills, the firmer the filling will become.
Step 7: Prepare the Topping
While the pie chills, whip together the remaining 4 ounces of cream cheese and Cool Whip until smooth. This whipped topping is what gives the pie its decadent, creamy finish. Once whipped, set it aside in the fridge.
Step 8: Garnish and Serve
After the pie has chilled to your desired consistency, take it out and spread the whipped cream cheese mixture on top of the pie. Use a rubber spatula to smooth it out, making sure to cover the entire surface of the pie. Garnish with fresh orange slices for a burst of color and a hint of freshness. The bright orange slices add the perfect finishing touch to this gorgeous dessert.
Beginner Tips and Notes: Troubleshooting Made Easy
Even though this recipe is beginner-friendly, it’s always helpful to have a few tips up your sleeve to ensure everything goes smoothly. Here are some troubleshooting tips:
- If your crust is too crumbly: You may not have added enough butter, or you might not have pressed it firmly enough into the dish. Try adding a bit more butter and pressing the crust again for a firmer base.
- If the filling is too runny: Ensure that your cream cheese is softened before mixing. Cold cream cheese doesn’t blend as well and can leave clumps in the filling. If you’re using a hand mixer, make sure to beat the ingredients long enough to create a smooth consistency.
- If the Cool Whip doesn’t whip up properly: Make sure that the Cool Whip is cold and well-chilled before using it in the recipe. If it’s too warm, it may not achieve the right fluffy texture.
Serving Suggestions: How to Elevate Your Jello Creamsicle Pie
This pie is a complete treat on its own, but you can always elevate the experience by pairing it with complementary sides or drinks. Here are some serving ideas:
- Serve the pie with a citrusy side salad that features orange or grapefruit slices, drizzled with a light vinaigrette.
- For an extra indulgence, top your slice with a scoop of vanilla ice cream or a dollop of whipped cream.
- Add a tropical twist by serving the pie alongside a refreshing coconut water or iced tea.
Leftovers and Storage Tips
If you’re lucky enough to have leftovers, you can store the pie in an airtight container in the refrigerator for up to 3 days. For longer storage, freeze the pie (wrapped tightly in plastic wrap and foil) for up to a month. Thaw in the fridge before serving for the best texture.

Conclusion: A Sweet Taste of Summer, All Year Long
There’s something magical about the combination of citrus and cream, and this Jello Creamsicle Pie brings that magic to life in the most refreshing and delicious way possible. With its easy prep, bright orange flavor, and creamy filling, this pie is perfect for beginner bakers and dessert lovers alike. It’s a quick, light dessert that’s perfect for hot days but can be enjoyed any time of year.
So, what are you waiting for? Try this easy and tasty recipe, and let us know how it turns out. We’d love to hear how you made this dessert your own or what creative twists you added. Get in the kitchen, whip up this Jello Creamsicle Pie, and treat yourself to a slice of nostalgia!


