A celebration of romance and affection calls for sweet indulgences, and these adorable Mini Cheesecake Hearts are the perfect treat to share with your loved ones. Creamy, dreamy, and perfectly portioned, they’re a delightful way to express your love and add a touch of homemade magic to any special occasion. Imagine presenting a platter of these charming heart-shaped cheesecakes, each one a miniature masterpiece of creamy filling and buttery crust. They’re a feast for the eyes and the taste buds, ideal for a romantic dinner, a festive gathering, or a sweet surprise for someone special. I remember the first time I made these Mini Cheesecake Hearts. It was a special occasion, and I wanted to create a dessert that was both beautiful and delicious. I was a relatively new baker, and the thought of making a full-sized cheesecake felt a bit daunting. But these mini versions were so approachable! They were easy to assemble, looked absolutely adorable, and tasted heavenly. They were the perfect sweet ending to a memorable celebration. This recipe is a fantastic introduction to the world of baking, demonstrating that delicious desserts don’t have to be complicated or time-consuming. It’s also a fun and creative way to express your love and add a personal touch to your celebrations.

Mini Cheesecake Hearts: A Sweet Symphony of Love

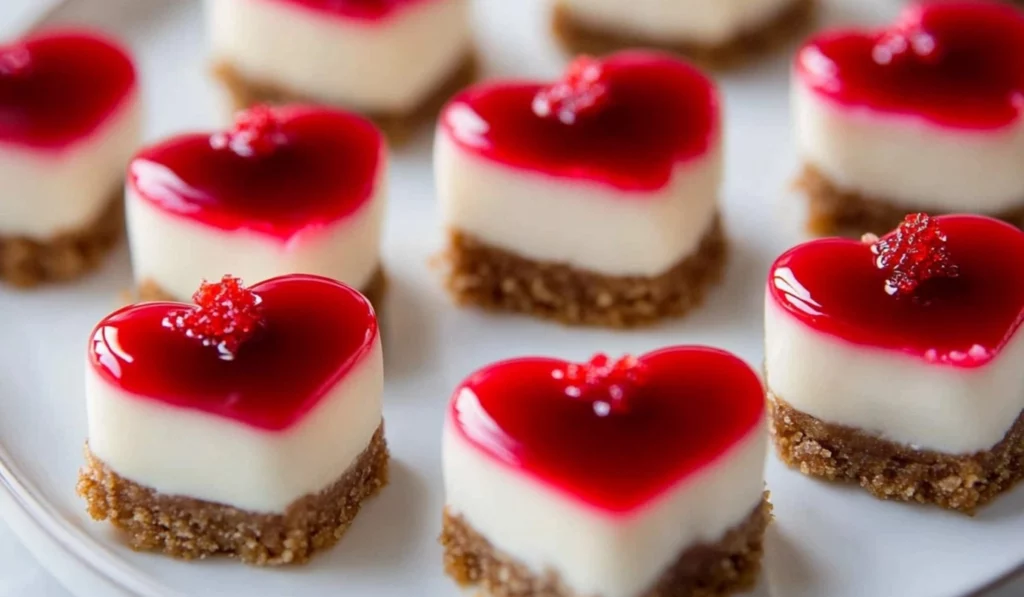
A special occasion calls for sweet indulgences, and these Mini Cheesecake Hearts are the perfect treat to share with your loved ones. Creamy, decadent, and perfectly portioned, they’re a delightful way to express your affection and add a touch of homemade charm to your celebrations. Imagine a platter overflowing with these adorable heart-shaped cheesecakes, each one a miniature masterpiece. It’s a feast for the eyes and the taste buds, perfect for any celebration. This easy recipe is ideal for beginner bakers, requiring minimal ingredients and delivering maximum flavor and visual appeal.
- Prep Time: 20 minutes
- Cook Time: 20 minutes
- Total Time: 40 minutes (plus chilling time)
- Yield: 8 mini cheesecakes 1x
- Category: Dessert
- Method: Baking
- Cuisine: American
- Diet: Vegetarian
Ingredients
For the Crust:
- 1 cup graham cracker crumbs
- ¼ cup (½ stick) butter, melted
For the Cheesecake Filling:
- 16 oz (2 packages) cream cheese, softened
- ½ cup granulated sugar
- 2 large eggs
- 1 tsp vanilla extract
- Red gel food coloring
Instructions
-
Preheat the Oven: Preheat your oven to 350°F (175°C). A properly preheated oven is essential for even baking and prevents the cheesecakes from cracking. Use an oven thermometer to ensure accurate temperature.
-
Prepare the Crusts: In a medium bowl, combine the graham cracker crumbs and melted butter. Mix well until the crumbs are evenly moistened and resemble wet sand. Press the mixture firmly into heart-shaped molds. You can use silicone molds, mini muffin tins lined with cupcake liners, or even individual ramekins. If using muffin tins, lightly grease them to prevent sticking. If you don’t have heart-shaped molds, you can use round molds and cut out heart shapes after baking using a heart-shaped cookie cutter. For a crispier crust, bake the crusts for 5-7 minutes before adding the filling.
-
Make the Cheesecake Filling: In a large bowl, beat the softened cream cheese and sugar together until smooth and creamy. It’s crucial that the cream cheese is softened to room temperature to prevent lumps in the batter. Use an electric mixer for best results, scraping down the sides of the bowl occasionally.
-
Add Eggs and Vanilla: Add the eggs one at a time, beating well after each addition. Then, stir in the vanilla extract. Don’t overmix the batter, as this can incorporate too much air and cause the cheesecakes to crack during baking. Mix until just combined.
-
Tint the Filling: Divide the cheesecake mixture into two bowls. Add red gel food coloring to one bowl and mix well until the desired color is achieved. Start with a small amount of food coloring and add more gradually until you reach the desired shade of pink or red. For a two-tone effect, leave some of the batter untinted.
-
Layer the Filling: Layer the red and white cheesecake mixtures into the prepared molds. You can create different patterns by alternating the colors. For a marbled effect, swirl the two colors together with a toothpick or knife. You can also create a layered effect by adding a spoonful of one color, followed by a spoonful of the other.
-
Bake: Bake for 20 minutes, or until the cheesecakes are set around the edges but still slightly jiggly in the center. The baking time may vary slightly depending on your oven and the size of your molds. Check for doneness by gently shaking the molds – the cheesecakes should be mostly set but still have a slight wiggle in the center.
-
Cool and Chill: Turn off the oven and let the cheesecakes cool completely in the oven with the door slightly ajar. This gradual cooling process helps prevent cracking. Once cooled, remove them from the oven and chill in the refrigerator for at least 2 hours before serving, or preferably overnight. Chilling allows the cheesecakes to set completely and become firm, making them easier to handle and serve.
Notes
- Softened Cream Cheese is Key: Ensure the cream cheese is fully softened to room temperature before mixing. This will prevent lumps in the batter and ensure a smooth and creamy cheesecake filling. If you’re short on time, you can microwave the cream cheese for a few seconds, but be careful not to overheat it.
- Don’t Overmix: Overmixing the cheesecake batter can incorporate too much air, which can cause the cheesecakes to crack during baking. Mix until just combined.
- Water Bath (Optional): For even smoother cheesecakes, you can place the molds in a larger baking pan and fill the pan with hot water halfway up the sides of the molds. This creates a water bath that helps the cheesecakes bake more evenly and prevents cracking.
- Checking for Doneness: The cheesecakes are done when they are set around the edges but still slightly jiggly in the center. They will firm up as they cool. Use a toothpick inserted into the center to check – it should come out with just a few moist crumbs attached.
- Preventing Cracks: To prevent cracks, avoid overbaking the cheesecakes and allow them to cool slowly in the oven with the door slightly ajar. Rapid temperature changes can cause cracking.
- Decorating: Get creative with decorating your Mini Cheesecake Hearts! You can top them with fresh berries, chocolate shavings, whipped cream, a drizzle of chocolate sauce, sprinkles, or even a dusting of powdered sugar. Consider using a piping bag to create elegant designs with whipped cream or chocolate ganache.
Ingredients and Preparation: The Building Blocks of Sweetness
These Mini Cheesecake Hearts use simple, readily available ingredients, making them a breeze to prepare.
For the Crust:
- 1 cup graham cracker crumbs – Alternative: You can use other cookie crumbs, such as Oreo crumbs (without the filling) or shortbread cookie crumbs, for a different flavor profile. You can also use a pre-made graham cracker crust to save time. For a gluten-free option, use gluten-free graham crackers or a gluten-free cookie crumb.
- ¼ cup (½ stick) butter, melted – Alternative: Coconut oil, melted, can be used for a dairy-free option. You can also use a vegan butter substitute. Browned butter adds a nutty depth of flavor.
For the Cheesecake Filling:
- 16 oz (2 packages) cream cheese, softened – Alternative: You can use Neufchâtel cheese for a slightly lighter option, but the texture might be slightly different. For a dairy-free version, consider using a vegan cream cheese alternative, but be aware that the baking time and texture may vary. Ensure the cream cheese is at room temperature for a smooth batter.
- ½ cup granulated sugar – Alternative: You can use a sugar substitute, such as stevia or erythritol, but the taste and texture may be slightly different. You can also use coconut sugar for a slightly different flavor. Adjust the amount of sugar to your preference.
- 2 large eggs – Alternative: For an egg-free option, you can try using a flax egg (1 tablespoon ground flaxseed meal mixed with 3 tablespoons water), but the texture may be slightly different. Aquafaba (the liquid from canned chickpeas) can also be used as an egg replacer, but the texture may be slightly different.
- 1 tsp vanilla extract – Alternative: You can use other extracts, such as almond extract or lemon extract, for a different flavor. You can also use vanilla bean paste for a more intense vanilla flavor. A splash of lemon juice enhances the cheesecake’s tang.
- Red gel food coloring – Alternative: You can use natural food coloring, such as beet juice or hibiscus powder, but the color may not be as vibrant. You can also use liquid food coloring, but gel food coloring is generally more concentrated and less likely to affect the consistency of the cheesecake filling. For a more natural look, use a combination of beet juice and a touch of cranberry juice.
Step-by-Step Instructions: Creating Culinary Love
These detailed, easy-to-follow instructions will guide you through each step of the process, ensuring your Mini Cheesecake Hearts turn out perfectly every time.
- Preheat the Oven: Preheat your oven to 350°F (175°C). A properly preheated oven is essential for even baking and prevents the cheesecakes from cracking. Use an oven thermometer to ensure accurate temperature.
- Prepare the Crusts: In a medium bowl, combine the graham cracker crumbs and melted butter. Mix well until the crumbs are evenly moistened and resemble wet sand. Press the mixture firmly into heart-shaped molds. You can use silicone molds, mini muffin tins lined with cupcake liners, or even individual ramekins. If using muffin tins, lightly grease them to prevent sticking. If you don’t have heart-shaped molds, you can use round molds and cut out heart shapes after baking using a heart-shaped cookie cutter. For a crispier crust, bake the crusts for 5-7 minutes before adding the filling.
- Make the Cheesecake Filling: In a large bowl, beat the softened cream cheese and sugar together until smooth and creamy. It’s crucial that the cream cheese is softened to room temperature to prevent lumps in the batter. Use an electric mixer for best results, scraping down the sides of the bowl occasionally.
- Add Eggs and Vanilla: Add the eggs one at a time, beating well after each addition. Then, stir in the vanilla extract. Don’t overmix the batter, as this can incorporate too much air and cause the cheesecakes to crack during baking. Mix until just combined.
- Tint the Filling: Divide the cheesecake mixture into two bowls. Add red gel food coloring to one bowl and mix well until the desired color is achieved. Start with a small amount of food coloring and add more gradually until you reach the desired shade of pink or red. For a two-tone effect, leave some of the batter untinted.
- Layer the Filling: Layer the red and white cheesecake mixtures into the prepared molds. You can create different patterns by alternating the colors. For a marbled effect, swirl the two colors together with a toothpick or knife. You can also create a layered effect by adding a spoonful of one color, followed by a spoonful of the other.
- Bake: Bake for 20 minutes, or until the cheesecakes are set around the edges but still slightly jiggly in the center. The baking time may vary slightly depending on your oven and the size of your molds. Check for doneness by gently shaking the molds – the cheesecakes should be mostly set but still have a slight wiggle in the center.
- Cool and Chill: Turn off the oven and let the cheesecakes cool completely in the oven with the door slightly ajar. This gradual cooling process helps prevent cracking. Once cooled, remove them from the oven and chill in the refrigerator for at least 2 hours before serving, or preferably overnight. Chilling allows the cheesecakes to set completely and become firm, making them easier to handle and serve.
Beginner Tips and Notes: Your Baking Companion
Baking should be a joyful and stress-free experience! Here are some helpful tips and notes to guide you:
- Softened Cream Cheese is Key: Ensure the cream cheese is fully softened to room temperature before mixing. This will prevent lumps in the batter and ensure a smooth and creamy cheesecake filling. If you’re short on time, you can microwave the cream cheese for a few seconds, but be careful not to overheat it.
- Don’t Overmix: Overmixing the cheesecake batter can incorporate too much air, which can cause the cheesecakes to crack during baking. Mix until just combined.
- Water Bath (Optional): For even smoother cheesecakes, you can place the molds in a larger baking pan and fill the pan with hot water halfway up the sides of the molds. This creates a water bath that helps the cheesecakes bake more evenly and prevents cracking.
- Checking for Doneness: The cheesecakes are done when they are set around the edges but still slightly jiggly in the center. They will firm up as they cool. Use a toothpick inserted into the center to check – it should come out with just a few moist crumbs attached.
- Preventing Cracks: To prevent cracks, avoid overbaking the cheesecakes and allow them to cool slowly in the oven with the door slightly ajar. Rapid temperature changes can cause cracking.
- Decorating: Get creative with decorating your Mini Cheesecake Hearts! You can top them with fresh berries, chocolate shavings, whipped cream, a drizzle of chocolate sauce, sprinkles, or even a dusting of powdered sugar. Consider using a piping bag to create elegant designs with whipped cream or chocolate ganache.
Serving Suggestions: Completing the Sweet Symphony
These Mini Cheesecake Hearts are a delightful dessert on their own, but they can be further enhanced with some thoughtful serving suggestions.
- Romantic Presentation: Arrange the Mini Cheesecake Hearts on a beautiful platter or cake stand. You can add some fresh flowers, rose petals, or a scattering of conversation hearts for a romantic touch. Consider using a heart-shaped serving platter for added charm.
- Complementary Flavors: Serve the cheesecakes with fresh berries, such as strawberries, raspberries, or blueberries, which complement the creamy cheesecake filling beautifully. The tartness of the berries balances the sweetness of the cheesecake.
- Chocolate Indulgence: Drizzle the cheesecakes with chocolate sauce or sprinkle them with chocolate shavings for an extra touch of decadence. A dark chocolate ganache would also be a delicious addition.
- Whipped Cream Delight: Top the cheesecakes with a dollop of freshly whipped cream for a light and airy addition. You can also flavor the whipped cream with a touch of vanilla extract or a hint of almond extract.
- Fruit Sauces: Drizzle the cheesecakes with a fruit sauce, such as raspberry sauce, strawberry sauce, or blueberry sauce, for added flavor and visual appeal. Homemade fruit sauces are easy to make and add a burst of fresh flavor.
- Garnishes: Add a sprig of mint, a few edible flowers, or a dusting of powdered sugar for an elegant touch. A small chocolate heart or a candy heart placed on top adds a festive touch.

Conclusion: A Heartfelt Culinary Creation
These Mini Cheesecake Hearts are more than just a delicious dessert; they are a symbol of love, care, and the joy of creating something special for someone you cherish. This recipe is a wonderful introduction to the art of baking, offering a fun, flavorful, and visually stunning treat that even novice bakers can confidently master. It’s a testament to the fact that delicious and impressive food doesn’t have to be complicated or intimidating. So, gather your ingredients, put on your apron, and get ready to create a dessert that’s as heartwarming as it is delicious. Don’t be afraid to experiment with flavors, add your own personal touch, and make this recipe your own. Perhaps add a hint of lemon zest to the filling for a bright and citrusy note, or use different cookie crumbs for the crust to create a unique flavor profile. The possibilities are endless! And most importantly, have fun in the kitchen!
Baking should be an enjoyable and creative experience. Share your culinary creations and experiences in the comments below – I’d love to see your heart-shaped masterpieces and hear about your baking adventures! Did you try any variations? What were your favorite toppings? Sharing your tips and tricks can help other bakers create their own delicious Mini Cheesecake Hearts. So, embrace the imperfections, enjoy the process, and savor the delicious results! Happy baking! And most importantly, happy celebrating! May your day be filled with joy, laughter, and the sweet taste of love.


