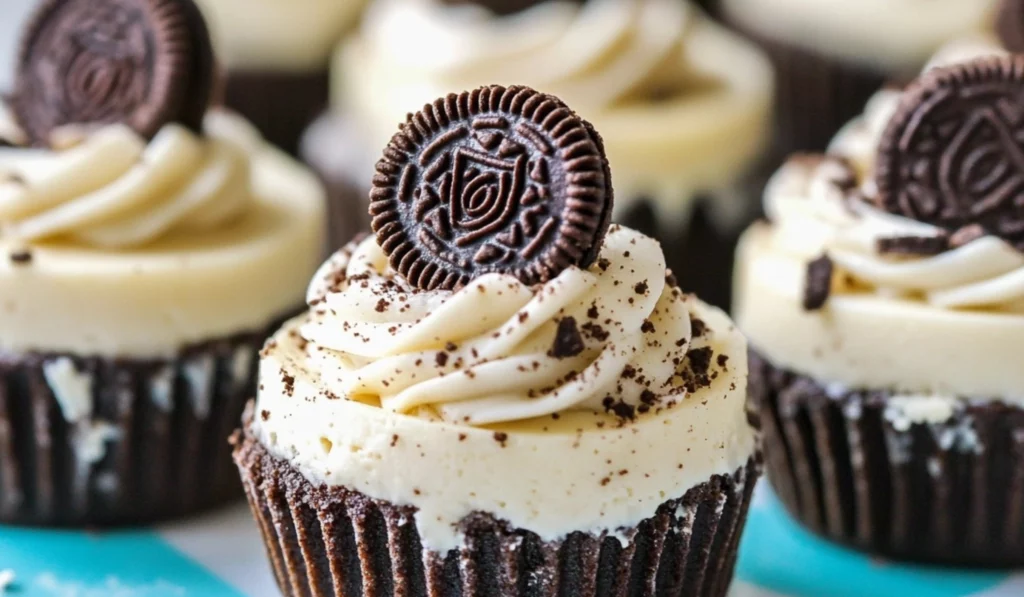
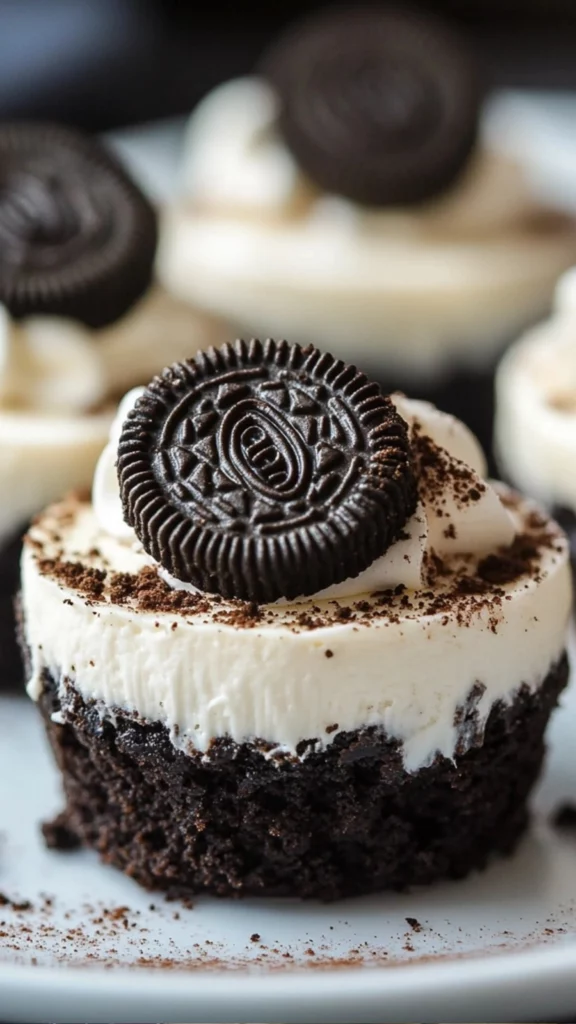
There’s something magical about no-bake desserts—they take minimal effort yet deliver maximum flavor. If you’ve ever looked at a cheesecake recipe and been intimidated by the long list of ingredients and complex instructions, this Mini No Bake Oreo Cheesecake recipe is about to change your perspective. Perfect for beginners, these individual cheesecakes are made with an Oreo cookie crust, a rich and creamy cheesecake filling, and topped with a fluffy whipped cream. The best part? No oven required!
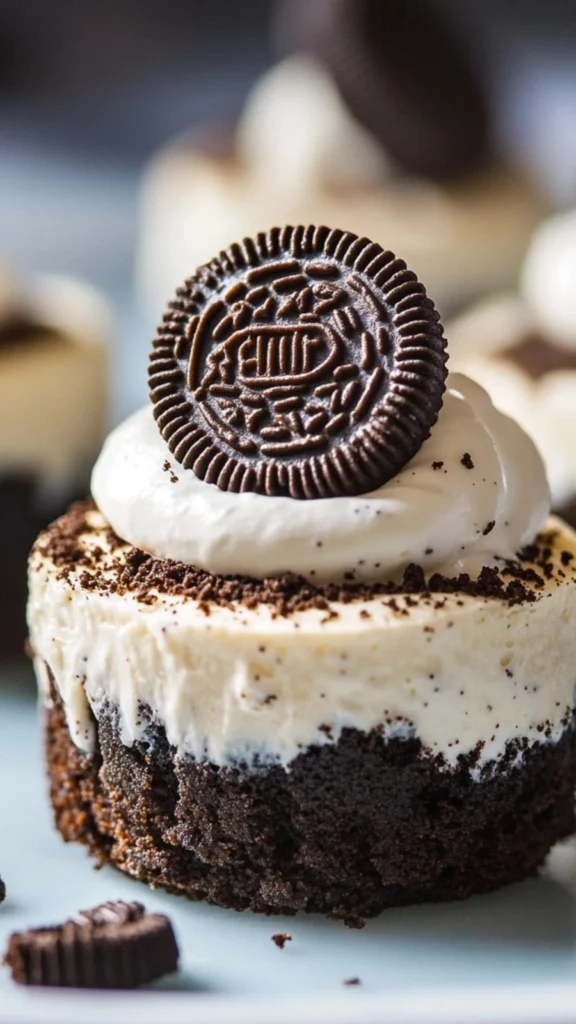
Mini No Bake Oreo Cheesecakes: The Perfect Dessert for Beginners
If you love indulgent desserts that are quick, easy, and absolutely delicious, then these Mini No Bake Oreo Cheesecakes are about to become your new favorite treat. Imagine the rich, creamy texture of cheesecake paired with the irresistible crunch of Oreo cookies—no baking required! This dessert is perfect for beginners, whether you’re looking to whip up a last-minute treat for a family gathering or simply want to treat yourself to something special without the hassle. With minimal effort and maximum flavor, these mini cheesecakes are sure to impress. Ready to dive in? Let’s get started!
- Prep Time: 1 hour 10 minutes
- Cook Time: 0 minutes
- Total Time: 1 hour 10 minutes
- Yield: 12 mini cheesecakes 1x
- Category: Dessert
- Method: No-bake
- Cuisine: American
- Diet: Vegetarian
Ingredients
For the Crust:
- 1 cup (134g) Oreo cookie crumbs (from about 10 Oreos)
- 3 tbsp butter, melted
For the Filling:
- 12 ounces (339g) cream cheese, at room temperature
- 1/2 cup (104g) sugar
- 2 tbsp sour cream
- 1 tsp vanilla extract
- 1/2 cup + 2 tbsp (150ml) heavy whipping cream, cold
- 6 tbsp (43g) powdered sugar
- 3/4 cup (100g) Oreo crumbs (from about 8 Oreos)
- 8–10 Oreos, chopped into small pieces
For the Whipped Cream Topping:
- 3/4 cup (180ml) heavy whipping cream, cold
- 1/4 cup (29g) powdered sugar
- 1/2 tsp vanilla extract
- 2 tbsp Oreo crumbs
- 12 Oreos, for topping
Instructions
1. Prepare the Crust:
Begin by lining a cupcake pan with cupcake liners. It’s important to use liners because they make it so much easier to remove the cheesecakes once they’ve set. After you’ve added the liners, lightly spray them with non-stick spray to ensure the crust doesn’t stick to the paper.
In a medium-sized bowl, combine the Oreo cookie crumbs and melted butter. Stir the mixture together until the crumbs are evenly coated with the butter. The butter acts as a binder, helping the crumbs stay together once chilled. Divide the mixture evenly between the cupcake liners, pressing it firmly into the bottom. You can use your fingers, the back of a spoon, or even the base of a glass to compact the crumbs and form a solid crust.
Once the crusts are set, place the pan in the fridge to chill while you prepare the filling. This helps the crusts firm up and stay in place when you add the filling.
2. Make the Cheesecake Filling:
Now it’s time to work on the creamy cheesecake filling. In a large mixing bowl, beat the room temperature cream cheese and sugar together until smooth. You can use a hand mixer or stand mixer for this step. If you don’t have an electric mixer, a whisk and some elbow grease will do the trick, but it may take a little longer to achieve the desired smooth texture.
Once the cream cheese and sugar are well combined, add the sour cream and vanilla extract. Continue to mix until everything is fully incorporated. The filling should be thick and creamy at this point. Set the bowl aside.
In a separate bowl, whip the cold heavy whipping cream and powdered sugar together on high speed until stiff peaks form. This is a fun step to watch! You’ll know it’s ready when the whipped cream holds its shape and doesn’t collapse when you lift the whisk or beaters. Be careful not to over-whip, or the cream may become too stiff and start to separate.
Next, gently fold the whipped cream into the cream cheese mixture. Take your time with this step—folding ensures the whipped cream stays light and airy, which is what gives the cheesecake its fluffy texture. Once fully combined, fold in the Oreo crumbs and chopped Oreos for that signature crunch.
3. Assemble the Cheesecakes:
With the crusts chilled and the filling ready, it’s time to assemble your mini cheesecakes. Spoon the filling into the cupcake liners, dividing it evenly between the 12 crusts. If you have a piping bag, you can use that to make the filling process cleaner and more precise. Simply fill the piping bag with the cheesecake mixture and pipe it into the cupcake liners. This also gives the cheesecake a beautiful, smooth appearance.
Once all the filling is added, smooth out the tops of the cheesecakes with the back of a spoon or a spatula to ensure they’re even. Place the pan back in the fridge and chill the cheesecakes for 3-4 hours, or until they are firm to the touch. This step is crucial, as it allows the filling to set and hold its shape.
4. Make the Whipped Cream Topping:
While the cheesecakes are chilling, prepare the whipped cream topping. In a clean bowl, combine the cold heavy whipping cream, powdered sugar, vanilla extract, and Oreo crumbs. Whip the mixture on high speed until stiff peaks form. This will create a light, fluffy topping that perfectly complements the richness of the cheesecake filling.
Once the whipped cream is ready, pipe it onto each mini cheesecake. You can use a star tip for a decorative look or simply pipe a dollop on top. Finish by adding an Oreo cookie on top of each cheesecake as a garnish.
5. Serve and Enjoy:
Your Mini No Bake Oreo Cheesecakes are now ready to enjoy! Carefully remove them from the cupcake liners if you prefer to serve them without the liners. These cheesecakes are best served chilled, so keep them in the fridge until you’re ready to serve.
Notes
- Room Temperature Cream Cheese: To avoid lumps in your cheesecake filling, make sure the cream cheese is at room temperature before mixing. Cold cream cheese will be harder to blend and could create a lumpy texture.
- Chill the Cheesecakes Long Enough: Patience is key! Be sure to chill the cheesecakes for the full 3-4 hours (or even longer) to ensure the filling is set and firm.
- Whipped Cream Troubleshooting: If your whipped cream isn’t forming stiff peaks, make sure the heavy cream is cold. Warm cream will not whip properly.
- Oreo Variations: Feel free to experiment with different types of Oreos or even use other cookies, like chocolate wafer cookies, for a fun twist on this classic dessert.
I first stumbled upon this recipe during a summer gathering. I needed a dessert that was easy to prepare but would still wow my guests. Something that didn’t require me to babysit an oven or spend hours putting together intricate decorations. I turned to no-bake desserts and came across this simple yet indulgent mini cheesecake recipe. The result was a huge hit, and it quickly became a go-to recipe in my kitchen. There’s just something about that Oreo crust combined with a creamy cheesecake filling that brings pure joy with every bite. This recipe is foolproof for beginners who want to feel like baking pros without any of the stress.
This dessert is perfect for anyone looking to create a quick and easy treat without sacrificing flavor. From its simple ingredients to its straightforward preparation, these Mini No Bake Oreo Cheesecakes are ideal for anyone looking to take their first steps into the world of desserts. With a few mixing bowls, a hand mixer, and a cupcake pan, you’re well on your way to creating a dessert that will have everyone asking for seconds.
Ingredients and Preparation
Before we dive into the step-by-step instructions, let’s take a closer look at the ingredients needed for this recipe. This is a great chance for beginners to get comfortable with ingredient measurements and learn how to mix and combine components to create the perfect dessert. Not only will I give you the exact quantities required, but I’ll also provide alternatives in case you want to customize the recipe based on what you have available or dietary preferences.
For the Crust:
- 1 cup (134g) Oreo cookie crumbs (from about 10 Oreos)
- 3 tbsp butter, melted
The crust is simple yet crucial for setting the foundation of your mini cheesecakes. The Oreo crumbs create a deliciously crunchy base that complements the creamy filling. Don’t worry if you don’t have a food processor to crush the cookies—you can easily use a Ziploc bag and a rolling pin to crush the cookies into fine crumbs. Just place the Oreos in the bag, seal it, and crush them with the rolling pin until you get the texture you want.
If you prefer a slightly different flavor, you can swap out the regular Oreos for other cookies. Try chocolate wafer cookies for a similar taste, or even use Golden Oreos for a different twist.
For the Filling:
- 12 ounces (339g) cream cheese, at room temperature
- 1/2 cup (104g) sugar
- 2 tbsp sour cream
- 1 tsp vanilla extract
- 1/2 cup + 2 tbsp (150ml) heavy whipping cream, cold
- 6 tbsp (43g) powdered sugar
- 3/4 cup (100g) Oreo crumbs (from about 8 Oreos)
- 8–10 Oreos, chopped into small pieces
The filling is the star of the show. Cream cheese gives the cheesecake its signature rich and creamy texture, while the powdered sugar and sour cream add the perfect level of sweetness and tanginess. Vanilla extract brings depth and flavor to the filling, and the heavy cream makes it light and fluffy. Chopping up Oreos and folding them into the filling gives each bite that classic Oreo crunch, which contrasts wonderfully with the creamy texture of the cheesecake.
For those who may be avoiding dairy, you can substitute the cream cheese with a dairy-free option such as coconut cream cheese. You can also replace the sour cream with non-dairy yogurt or simply skip it altogether for a smoother, less tangy flavor.
For the Whipped Cream Topping:
- 3/4 cup (180ml) heavy whipping cream, cold
- 1/4 cup (29g) powdered sugar
- 1/2 tsp vanilla extract
- 2 tbsp Oreo crumbs
- 12 Oreos, for topping
The whipped cream topping is what brings the cheesecake together. It’s light, fluffy, and perfectly sweet, complementing the richness of the filling. If you want an extra Oreo flavor in the topping, adding Oreo crumbs to the whipped cream is a brilliant touch. The final Oreo on top completes the look and adds an extra crunch.
Again, if you’re looking for a dairy-free option, you can use coconut cream or almond-based whipping cream to create a vegan-friendly topping.
Step-by-Step Instructions
Ready to dive into the process? I’ve broken it down into easy-to-follow steps so that even beginner bakers can feel confident as they go along. Each step is designed to guide you through the process, ensuring your mini cheesecakes turn out perfectly every time.
1. Prepare the Crust:
Begin by lining a cupcake pan with cupcake liners. It’s important to use liners because they make it so much easier to remove the cheesecakes once they’ve set. After you’ve added the liners, lightly spray them with non-stick spray to ensure the crust doesn’t stick to the paper.
In a medium-sized bowl, combine the Oreo cookie crumbs and melted butter. Stir the mixture together until the crumbs are evenly coated with the butter. The butter acts as a binder, helping the crumbs stay together once chilled. Divide the mixture evenly between the cupcake liners, pressing it firmly into the bottom. You can use your fingers, the back of a spoon, or even the base of a glass to compact the crumbs and form a solid crust.
Once the crusts are set, place the pan in the fridge to chill while you prepare the filling. This helps the crusts firm up and stay in place when you add the filling.
2. Make the Cheesecake Filling:
Now it’s time to work on the creamy cheesecake filling. In a large mixing bowl, beat the room temperature cream cheese and sugar together until smooth. You can use a hand mixer or stand mixer for this step. If you don’t have an electric mixer, a whisk and some elbow grease will do the trick, but it may take a little longer to achieve the desired smooth texture.
Once the cream cheese and sugar are well combined, add the sour cream and vanilla extract. Continue to mix until everything is fully incorporated. The filling should be thick and creamy at this point. Set the bowl aside.
In a separate bowl, whip the cold heavy whipping cream and powdered sugar together on high speed until stiff peaks form. This is a fun step to watch! You’ll know it’s ready when the whipped cream holds its shape and doesn’t collapse when you lift the whisk or beaters. Be careful not to over-whip, or the cream may become too stiff and start to separate.
Next, gently fold the whipped cream into the cream cheese mixture. Take your time with this step—folding ensures the whipped cream stays light and airy, which is what gives the cheesecake its fluffy texture. Once fully combined, fold in the Oreo crumbs and chopped Oreos for that signature crunch.
3. Assemble the Cheesecakes:
With the crusts chilled and the filling ready, it’s time to assemble your mini cheesecakes. Spoon the filling into the cupcake liners, dividing it evenly between the 12 crusts. If you have a piping bag, you can use that to make the filling process cleaner and more precise. Simply fill the piping bag with the cheesecake mixture and pipe it into the cupcake liners. This also gives the cheesecake a beautiful, smooth appearance.
Once all the filling is added, smooth out the tops of the cheesecakes with the back of a spoon or a spatula to ensure they’re even. Place the pan back in the fridge and chill the cheesecakes for 3-4 hours, or until they are firm to the touch. This step is crucial, as it allows the filling to set and hold its shape.
4. Make the Whipped Cream Topping:
While the cheesecakes are chilling, prepare the whipped cream topping. In a clean bowl, combine the cold heavy whipping cream, powdered sugar, vanilla extract, and Oreo crumbs. Whip the mixture on high speed until stiff peaks form. This will create a light, fluffy topping that perfectly complements the richness of the cheesecake filling.
Once the whipped cream is ready, pipe it onto each mini cheesecake. You can use a star tip for a decorative look or simply pipe a dollop on top. Finish by adding an Oreo cookie on top of each cheesecake as a garnish.
5. Serve and Enjoy:
Your Mini No Bake Oreo Cheesecakes are now ready to enjoy! Carefully remove them from the cupcake liners if you prefer to serve them without the liners. These cheesecakes are best served chilled, so keep them in the fridge until you’re ready to serve.
Beginner Tips and Notes
- Room Temperature Cream Cheese: To avoid lumps in your cheesecake filling, make sure the cream cheese is at room temperature before mixing. Cold cream cheese will be harder to blend and could create a lumpy texture.
- Chill the Cheesecakes Long Enough: Patience is key! Be sure to chill the cheesecakes for the full 3-4 hours (or even longer) to ensure the filling is set and firm.
- Whipped Cream Troubleshooting: If your whipped cream isn’t forming stiff peaks, make sure the heavy cream is cold. Warm cream will not whip properly.
- Oreo Variations: Feel free to experiment with different types of Oreos or even use other cookies, like chocolate wafer cookies, for a fun twist on this classic dessert.
Serving Suggestions
While these Mini No Bake Oreo Cheesecakes are delicious on their own, you can serve them with a variety of toppings or sides to elevate the dessert. Fresh berries like strawberries, raspberries, or blueberries complement the sweetness of the cheesecake and add a pop of color. A drizzle of chocolate or caramel sauce can also enhance the dessert’s richness.
If you have leftover cheesecakes (which is unlikely!), store them in an airtight container in the fridge for up to 5 days. These mini cheesecakes also freeze well, so you can enjoy them at a later time by freezing them and thawing them in the fridge overnight.
Conclusion
This Mini No Bake Oreo Cheesecake recipe is the perfect treat for beginners looking to dip their toes into the world of dessert-making. With its simple ingredients, easy preparation, and no-bake method, it’s a great way to create an impressive dessert without any baking experience. Whether you’re looking to impress guests at a party, treat yourself to something sweet, or simply experiment with new recipes, these cheesecakes are a great place to start. Try it out and let me know how it turns out!
