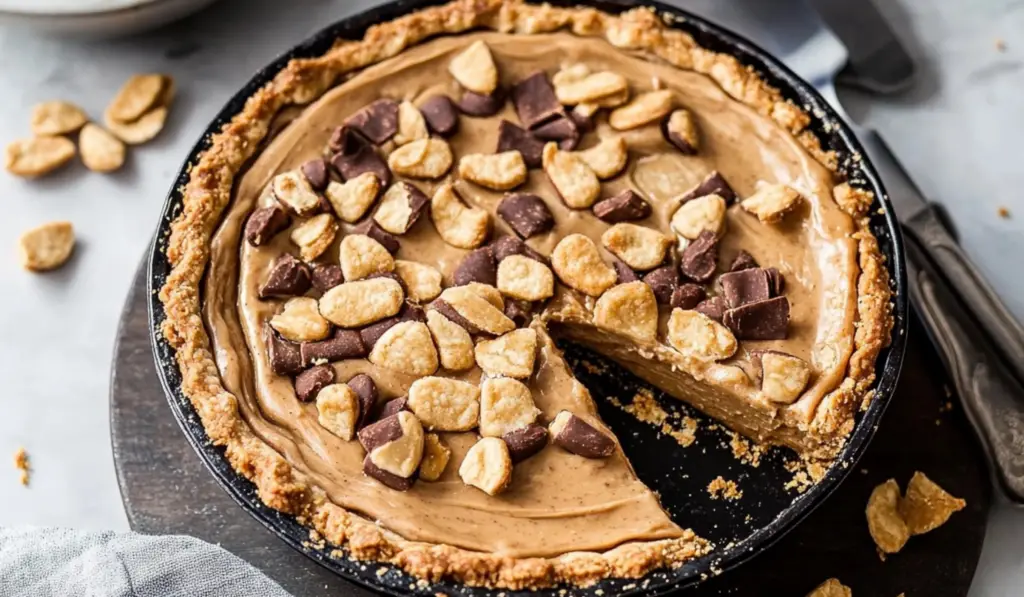
Peanut butter and chocolate—a combination so beloved that it has earned its place as one of the most iconic pairings in dessert history. When you combine these two classic flavors into a pie, you end up with a dessert that’s simply irresistible. This homemade Peanut Butter Pie is everything you could want in a dessert: creamy, sweet, and rich, with the perfect balance of textures and flavors. A crisp, buttery graham cracker crust provides a satisfying crunch, while the smooth, velvety peanut butter filling is light yet indulgent. The pie is then topped with layers of decadent melted peanut butter and chocolate, along with a sprinkling of candy for extra fun and flavor. Whether served frozen for a more substantial, ice cream-like treat or chilled for a silky smooth experience, this pie is perfect for any occasion. Its no-bake nature makes it a quick and easy dessert to prepare, but the results are so impressive that it’s guaranteed to be a showstopper. Perfect for family dinners, holiday gatherings, or as a sweet indulgence after a busy day, this Peanut Butter Pie will quickly become a favorite in your dessert repertoire.

Peanut Butter Pie: The Ultimate Decadent Dessert

Peanut butter and chocolate—a combination so beloved that it has earned its place as one of the most iconic pairings in dessert history. When you combine these two classic flavors into a pie, you end up with a dessert that’s simply irresistible. This homemade Peanut Butter Pie is everything you could want in a dessert: creamy, sweet, and rich, with the perfect balance of textures and flavors. A crisp, buttery graham cracker crust provides a satisfying crunch, while the smooth, velvety peanut butter filling is light yet indulgent. The pie is then topped with layers of decadent melted peanut butter and chocolate, along with a sprinkling of candy for extra fun and flavor. Whether served frozen for a more substantial, ice cream-like treat or chilled for a silky smooth experience, this pie is perfect for any occasion. Its no-bake nature makes it a quick and easy dessert to prepare, but the results are so impressive that it’s guaranteed to be a showstopper. Perfect for family dinners, holiday gatherings, or as a sweet indulgence after a busy day, this Peanut Butter Pie will quickly become a favorite in your dessert repertoire.
- Prep Time: 20 minutes
- Cook Time: 12 minutes
- Total Time: 32 minutes
- Yield: 8 to 10 servings 1x
- Category: Dessert
- Method: Baking, Mixing
- Cuisine: American
- Diet: Vegetarian
Ingredients
For the crust:
- 14 whole chocolate graham crackers (196 grams)
- 1 tablespoon light brown sugar
- 7 tablespoons (99 grams) unsalted butter, melted
For the filling:
- 8 ounces (227 grams) cream cheese, at room temperature
- 3/4 cup (94 grams) powdered sugar plus 2 tablespoons, divided
- 1 cup (270 grams) creamy conventional peanut butter
- 1 cup (240 grams) heavy whipping cream
- 1 teaspoon vanilla extract
For the topping:
- Melted peanut butter
- Melted chocolate
- Mini Reese’s cups
- Peanut butter chips
Instructions
1. Prepare the Crust:
The first step in making this decadent Peanut Butter Pie is preparing the crust. Begin by preheating your oven to 325°F (163°C). This ensures that the crust will bake evenly. In the bowl of a food processor, add the chocolate graham crackers and light brown sugar. Pulse the ingredients until they form fine crumbs. You want the crumbs to be as fine as possible for an even, smooth crust. Once the graham crackers are crushed, add the melted butter and pulse the mixture again until the crumbs are evenly moistened. When you press the mixture between your fingers, it should hold together easily.
Next, transfer the graham cracker mixture into a 9-inch pie plate. Use a spoon or a measuring cup to press the crumbs firmly into the bottom and up the sides of the pie plate. It’s important to press the mixture evenly to ensure that the crust holds together once baked. Bake the crust in the preheated oven for about 10 to 12 minutes, or until it becomes fragrant and golden brown. The crust should be crisp and slightly firm to the touch. Once baked, remove it from the oven and set it on a wire rack to cool completely. Allow the crust to cool for at least 30 minutes before adding the filling to prevent the filling from melting into the warm crust.
2. Make the Filling:
While the crust is cooling, you can begin preparing the creamy peanut butter filling. Start by making sure the cream cheese is at room temperature. This ensures it blends smoothly with the other ingredients. In a large mixing bowl, combine the room-temperature cream cheese, powdered sugar (3/4 cup), and peanut butter. Using an electric mixer, beat the mixture for about 3 minutes, or until it becomes smooth, light, and fluffy. The texture should be thick but creamy, and the flavor of the peanut butter should be rich and well-balanced with the sweetness of the powdered sugar.
In a separate mixing bowl, whip the heavy whipping cream using the whisk attachment of your electric mixer. Whip the cream until it forms stiff peaks—this means that when you lift the whisk out of the cream, it should hold its shape without collapsing. Once the whipped cream has reached this stage, add the remaining 2 tablespoons of powdered sugar and the vanilla extract. Continue to whip until the cream is fully incorporated and the mixture becomes light and airy.
Now it’s time to combine the whipped cream with the peanut butter mixture. Gently fold the whipped cream into the peanut butter mixture using a spatula. Be careful not to deflate the whipped cream; folding it in gently will keep the mixture light and airy. Once the two mixtures are well combined, the filling should be creamy and smooth, with a mousse-like texture.
Carefully spoon the filling into the cooled pie crust. Use a spatula to smooth the top of the filling so that it’s even and level. The filling should fill the crust to the top, creating a thick, creamy layer. Once the filling is spread evenly, place the pie in the freezer for 3 hours to set. Alternatively, you can place it in the fridge for at least 6 hours, but freezing the pie helps it set more quickly. The filling will become firm yet creamy, making it easy to slice once fully set.
3. Add the Toppings:
After the pie has chilled and set, it’s time to add the final, indulgent touches to this masterpiece. Start by melting the peanut butter and chocolate. You can melt them separately in the microwave or over a double boiler. If you’re using the microwave, heat each in a microwave-safe bowl in 20-second intervals, stirring in between, until both the peanut butter and chocolate are smooth and fully melted.
Once melted, place the peanut butter and chocolate in separate resealable bags or piping bags. Cut off a tiny corner of each bag to create a small opening for drizzling. Drizzle the melted peanut butter and chocolate over the top of the pie in a decorative pattern. You can create swirls, stripes, or even a freeform drizzle—get creative with your design. The contrast of the dark chocolate and creamy peanut butter creates an eye-catching effect that’s as delicious as it is beautiful.
For the final touch, top the pie with mini Reese’s cups and peanut butter chips. The mini Reese’s cups add a delightful candy crunch and an extra burst of peanut butter flavor, while the peanut butter chips melt slightly on top, enhancing the overall richness of the pie. The combination of melted peanut butter, chocolate, and candy creates a luxurious, indulgent topping that’s irresistible.
4. Serve and Enjoy:
Once the pie is topped, it’s ready to be served. You can choose to serve it immediately after drizzling the toppings, or you can let the pie chill in the fridge for a few more hours to allow the toppings to set. The pie can be served either frozen or refrigerated, depending on your texture preference. If you want a firmer, ice cream-like texture, serve the pie frozen. If you prefer a smoother, creamier texture, serve it chilled from the fridge.
Store any leftovers in the fridge for up to 3 days, or in the freezer for up to 1 month. However, be warned: this pie is so delicious that you may not have any leftovers to store!
Notes
- Crust: For a gluten-free version, substitute the chocolate graham crackers with gluten-free graham crackers or any gluten-free cookie that you enjoy.
- Sweeteners: If you prefer to use natural sweeteners, try substituting the powdered sugar with honey, maple syrup, or coconut sugar. Note that this may slightly alter the texture of the filling, but it will still be delicious.
- Nut Butters: While peanut butter is the star of this pie, you can experiment with other nut butters such as almond butter or cashew butter for a different flavor profile.
- Chocolate: If you want a richer chocolate flavor, add a layer of chocolate ganache over the peanut butter filling before chilling the pie. You can also mix in some chopped dark chocolate for added texture and flavor.
- Whipped Cream: For a dairy-free option, substitute the heavy whipping cream with coconut cream. This will give the pie a slightly different flavor, but it will still be rich and creamy.
Ingredients Breakdown
For the crust:
- 14 whole chocolate graham crackers (196 grams)
- 1 tablespoon light brown sugar
- 7 tablespoons (99 grams) unsalted butter, melted
For the filling:
- 8 ounces (227 grams) cream cheese, at room temperature
- 3/4 cup (94 grams) powdered sugar plus 2 tablespoons, divided
- 1 cup (270 grams) creamy conventional peanut butter
- 1 cup (240 grams) heavy whipping cream
- 1 teaspoon vanilla extract
For the topping:
- Melted peanut butter
- Melted chocolate
- Mini Reese’s cups
- Peanut butter chips
Step-by-Step Instructions
1. Prepare the Crust:
The first step in making this decadent Peanut Butter Pie is preparing the crust. Begin by preheating your oven to 325°F (163°C). This ensures that the crust will bake evenly. In the bowl of a food processor, add the chocolate graham crackers and light brown sugar. Pulse the ingredients until they form fine crumbs. You want the crumbs to be as fine as possible for an even, smooth crust. Once the graham crackers are crushed, add the melted butter and pulse the mixture again until the crumbs are evenly moistened. When you press the mixture between your fingers, it should hold together easily.
Next, transfer the graham cracker mixture into a 9-inch pie plate. Use a spoon or a measuring cup to press the crumbs firmly into the bottom and up the sides of the pie plate. It’s important to press the mixture evenly to ensure that the crust holds together once baked. Bake the crust in the preheated oven for about 10 to 12 minutes, or until it becomes fragrant and golden brown. The crust should be crisp and slightly firm to the touch. Once baked, remove it from the oven and set it on a wire rack to cool completely. Allow the crust to cool for at least 30 minutes before adding the filling to prevent the filling from melting into the warm crust.
2. Make the Filling:
While the crust is cooling, you can begin preparing the creamy peanut butter filling. Start by making sure the cream cheese is at room temperature. This ensures it blends smoothly with the other ingredients. In a large mixing bowl, combine the room-temperature cream cheese, powdered sugar (3/4 cup), and peanut butter. Using an electric mixer, beat the mixture for about 3 minutes, or until it becomes smooth, light, and fluffy. The texture should be thick but creamy, and the flavor of the peanut butter should be rich and well-balanced with the sweetness of the powdered sugar.
In a separate mixing bowl, whip the heavy whipping cream using the whisk attachment of your electric mixer. Whip the cream until it forms stiff peaks—this means that when you lift the whisk out of the cream, it should hold its shape without collapsing. Once the whipped cream has reached this stage, add the remaining 2 tablespoons of powdered sugar and the vanilla extract. Continue to whip until the cream is fully incorporated and the mixture becomes light and airy.
Now it’s time to combine the whipped cream with the peanut butter mixture. Gently fold the whipped cream into the peanut butter mixture using a spatula. Be careful not to deflate the whipped cream; folding it in gently will keep the mixture light and airy. Once the two mixtures are well combined, the filling should be creamy and smooth, with a mousse-like texture.
Carefully spoon the filling into the cooled pie crust. Use a spatula to smooth the top of the filling so that it’s even and level. The filling should fill the crust to the top, creating a thick, creamy layer. Once the filling is spread evenly, place the pie in the freezer for 3 hours to set. Alternatively, you can place it in the fridge for at least 6 hours, but freezing the pie helps it set more quickly. The filling will become firm yet creamy, making it easy to slice once fully set.
3. Add the Toppings:
After the pie has chilled and set, it’s time to add the final, indulgent touches to this masterpiece. Start by melting the peanut butter and chocolate. You can melt them separately in the microwave or over a double boiler. If you’re using the microwave, heat each in a microwave-safe bowl in 20-second intervals, stirring in between, until both the peanut butter and chocolate are smooth and fully melted.
Once melted, place the peanut butter and chocolate in separate resealable bags or piping bags. Cut off a tiny corner of each bag to create a small opening for drizzling. Drizzle the melted peanut butter and chocolate over the top of the pie in a decorative pattern. You can create swirls, stripes, or even a freeform drizzle—get creative with your design. The contrast of the dark chocolate and creamy peanut butter creates an eye-catching effect that’s as delicious as it is beautiful.
For the final touch, top the pie with mini Reese’s cups and peanut butter chips. The mini Reese’s cups add a delightful candy crunch and an extra burst of peanut butter flavor, while the peanut butter chips melt slightly on top, enhancing the overall richness of the pie. The combination of melted peanut butter, chocolate, and candy creates a luxurious, indulgent topping that’s irresistible.
4. Serve and Enjoy:
Once the pie is topped, it’s ready to be served. You can choose to serve it immediately after drizzling the toppings, or you can let the pie chill in the fridge for a few more hours to allow the toppings to set. The pie can be served either frozen or refrigerated, depending on your texture preference. If you want a firmer, ice cream-like texture, serve the pie frozen. If you prefer a smoother, creamier texture, serve it chilled from the fridge.
Store any leftovers in the fridge for up to 3 days, or in the freezer for up to 1 month. However, be warned: this pie is so delicious that you may not have any leftovers to store!
Flavor and Texture Experience
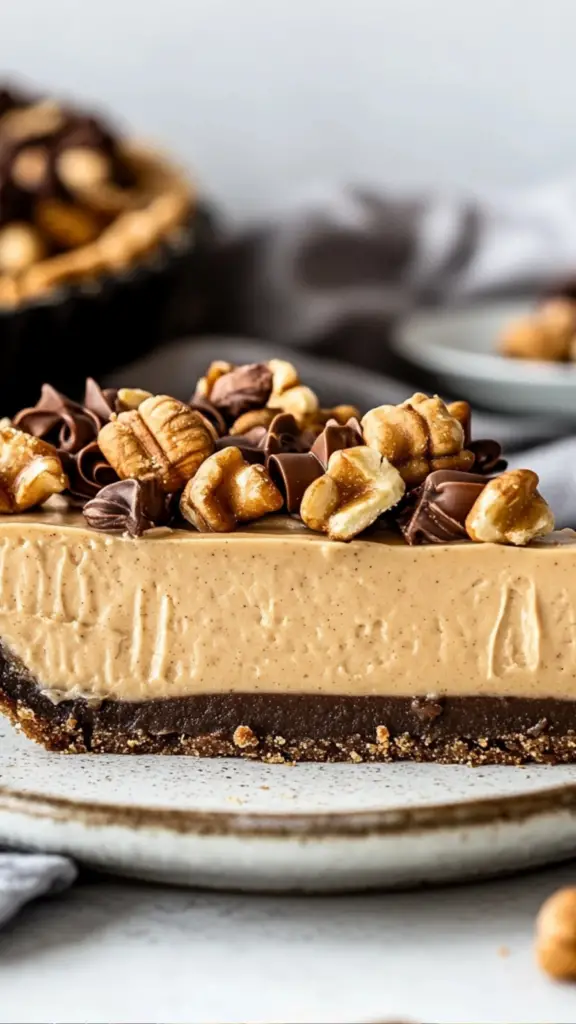
The first bite of this Peanut Butter Pie is a truly sensory experience. As you cut through the layers, the smooth, creamy peanut butter filling meets the crispy, slightly sweet graham cracker crust. The filling is rich and velvety, with the unmistakable flavor of peanut butter blending harmoniously with the tangy cream cheese and sweet powdered sugar. The whipped cream adds an airy lightness to the filling, making it feel indulgent without being overly heavy.
The melted peanut butter and chocolate drizzle provides a layer of sweetness and richness that perfectly complements the peanut butter filling. Each bite is a delightful contrast of textures: the crunch of the graham cracker crust, the smoothness of the peanut butter filling, and the decadence of the chocolate and peanut butter drizzle. The mini Reese’s cups add a satisfying crunch, while the peanut butter chips melt just slightly on top, creating bursts of peanut butter flavor throughout.
The overall flavor profile is balanced, with the slight saltiness of the peanut butter playing off the sweetness of the chocolate and powdered sugar. The combination of creamy, crunchy, sweet, and salty makes every bite a truly indulgent experience.
Ingredient Substitutions and Variations
- Crust: For a gluten-free version, substitute the chocolate graham crackers with gluten-free graham crackers or any gluten-free cookie that you enjoy.
- Sweeteners: If you prefer to use natural sweeteners, try substituting the powdered sugar with honey, maple syrup, or coconut sugar. Note that this may slightly alter the texture of the filling, but it will still be delicious.
- Nut Butters: While peanut butter is the star of this pie, you can experiment with other nut butters such as almond butter or cashew butter for a different flavor profile.
- Chocolate: If you want a richer chocolate flavor, add a layer of chocolate ganache over the peanut butter filling before chilling the pie. You can also mix in some chopped dark chocolate for added texture and flavor.
- Whipped Cream: For a dairy-free option, substitute the heavy whipping cream with coconut cream. This will give the pie a slightly different flavor, but it will still be rich and creamy.
Serving Suggestions
This Peanut Butter Pie is perfect for any occasion. Serve it after a hearty dinner to satisfy your sweet cravings, or enjoy it as a special treat for a holiday or family gathering. For an extra touch, serve each slice with a dollop of freshly whipped cream or a scoop of vanilla ice cream. The richness of the pie pairs beautifully with something cold and creamy, balancing out the sweetness and adding another layer of texture.
Conclusion
This Peanut Butter Pie is the ultimate indulgent dessert that combines the best flavors and textures into one irresistible treat. With its creamy peanut butter filling, crunchy chocolate graham cracker crust, and decadent topping, it’s a dessert that will wow your guests and leave everyone asking for the recipe. Whether you serve it chilled or frozen, this pie is a showstopper that’s perfect for any occasion. With its ease of preparation and rich, satisfying flavor, it’s sure to become a favorite in your dessert rotation. So, gather your ingredients, follow the simple steps, and get ready to enjoy one of the most delicious desserts you’ll ever taste.


