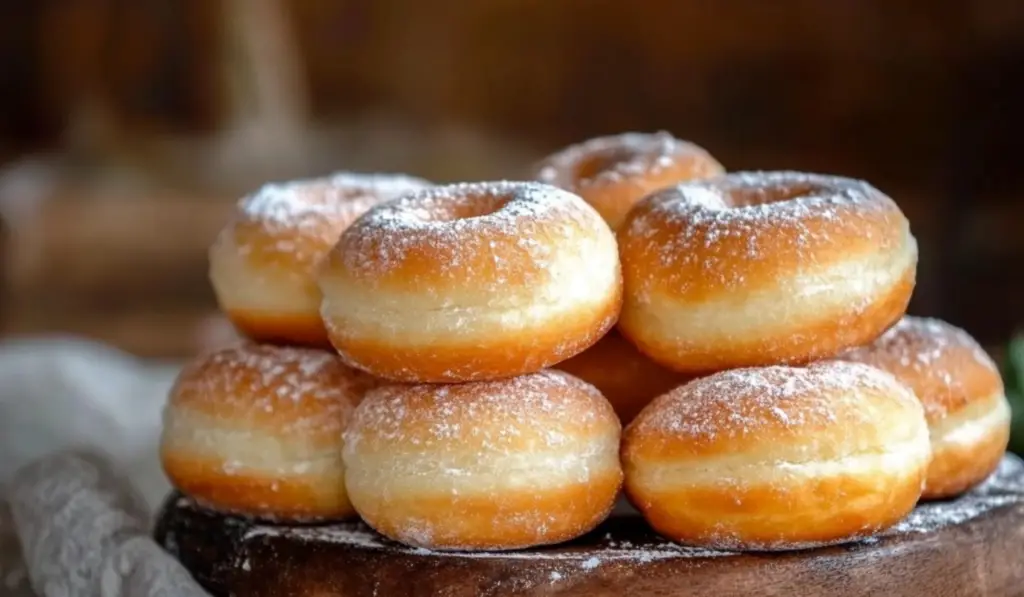
Doughnuts, that irresistible fried delicacy, have captured hearts and taste buds for generations. Whether you enjoy them glazed, powdered, or filled with delicious jam or chocolate hazelnut spread, there’s no denying the appeal of a perfectly fried doughnut. But among the different types of doughnuts, the yeast-based variety stands out for its light, fluffy texture, making each bite a heavenly experience. These Perfect Yeast Doughnuts are no exception! Light, airy, and perfectly sweetened, this recipe brings the bakery experience straight to your kitchen. Made with just a few simple ingredients, they are easy to prepare and absolutely delicious.
PrintPerfect Yeast Doughnuts: A Step-by-Step Guide to the Ultimate Fluffy Treat

Doughnuts, that irresistible fried delicacy, have captured hearts and taste buds for generations. Whether you enjoy them glazed, powdered, or filled with delicious jam or chocolate hazelnut spread, there’s no denying the appeal of a perfectly fried doughnut. But among the different types of doughnuts, the yeast-based variety stands out for its light, fluffy texture, making each bite a heavenly experience. These Perfect Yeast Doughnuts are no exception! Light, airy, and perfectly sweetened, this recipe brings the bakery experience straight to your kitchen. Made with just a few simple ingredients, they are easy to prepare and absolutely delicious.
- Prep Time: 30 minutes
- Cook Time: 15 minutes
- Total Time: 2 hours 15 minutes
- Yield: 16 doughnuts
- Category: Breakfast, Dessert
- Method: Frying, Mixing, Rising
- Cuisine: American
- Diet: Vegetarian
Ingredients
- Water (6 Tbsp or 90 ml): Used to activate the yeast.
- Buttermilk (5 oz or 150 ml): Adds richness and tang to the doughnut batter.
- Egg (1, beaten): Provides structure and helps the dough rise.
- Butter (2 oz or 57 g, melted): Adds flavor and helps achieve a tender crumb.
- All-purpose or bread flour (16 oz or 454 g): This is the main ingredient that gives structure to the dough.
- Sugar (2 oz or 57 g): Sweetens the dough and helps with browning during frying.
- Salt (1 tsp): Enhances flavor and balances the sweetness.
- Yeast (1 1/2 tsp or 5 g): The star of the show, responsible for the dough’s rise and light texture.
- Oil for frying (sunflower, grapeseed, or a combination): Used for frying the doughnuts to a perfect golden brown.
- Sugar for coating: A classic finishing touch for the doughnuts.
- Jam, chocolate hazelnut spread, and/or whipped cream (optional): For filling the doughnuts, if desired.
Instructions
Step 1: Prepare the Dough
To begin, combine the wet ingredients. If you’re using a bread machine, add the water, buttermilk, beaten egg, and melted butter into the machine pan. Then, add the dry ingredients (flour, sugar, salt) but save the yeast for later. Make a small indentation in the flour and pour the yeast in the center. This method helps prevent the yeast from coming into contact with the salt and sugar too soon, which could interfere with its activation.
If you’re using a stand mixer with a dough hook or making the dough by hand, start by mixing the dry ingredients in a bowl. In a separate cup, add the warm water and sprinkle the yeast on top. Let it sit for about 5 minutes until it becomes frothy. Create a well in the center of the dry ingredients and pour in the buttermilk, egg, melted butter, and yeast mixture.
If using a stand mixer, run the dough hook until the dough starts to form, and then continue kneading for another 5 minutes. If kneading by hand, work the dough for about 10 minutes until it becomes smooth and elastic. Once ready, cover the dough and let it rise until it doubles in size, which should take about 1 to 2 hours.
Step 2: Shape the Doughnuts
Once the dough has risen, transfer it to a floured surface and knead it lightly. Divide the dough in half and keep one portion covered to prevent it from drying out. Roll out the first half of the dough to a thickness of about 1/2 inch. Using a sharp cookie cutter, cut out 3-inch rounds for the doughnut shapes. Then, use a smaller cutter (about 1 inch in diameter) to make the holes in the center of each round. Don’t discard the doughnut holes—they can be fried up too and make for a delightful snack!
Place the doughnuts on squares of parchment or waxed paper, and arrange them on a cookie sheet. This step will make it easier to transfer the doughnuts into the hot oil later.
Step 3: Let the Doughnuts Rise
Before frying, it’s important to let the doughnuts rise again. Place the tray in the oven (preheated for 1 minute and then turned off) with a jug of boiling water placed nearby. The steam from the water will keep the dough from forming a skin and will help the doughnuts rise properly. Allow the doughnuts to rise until they have doubled in size, which should take about 30 minutes to an hour.
Step 4: Fry the Doughnuts
While the doughnuts are rising, heat the oil in a deep fryer, pot, or wok to 350°F (180°C). If you don’t have a thermometer, you can test the oil by dropping a doughnut hole into the oil—if it fries immediately, the oil is ready. If it browns too quickly, lower the heat a bit.
Carefully drop the doughnuts into the hot oil using the parchment paper to guide them. Fry them for about 1 to 2 minutes on each side until they turn golden brown. Turn them over gently using tongs or a slotted spoon, and once they are perfectly fried, remove them and place them on a paper towel-lined platter to drain any excess oil.
Step 5: Coat and Fill the Doughnuts
Once the doughnuts have cooled slightly, roll them in sugar to coat them evenly. If you want to fill the doughnuts, use a skewer to create a hole in the center of each doughnut. Then, pipe in your desired filling, such as jam, Nutella, or fresh whipped cream.
Step 6: Enjoy!
Now that your doughnuts are ready, take a moment to admire the golden, fluffy beauties you’ve created. Each bite will be soft, tender, and slightly sweet with a satisfying crunch on the outside. Serve them fresh for breakfast, dessert, or any time you crave a delicious treat.
Notes
- Use a kitchen scale: Accuracy in measuring ingredients, especially flour, is crucial to achieving the perfect dough. A scale ensures that your dough will have the right texture and rise properly.
- Be patient with the rise times: The dough needs time to rise twice—first after mixing and then after shaping. Rushing this step can result in dense doughnuts, so be sure to allow for ample rise time.
- Fry at the right temperature: Too hot or too cold oil can affect the texture and color of the doughnuts. Maintaining an oil temperature of 350°F is key for perfectly fried doughnuts.
- Experiment with fillings: Don’t be afraid to get creative with your fillings. Jam, chocolate spread, or even fresh cream are just a few delicious options that will elevate your doughnuts.
- Leftovers: If you have any leftover doughnuts (though they likely won’t last long!), store them in an airtight container at room temperature. They are best enjoyed within a day or two but can also be reheated for a few seconds in the microwave.
In this article, we will walk you through each step of making yeast doughnuts from scratch, ensuring that you end up with a batch of golden, pillowy doughnuts that are perfect for any occasion. Whether you’re new to yeast doughnuts or an experienced home baker, this guide will provide all the tips and techniques needed to master the art of doughnut making.
The Allure of Yeast Doughnuts
What makes yeast doughnuts so special? Unlike cake doughnuts, which are made with baking powder or baking soda to provide leavening, yeast doughnuts rely on yeast to give them that light and airy texture. The yeast ferments, causing the dough to rise, and when fried, the doughnuts puff up, creating a soft, chewy interior. The outer layer is golden and slightly crisp, providing a satisfying contrast to the pillowy center.
The beauty of yeast doughnuts lies in their versatility. You can fill them with your favorite sweet spreads like jam, Nutella, or whipped cream, or leave them plain and coat them with sugar for a simpler treat. The process might take a bit of time due to the rise time, but the result is definitely worth it—light, fluffy doughnuts that taste like they were made by a professional baker.
Key Ingredients for Perfect Yeast Doughnuts
To make these doughnuts, you’ll need just a handful of ingredients that are likely already in your kitchen. Here’s a breakdown:
- Water (6 Tbsp or 90 ml): Used to activate the yeast.
- Buttermilk (5 oz or 150 ml): Adds richness and tang to the doughnut batter.
- Egg (1, beaten): Provides structure and helps the dough rise.
- Butter (2 oz or 57 g, melted): Adds flavor and helps achieve a tender crumb.
- All-purpose or bread flour (16 oz or 454 g): This is the main ingredient that gives structure to the dough.
- Sugar (2 oz or 57 g): Sweetens the dough and helps with browning during frying.
- Salt (1 tsp): Enhances flavor and balances the sweetness.
- Yeast (1 1/2 tsp or 5 g): The star of the show, responsible for the dough’s rise and light texture.
- Oil for frying (sunflower, grapeseed, or a combination): Used for frying the doughnuts to a perfect golden brown.
- Sugar for coating: A classic finishing touch for the doughnuts.
- Jam, chocolate hazelnut spread, and/or whipped cream (optional): For filling the doughnuts, if desired.
Step-by-Step Instructions
Step 1: Prepare the Dough
To begin, combine the wet ingredients. If you’re using a bread machine, add the water, buttermilk, beaten egg, and melted butter into the machine pan. Then, add the dry ingredients (flour, sugar, salt) but save the yeast for later. Make a small indentation in the flour and pour the yeast in the center. This method helps prevent the yeast from coming into contact with the salt and sugar too soon, which could interfere with its activation.
If you’re using a stand mixer with a dough hook or making the dough by hand, start by mixing the dry ingredients in a bowl. In a separate cup, add the warm water and sprinkle the yeast on top. Let it sit for about 5 minutes until it becomes frothy. Create a well in the center of the dry ingredients and pour in the buttermilk, egg, melted butter, and yeast mixture.
If using a stand mixer, run the dough hook until the dough starts to form, and then continue kneading for another 5 minutes. If kneading by hand, work the dough for about 10 minutes until it becomes smooth and elastic. Once ready, cover the dough and let it rise until it doubles in size, which should take about 1 to 2 hours.
Step 2: Shape the Doughnuts
Once the dough has risen, transfer it to a floured surface and knead it lightly. Divide the dough in half and keep one portion covered to prevent it from drying out. Roll out the first half of the dough to a thickness of about 1/2 inch. Using a sharp cookie cutter, cut out 3-inch rounds for the doughnut shapes. Then, use a smaller cutter (about 1 inch in diameter) to make the holes in the center of each round. Don’t discard the doughnut holes—they can be fried up too and make for a delightful snack!
Place the doughnuts on squares of parchment or waxed paper, and arrange them on a cookie sheet. This step will make it easier to transfer the doughnuts into the hot oil later.
Step 3: Let the Doughnuts Rise
Before frying, it’s important to let the doughnuts rise again. Place the tray in the oven (preheated for 1 minute and then turned off) with a jug of boiling water placed nearby. The steam from the water will keep the dough from forming a skin and will help the doughnuts rise properly. Allow the doughnuts to rise until they have doubled in size, which should take about 30 minutes to an hour.
Step 4: Fry the Doughnuts
While the doughnuts are rising, heat the oil in a deep fryer, pot, or wok to 350°F (180°C). If you don’t have a thermometer, you can test the oil by dropping a doughnut hole into the oil—if it fries immediately, the oil is ready. If it browns too quickly, lower the heat a bit.
Carefully drop the doughnuts into the hot oil using the parchment paper to guide them. Fry them for about 1 to 2 minutes on each side until they turn golden brown. Turn them over gently using tongs or a slotted spoon, and once they are perfectly fried, remove them and place them on a paper towel-lined platter to drain any excess oil.
Step 5: Coat and Fill the Doughnuts
Once the doughnuts have cooled slightly, roll them in sugar to coat them evenly. If you want to fill the doughnuts, use a skewer to create a hole in the center of each doughnut. Then, pipe in your desired filling, such as jam, Nutella, or fresh whipped cream.
Step 6: Enjoy!
Now that your doughnuts are ready, take a moment to admire the golden, fluffy beauties you’ve created. Each bite will be soft, tender, and slightly sweet with a satisfying crunch on the outside. Serve them fresh for breakfast, dessert, or any time you crave a delicious treat.
Tips for Success
- Use a kitchen scale: Accuracy in measuring ingredients, especially flour, is crucial to achieving the perfect dough. A scale ensures that your dough will have the right texture and rise properly.
- Be patient with the rise times: The dough needs time to rise twice—first after mixing and then after shaping. Rushing this step can result in dense doughnuts, so be sure to allow for ample rise time.
- Fry at the right temperature: Too hot or too cold oil can affect the texture and color of the doughnuts. Maintaining an oil temperature of 350°F is key for perfectly fried doughnuts.
- Experiment with fillings: Don’t be afraid to get creative with your fillings. Jam, chocolate spread, or even fresh cream are just a few delicious options that will elevate your doughnuts.
- Leftovers: If you have any leftover doughnuts (though they likely won’t last long!), store them in an airtight container at room temperature. They are best enjoyed within a day or two but can also be reheated for a few seconds in the microwave.
Variations
- Glazed Doughnuts: Instead of rolling the doughnuts in sugar, you can dip them in a simple glaze made of powdered sugar, milk, and vanilla extract. This will give the doughnuts a shiny, sweet coating.
- Chocolate Coated Doughnuts: For a chocolatey twist, melt some dark or milk chocolate and dip the cooled doughnuts in it. You can even top them with sprinkles or crushed nuts for added texture.
- Filled Doughnuts: Beyond jam and Nutella, you can fill the doughnuts with pastry cream, custard, or even peanut butter for a fun variation.

Conclusion
These Perfect Yeast Doughnuts are a true delight for anyone who loves the soft, airy texture of freshly fried doughnuts. With their golden exterior, fluffy interior, and the option to fill them with sweet spreads, these doughnuts are a crowd-pleasing treat that is perfect for any occasion. While the process may take a little time, the end result is well worth the effort. So, gather your ingredients, follow the steps, and enjoy these homemade doughnuts that are sure to impress your family and friends!


