I have a vivid memory of the first time I experienced the simple yet profound joy of a Reese’s Peanut Butter Cup. The perfect harmony of creamy peanut butter and rich chocolate was an instant revelation, a flavor combination that quickly became a cherished favorite. The idea of transforming that iconic treat into a decadent pie seemed like an exciting culinary adventure, a challenge I was eager to undertake. When I finally created this Reese’s Pie, it was an undeniable success! This no-bake dessert is exceptionally well-suited for beginner cooks because it eliminates the need for an oven, utilizes minimal ingredients, and delivers maximum flavor with minimal effort. You’ll learn how to create a smooth and glossy chocolate ganache that forms the base and sides of the pie, mix a creamy and flavorful peanut butter filling that perfectly captures the essence of a peanut butter cup, and assemble a visually stunning dessert that tastes just like a giant peanut butter cup, all while experiencing the satisfaction of creating a delicious treat with ease. Plus, it’s a fantastic way to satisfy your sweet cravings without spending hours laboring in the kitchen.
Reese’s Pie: A No-Bake Peanut Butter Dream for Beginners
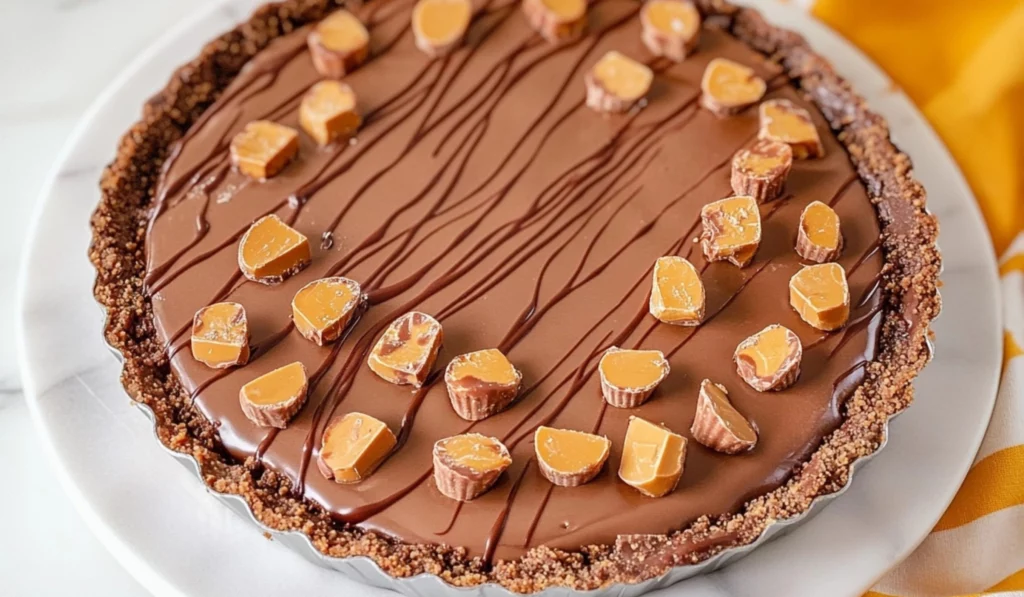
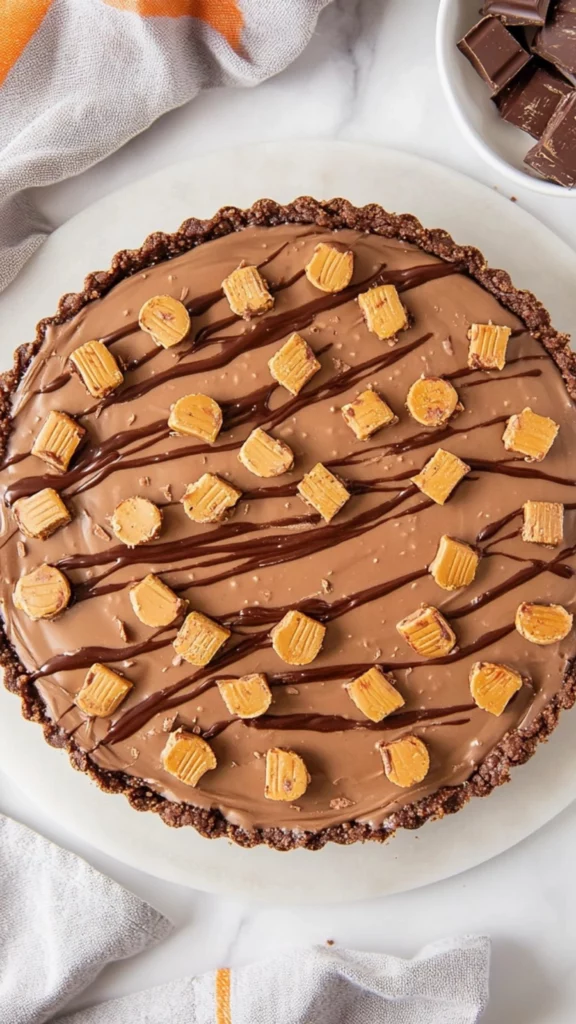
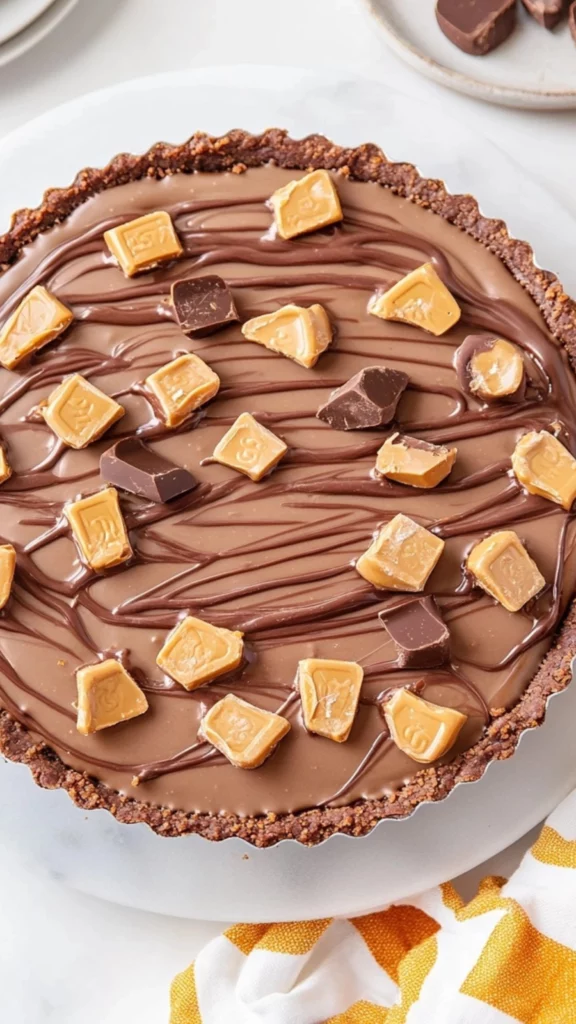
Indulge in peanut butter and chocolate flavors with this pie. Layers of creamy filling and chocolate ganache make a perfect treat.
- Prep Time: 10 minutes
- Cook Time: 4 hours (chilling time)
- Total Time: 4 hours 10 minutes
- Yield: 8 servings
- Category: Dessert
- Method: No-Bake, Melting, Assembling
- Cuisine: American
Ingredients
- Powdered sugar (1 ⅓ cups)
- Graham cracker crumbs (1 cup)
- Peanut butter (1 ¼ cups)
- Butter (½ cup)
- Reese’s cups (1 cup)
- Chocolate chips (2 ½ cups)
- Peanut butter (drizzle)
- Vegetable oil
Instructions
- Prepare Tart Pan (The Pan Preparation): Line a 9-inch tart pan with parchment paper cut into a circle and spray it with non-stick spray. This prevents the pie from sticking to the pan and makes it easy to remove after chilling.
- Melt Chocolate (The Chocolate Melting): Heat 2 ½ cups of milk chocolate chips with the vegetable oil in a microwaveable bowl for 45 seconds to 1 minute, stirring every 15 seconds to prevent burning, until the chocolate is completely melted and smooth.
- Create Chocolate Shell (The Shell Shaping): Pour half of the melted chocolate into the bottom of the prepared tart pan and use a spatula to spread it evenly up the sides, creating a chocolate shell that will hold the filling.
- Harden Chocolate Shell (The Shell Setting): Place the tart pan in the refrigerator to harden the chocolate shell while you prepare the peanut butter filling.
- Mix Dry Ingredients (The Dry Mixture): In a large bowl, whisk together the powdered sugar and crushed graham crackers until well combined.
- Melt Peanut Butter and Butter (The Peanut Butter Blending): Heat the smooth peanut butter and salted sweet cream butter in a microwaveable bowl for 45 seconds, or until melted and smooth.
- Combine Filling Ingredients (The Filling Fusion): Combine the melted peanut butter and butter mixture with the powdered sugar and graham cracker mixture. Mix thoroughly until all ingredients are completely incorporated and the filling is smooth.
- Fill Chocolate Shell (The Filling Feature): Take the tart pan out of the refrigerator and pour the peanut butter filling into the hardened chocolate casing. Use a spatula to smooth the top of the filling, creating an even layer.
- Top with Remaining Chocolate (The Chocolate Crown): Pour the remaining melted chocolate over the peanut butter filling, spreading it evenly to cover the entire surface.
- Settle Chocolate (The Settling Solution): Gently tap the tart pan on the surface to settle the chocolate and create a smooth and even surface.
- Chill Pie (The Chilling Conclusion): Refrigerate the peanut butter cup pie for a minimum of 4 hours, or until completely set. This allows the pie to firm up and the flavors to meld.
- Remove from Pan (The Removal Ritual): Once the pie is completely set, remove the tart pan from the dessert by gently applying pressure to the edges of the pan to release the pie. Then, flip the pan upside down over a large plate that covers the pan. Remove the parchment paper and flip the pie onto another plate for serving.
- Garnish and Serve (The Garnish Grandeur): Cut the Reese’s peanut butter pie into slices. Serve with whipped cream, and drizzle melted chocolate and soft peanut butter over the top for a decorative touch and enhanced flavor.
Notes
- Heat peanut butter and butter together.
- Tap pan to settle chocolate.
- Chill thoroughly before serving.
This Reese’s Pie recipe is meticulously designed to be beginner-friendly, breaking down the entire assembly process into clear, manageable, numbered steps. We’ll begin by preparing the chocolate ganache, a simple yet elegant mixture of melted chocolate chips and vegetable oil that forms the sturdy base and sides of the pie. Then, we’ll mix the peanut butter filling, combining creamy peanut butter, melted butter, powdered sugar, and graham cracker crumbs to create a rich and creamy texture that melts in your mouth. Finally, we’ll assemble the pie, layering the filling and ganache before chilling it to perfection, allowing the flavors to meld and the textures to set. This recipe is a fantastic way to learn some essential no-bake dessert techniques, such as melting chocolate to the perfect consistency, mixing fillings to achieve the desired texture, and assembling layers to create a visually appealing and delicious dessert, all while experiencing the joy of creating a treat that’s both indulgent and easy to make.
Ingredients and Preparation (A Detailed Guide to Peanut Butter Cup Perfection)
This recipe yields 8 servings, making it perfect for sharing with friends and family during gatherings, bringing to a potluck or party, or enjoying throughout the week as a sweet treat. You can easily adjust the ingredient amounts to make a larger or smaller pie, depending on your needs. This recipe is easily doubled or tripled for larger gatherings or to have extra pie for later enjoyment.
Ingredients (The Stars of the Show):
Chunky Peanut Butter Filling (The Filling Foundation):
- 1 ⅓ cups Powdered sugar Powdered sugar adds sweetness and a smooth texture to the filling. You can use granulated sugar, but the texture of the filling may be slightly different.
- 1 cup Graham cracker crumbs Graham cracker crumbs provide a slightly crunchy texture and a subtle flavor that complements the peanut butter. You can use other cookie crumbs like Oreo crumbs (without the filling) or digestive biscuits for a different flavor profile.
- 1 ¼ cups Smooth peanut butter Smooth peanut butter creates a creamy and rich filling. You can use chunky peanut butter for a more textured filling.
- ½ cup Salted sweet cream butter Salted sweet cream butter adds richness and flavor to the filling. You can use unsalted butter, but add a pinch of salt to the filling mixture.
Toppings (The Topping Temptations):
- 1 cup Mini Reese’s peanut butter cups – or chopped PB cups Mini Reese’s peanut butter cups add a decorative touch and enhance the peanut butter and chocolate flavors. You can use other peanut butter candies or chopped chocolate for the topping.
- Drizzle of some melted chocolate chips and soft peanut butter A drizzle of melted chocolate chips and soft peanut butter adds a decorative touch and enhances the flavors of the pie. You can use dark chocolate, milk chocolate, or white chocolate chips for the ganache and drizzle.
Alternatives and Flexibility (Making it Your Own Culinary Creation):
- Sugar Substitutes (The Sugar Switch): You can use sugar substitutes like stevia or erythritol for the filling, adjusting the amount to your sweetness preference.
- Cookie Crumb Variations (The Crumb Choices): You can use other cookie crumbs like chocolate graham crackers, Oreo crumbs (without the filling), or shortbread cookies for the crust.
- Peanut Butter Options (The Peanut Butter Preference): You can use natural peanut butter, honey roasted peanut butter, or other flavored peanut butters for the filling.
- Butter Alternatives (The Butter Balance): You can use unsalted butter, vegan butter, or coconut oil for the filling.
- Chocolate Variations (The Chocolate Choices): You can use dark chocolate, milk chocolate, white chocolate, or a combination of different chocolates for the ganache and drizzle.
- Oil Options (The Oil Option): You can use coconut oil, canola oil, or other neutral oils for melting the chocolate.
- Topping Additions (The Topping Temptations): Feel free to get creative with your toppings. You can add chopped nuts, whipped cream, sprinkles, or caramel sauce.
Step-by-Step Instructions (Easy Steps to Reese’s Pie)
- Prepare Tart Pan (The Pan Preparation): Line a 9-inch tart pan with parchment paper cut into a circle and spray it with non-stick spray. This prevents the pie from sticking to the pan and makes it easy to remove after chilling.
- Melt Chocolate (The Chocolate Melting): Heat 2 ½ cups of milk chocolate chips with the vegetable oil in a microwaveable bowl for 45 seconds to 1 minute, stirring every 15 seconds to prevent burning, until the chocolate is completely melted and smooth.
- Create Chocolate Shell (The Shell Shaping): Pour half of the melted chocolate into the bottom of the prepared tart pan and use a spatula to spread it evenly up the sides, creating a chocolate shell that will hold the filling.
- Harden Chocolate Shell (The Shell Setting): Place the tart pan in the refrigerator to harden the chocolate shell while you prepare the peanut butter filling.
- Mix Dry Ingredients (The Dry Mixture): In a large bowl, whisk together the powdered sugar and crushed graham crackers until well combined.
- Melt Peanut Butter and Butter (The Peanut Butter Blending): Heat the smooth peanut butter and salted sweet cream butter in a microwaveable bowl for 45 seconds, or until melted and smooth.
- Combine Filling Ingredients (The Filling Fusion): Combine the melted peanut butter and butter mixture with the powdered sugar and graham cracker mixture. Mix thoroughly until all ingredients are completely incorporated and the filling is smooth.
- Fill Chocolate Shell (The Filling Feature): Take the tart pan out of the refrigerator and pour the peanut butter filling into the hardened chocolate casing. Use a spatula to smooth the top of the filling, creating an even layer.
- Top with Remaining Chocolate (The Chocolate Crown): Pour the remaining melted chocolate over the peanut butter filling, spreading it evenly to cover the entire surface.
- Settle Chocolate (The Settling Solution): Gently tap the tart pan on the surface to settle the chocolate and create a smooth and even surface.
- Chill Pie (The Chilling Conclusion): Refrigerate the peanut butter cup pie for a minimum of 4 hours, or until completely set. This allows the pie to firm up and the flavors to meld.
- Remove from Pan (The Removal Ritual): Once the pie is completely set, remove the tart pan from the dessert by gently applying pressure to the edges of the pan to release the pie. Then, flip the pan upside down over a large plate that covers the pan. Remove the parchment paper and flip the pie onto another plate for serving.
- Garnish and Serve (The Garnish Grandeur): Cut the Reese’s peanut butter pie into slices. Serve with whipped cream, and drizzle melted chocolate and soft peanut butter over the top for a decorative touch and enhanced flavor.
Beginner Tips and Notes (Troubleshooting and Helpful Hints)
- Melting Chocolate (The Chocolate Control): Microwave the chocolate in short intervals, stirring frequently to prevent burning. Chocolate can scorch easily, so it’s important to heat it gently.
- Smooth Filling (The Filling Fix): Ensure the peanut butter and butter are completely melted and mixed thoroughly with the dry ingredients for a smooth and creamy filling.
- Even Chocolate Shell (The Shell Shaping): Spread the melted chocolate evenly up the sides of the tart pan to create a sturdy and even shell that will hold the filling without breaking.
- Settling Chocolate (The Settling Solution): Gently tap the tart pan on the surface to settle the chocolate and create a smooth and even surface. This will result in a more visually appealing pie.
Serving Suggestions (Enhancing Your Reese’s Pie Experience)
This Reese’s Pie is a delightful treat on its own, offering a rich and satisfying dessert experience. However, it can be further elevated with some complementary sides and toppings to create a more elaborate and visually appealing dessert presentation.
Complementary Sides (The Delicious Additions):
- Whipped Cream (The Creamy Cloud): Top with a dollop of homemade whipped cream for a light and airy addition that complements the richness of the pie.
- Vanilla Ice Cream (The Ice Cream Indulgence): Serve with a scoop of vanilla ice cream for a classic pairing that balances the sweetness of the pie.
- Chocolate Sauce (The Chocolate Drizzle): Drizzle with chocolate sauce, either dark chocolate or milk chocolate, for an extra chocolatey treat.
- Caramel Sauce (The Caramel Crown): Drizzle with caramel sauce for a sweet and salty combination that enhances the peanut butter flavor.
Conclusion (Inviting You to Create and Share)
This Reese’s Pie is a perfect example of how combining simple ingredients and no-bake techniques can create a truly delightful dessert that’s perfect for any occasion, from casual gatherings to holiday celebrations. It’s a fantastic option for beginner cooks who want to learn some basic dessert assembly skills and create a batch of irresistible pie. Don’t be afraid to experiment with the recipe and add your own personal touch. Try different toppings, fillings, chocolate varieties, or garnishes to create your own unique version. And most importantly, have fun in the kitchen! Dessert making should be an enjoyable and creative experience, not a chore.
Now, I encourage you to try this recipe – you won’t be disappointed! Share your culinary creations and any variations you come up with in the comments below – I’d love to hear about your Reese’s Pie adventures! Did you try a different chocolate? Did you add any special ingredients to the filling? What toppings did you use? What did your family or friends think? Let me know! Happy dessert making, and may your kitchen be filled with the sweet aroma of peanut butter and chocolate and the anticipation of a truly satisfying treat! This Reese’s Pie is more than just a dessert; it’s a celebration of simple pleasures, sweet moments, and the joy of sharing homemade treats with loved ones. Enjoy every flavorful bite! And who knows? Maybe this will become your new go-to recipe for a special occasion or a sweet treat to share with friends and family. You might even find yourself making a double or triple batch because it’s just that good. So, go ahead, embrace the simplicity of this recipe, unleash your culinary creativity, and prepare to be amazed by just how delicious and impressive this Reese’s Pie is. It’s a guaranteed crowd-pleaser that will have everyone coming back for more. Bon appétit!


