There are few things as comforting and delightful as a cake that brings a smile to your face the moment you see it. The Shirley Temple Cake does just that, with its vibrant, nostalgic flavors and inviting appearance. Inspired by the classic Shirley Temple drink, this cake combines lemon-lime soda, maraschino cherries, and a moist, tender crumb that makes it a truly irresistible treat. The tangy citrus from the lemon extract and 7UP soda creates a refreshing contrast to the sweet cherries, and the cake is finished with a silky glaze that adds the perfect touch of sweetness.

Shirley Temple Cake: A Delightful Citrus-Cherry Bundt to Brighten Your Day

There are few things as comforting and delightful as a cake that brings a smile to your face the moment you see it. The Shirley Temple Cake does just that, with its vibrant, nostalgic flavors and inviting appearance. Inspired by the classic Shirley Temple drink, this cake combines lemon-lime soda, maraschino cherries, and a moist, tender crumb that makes it a truly irresistible treat. The tangy citrus from the lemon extract and 7UP soda creates a refreshing contrast to the sweet cherries, and the cake is finished with a silky glaze that adds the perfect touch of sweetness.
- Prep Time: 10 minutes
- Cook Time: 1 hour 30 minutes
- Total Time: 1 hour 40 minutes
- Yield: 12 servings 1x
- Category: Dessert
- Method: Baking
- Cuisine: American
- Diet: Vegetarian
Ingredients
- 1 1/2 cups unsalted butter (softened)
- 3 cups granulated sugar
- 5 large eggs (room temperature)
- 3 cups all-purpose flour
- 2 teaspoons lemon extract
- 3/4 cup 7UP soda (or any lemon-lime soda)
- 10 ounces maraschino cherries (1 jar, drained and juice reserved)
For the glaze, you’ll need the following ingredients:
- 2 cups powdered sugar
- 1 teaspoon lemon extract
- 3–4 tablespoons milk
Instructions
Step 1: Preheat the Oven
Begin by preheating your oven to 325º Fahrenheit. It’s always a good idea to preheat the oven before you start baking, as it ensures the cake bakes evenly at the right temperature. This step is essential to achieve the desired texture and golden color.
Step 2: Mix Butter and Sugar
In a large mixing bowl, beat together the softened butter and granulated sugar until the mixture becomes light and fluffy. This is a key step in creating the soft, tender crumb of the cake. The sugar dissolves into the butter, creating a smooth and creamy base that will help the cake rise beautifully in the oven.
Step 3: Add Eggs
Once the butter and sugar mixture is light and fluffy, add the room-temperature eggs one at a time, mixing well after each addition. The eggs are essential for binding the ingredients together and providing structure to the cake. They also help create a soft, moist texture, so make sure they are fully incorporated before moving on to the next step.
Step 4: Incorporate Flour
Gradually add the all-purpose flour, mixing until the batter is smooth and well-combined. The flour will give the cake its structure, and it’s important to add it gradually to avoid overmixing the batter. Overmixing can lead to a dense, heavy cake, so stir just until the flour is fully incorporated.
Step 5: Add Lemon Extract and 7UP
Pour in the lemon extract and 7UP soda, and continue mixing until everything is well-combined. The lemon extract gives the cake a bright, citrusy flavor that perfectly complements the sweetness of the cherries, while the 7UP soda adds a subtle tang and helps the cake rise. The bubbles in the soda also contribute to the lightness of the cake, giving it a soft and airy texture.
Step 6: Fold in Cherries
Next, gently fold in the maraschino cherries. These cherries add a delightful sweetness and a touch of color to the cake, making it even more visually appealing. Be sure to fold them in carefully, as you don’t want to break them up too much or overmix the batter. The goal is to have the cherries evenly distributed throughout the cake while maintaining its light texture.
Step 7: Prepare the Bundt Pan
Grease a 10-inch bundt pan with shortening, ensuring that every crevice is coated to prevent the cake from sticking. Once greased, dust the pan with flour to create a non-stick surface. This will allow the cake to slide out easily once it’s baked, preserving its shape. Bundt cakes can be tricky to remove from the pan, so be sure to coat it thoroughly.
Step 8: Bake the Cake
Pour the cake batter into the prepared bundt pan, spreading it evenly. Place the pan in the preheated oven and bake for 70-90 minutes, or until the center is set. The baking time may vary depending on your oven and the type of bundt pan you use, so it’s important to check the cake regularly. To test for doneness, insert a toothpick into the center of the cake—if it comes out clean, the cake is ready. The cake should have a golden brown color on top and should feel firm to the touch.
Step 9: Cool and Add Cherry Juice
Once the cake is finished baking, remove it from the oven and let it cool for 10-15 minutes in the pan. During this time, the cake will firm up slightly, making it easier to remove from the pan. After the cooling period, carefully flip the bundt pan over and turn the cake onto a serving dish. Using a skewer or toothpick, poke holes all over the top of the cake. Slowly pour the reserved cherry juice over the cake, making sure it seeps into the holes. The juice will soak into the cake, adding extra moisture and enhancing the cherry flavor. Allow the cake to cool completely before glazing.
Step 10: Glaze the Cake
While the cake is cooling, prepare the glaze by mixing the powdered sugar, lemon extract, and milk in a small bowl. Stir until the glaze is smooth and has a pourable consistency. Once the cake has cooled completely, drizzle the glaze over the top, allowing it to cascade down the sides. The glaze adds a glossy finish and a hint of sweetness that complements the tangy lemon-lime flavors of the cake.
Step 11: Garnish with Cherries
For an extra touch of color and sweetness, top the cake with additional maraschino cherries. This not only makes the cake more visually appealing but also enhances the cherry flavor, making each slice even more indulgent.
Notes
- Gluten-Free Version: If you need a gluten-free version of this cake, you can replace the all-purpose flour with a gluten-free flour blend. Be sure to follow the instructions on the flour package for any additional modifications to ensure the cake turns out as expected.
- 7UP Substitute: While 7UP is the traditional choice for this recipe, you can use other lemon-lime sodas like Sprite or Sierra Mist. If you prefer a less sugary option, you can even substitute the soda with lemon-lime sparkling water.
- Dairy-Free Option: To make the cake dairy-free, you can replace the butter with a non-dairy margarine or coconut oil. The texture may change slightly, but the flavor will still be delicious.
- Fruit Variations: If maraschino cherries are not available, feel free to experiment with other fruits. Fresh cherries, strawberries, or even blueberries can be used as a substitute. You can also try soaking the cake with other fruit juices, such as orange or raspberry juice, for a different twist on the classic recipe.
Whether you’re making this cake for a family gathering, a birthday celebration, or simply because you’re in the mood for something delicious, the Shirley Temple Cake is sure to be a hit. With its easy-to-follow instructions and simple ingredients, this recipe is perfect for bakers of all levels. As you prepare and bake this cake, you’ll be treated to the enticing aromas of citrus and cherry filling your kitchen, and each bite will transport you to a place of pure indulgence.
Ingredients for the Cake
Before we dive into the baking process, let’s take a look at the ingredients that come together to create this unforgettable cake. The ingredients are simple and easy to find, but the magic happens when they blend together in the mixing bowl. Here’s a breakdown of the ingredients you’ll need for the cake itself:
- 1 1/2 cups unsalted butter (softened)
- 3 cups granulated sugar
- 5 large eggs (room temperature)
- 3 cups all-purpose flour
- 2 teaspoons lemon extract
- 3/4 cup 7UP soda (or any lemon-lime soda)
- 10 ounces maraschino cherries (1 jar, drained and juice reserved)
For the glaze, you’ll need the following ingredients:
- 2 cups powdered sugar
- 1 teaspoon lemon extract
- 3-4 tablespoons milk
Each ingredient plays a crucial role in contributing to the final flavor and texture of the cake. The butter and sugar create the rich, tender base, while the eggs bind everything together. The all-purpose flour gives structure to the cake, and the 7UP soda provides the slight tanginess and moisture that make this cake so light and airy. The maraschino cherries add a burst of sweetness and a pop of color, making the cake not only delicious but visually striking as well. The glaze, made with powdered sugar, lemon extract, and milk, enhances the sweetness of the cake and gives it a glossy, irresistible finish.
Step-by-Step Instructions
Step 1: Preheat the Oven
Begin by preheating your oven to 325º Fahrenheit. It’s always a good idea to preheat the oven before you start baking, as it ensures the cake bakes evenly at the right temperature. This step is essential to achieve the desired texture and golden color.
Step 2: Mix Butter and Sugar
In a large mixing bowl, beat together the softened butter and granulated sugar until the mixture becomes light and fluffy. This is a key step in creating the soft, tender crumb of the cake. The sugar dissolves into the butter, creating a smooth and creamy base that will help the cake rise beautifully in the oven.
Step 3: Add Eggs
Once the butter and sugar mixture is light and fluffy, add the room-temperature eggs one at a time, mixing well after each addition. The eggs are essential for binding the ingredients together and providing structure to the cake. They also help create a soft, moist texture, so make sure they are fully incorporated before moving on to the next step.
Step 4: Incorporate Flour
Gradually add the all-purpose flour, mixing until the batter is smooth and well-combined. The flour will give the cake its structure, and it’s important to add it gradually to avoid overmixing the batter. Overmixing can lead to a dense, heavy cake, so stir just until the flour is fully incorporated.
Step 5: Add Lemon Extract and 7UP
Pour in the lemon extract and 7UP soda, and continue mixing until everything is well-combined. The lemon extract gives the cake a bright, citrusy flavor that perfectly complements the sweetness of the cherries, while the 7UP soda adds a subtle tang and helps the cake rise. The bubbles in the soda also contribute to the lightness of the cake, giving it a soft and airy texture.
Step 6: Fold in Cherries
Next, gently fold in the maraschino cherries. These cherries add a delightful sweetness and a touch of color to the cake, making it even more visually appealing. Be sure to fold them in carefully, as you don’t want to break them up too much or overmix the batter. The goal is to have the cherries evenly distributed throughout the cake while maintaining its light texture.
Step 7: Prepare the Bundt Pan
Grease a 10-inch bundt pan with shortening, ensuring that every crevice is coated to prevent the cake from sticking. Once greased, dust the pan with flour to create a non-stick surface. This will allow the cake to slide out easily once it’s baked, preserving its shape. Bundt cakes can be tricky to remove from the pan, so be sure to coat it thoroughly.
Step 8: Bake the Cake
Pour the cake batter into the prepared bundt pan, spreading it evenly. Place the pan in the preheated oven and bake for 70-90 minutes, or until the center is set. The baking time may vary depending on your oven and the type of bundt pan you use, so it’s important to check the cake regularly. To test for doneness, insert a toothpick into the center of the cake—if it comes out clean, the cake is ready. The cake should have a golden brown color on top and should feel firm to the touch.
Step 9: Cool and Add Cherry Juice
Once the cake is finished baking, remove it from the oven and let it cool for 10-15 minutes in the pan. During this time, the cake will firm up slightly, making it easier to remove from the pan. After the cooling period, carefully flip the bundt pan over and turn the cake onto a serving dish. Using a skewer or toothpick, poke holes all over the top of the cake. Slowly pour the reserved cherry juice over the cake, making sure it seeps into the holes. The juice will soak into the cake, adding extra moisture and enhancing the cherry flavor. Allow the cake to cool completely before glazing.
Step 10: Glaze the Cake
While the cake is cooling, prepare the glaze by mixing the powdered sugar, lemon extract, and milk in a small bowl. Stir until the glaze is smooth and has a pourable consistency. Once the cake has cooled completely, drizzle the glaze over the top, allowing it to cascade down the sides. The glaze adds a glossy finish and a hint of sweetness that complements the tangy lemon-lime flavors of the cake.
Step 11: Garnish with Cherries
For an extra touch of color and sweetness, top the cake with additional maraschino cherries. This not only makes the cake more visually appealing but also enhances the cherry flavor, making each slice even more indulgent.
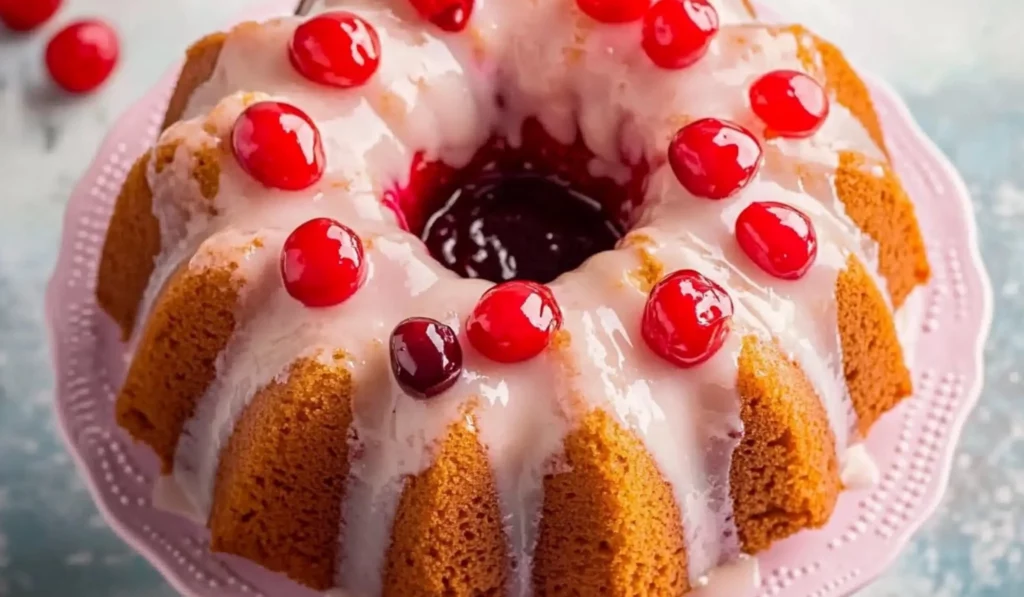
Flavor, Texture, and Aroma
As you slice into the Shirley Temple Cake, you’ll be met with its light, moist texture and fluffy crumb. The cake is soft and airy, with a delicate sweetness that’s perfectly balanced by the tangy lemon-lime flavor. The maraschino cherries provide a burst of sweetness in every bite, adding a playful touch to the overall flavor profile. The glaze, made from powdered sugar and lemon extract, adds a glossy finish and a subtle citrus kick that ties everything together. The aroma of lemon extract and cherries fills the air as the cake bakes, creating an inviting atmosphere in your kitchen. Each bite is a perfect combination of sweetness, citrus, and cherry, making this cake an absolute treat for the senses.
Tips for Substitutions and Variations
- Gluten-Free Version: If you need a gluten-free version of this cake, you can replace the all-purpose flour with a gluten-free flour blend. Be sure to follow the instructions on the flour package for any additional modifications to ensure the cake turns out as expected.
- 7UP Substitute: While 7UP is the traditional choice for this recipe, you can use other lemon-lime sodas like Sprite or Sierra Mist. If you prefer a less sugary option, you can even substitute the soda with lemon-lime sparkling water.
- Dairy-Free Option: To make the cake dairy-free, you can replace the butter with a non-dairy margarine or coconut oil. The texture may change slightly, but the flavor will still be delicious.
- Fruit Variations: If maraschino cherries are not available, feel free to experiment with other fruits. Fresh cherries, strawberries, or even blueberries can be used as a substitute. You can also try soaking the cake with other fruit juices, such as orange or raspberry juice, for a different twist on the classic recipe.
Serving Suggestions
The Shirley Temple Cake is incredibly versatile and can be served in a variety of ways. It’s perfect for any occasion, from birthdays to holiday dinners, or even as a sweet treat for a casual family gathering. For an added touch of indulgence, serve it with a dollop of freshly whipped cream or a scoop of vanilla ice cream. You can also garnish the cake with fresh fruit, such as berries or sliced citrus, to complement the cake’s flavors and make it even more visually appealing.
This cake pairs wonderfully with a refreshing beverage, such as iced tea, lemonade, or even a glass of champagne for a more festive occasion. The light, citrusy flavor of the cake makes it an ideal dessert for warm weather or outdoor gatherings. For a fun twist, try serving it alongside a fruit salad for a fresh, vibrant dessert spread.

Storage and Shelf Life
To keep your Shirley Temple Cake fresh, store it in an airtight container at room temperature for up to three days. If you need to keep it longer, refrigerate it for up to five days. This cake also freezes beautifully. To freeze, wrap the cake tightly in plastic wrap and aluminum foil, and store it in the freezer. When you’re ready to serve it, simply thaw it at room temperature for a few hours, then drizzle with the glaze and enjoy!
Final Thoughts
The Shirley Temple Cake is the perfect combination of nostalgia, flavor, and fun. Its light texture, sweet cherry flavor, and tangy lemon-lime notes make it a delightful treat for any occasion. Whether you’re baking it for a special event or simply because you’re in the mood for something delicious, this cake is sure to please everyone who tries it. With simple ingredients and easy-to-follow instructions, it’s a recipe that will quickly become a favorite in your baking repertoire. So go ahead, embrace the sweet nostalgia of childhood and enjoy a slice of this enchanting cake.


