When I think about classic desserts that never seem to go out of style, Strawberry Jello Cups are always near the top of the list. They’re colorful, fun, and full of flavor, which makes them a hit at almost any event, whether it’s a birthday party, a picnic, or even a casual family gathering. These layered treats are a perfect example of a dessert that’s both easy to make and delightful to serve. The very first time I tried making these jello cups, I remember feeling a little intimidated. With all those layers, I wasn’t sure if I could pull it off without messing it up. But, to my surprise, the process was not only simple but also incredibly rewarding. The layers, although they take some time to set, are easy to make, and the result is a dessert that looks impressive and tastes delicious.

Strawberry Jello Cups: A Vibrant, Layered Delight for All Occasions

Looking for a simple yet impressive dessert? Strawberry Jello Cups are the answer! These colorful, layered treats are a fun, nostalgic favorite that’s perfect for any occasion. With just a few basic ingredients and easy steps, even beginner cooks can whip up these sweet, creamy cups. Whether you’re making them for a party or a cozy treat, they’re sure to brighten up the day. Let’s dive in and create something delicious!
- Prep Time: 15 minutes
- Cook Time: 5 minutes
- Total Time: 20 minutes
- Yield: 6 servings 1x
- Category: Dessert
- Method: Layering, No-Bake
- Cuisine: American
- Diet: Vegetarian
Ingredients
- 5 boxes of Strawberry Jello mix (3 oz each) – The star of the show! These jello mixes give the dessert its signature vibrant color and flavor. If you prefer a different flavor, feel free to experiment with raspberry, cherry, or even tropical fruit jello mixes.
- Water – For dissolving the jello and helping it set properly.
- 2 cups of Cool Whip (approximately two containers) – Cool Whip provides that creamy, light texture that perfectly complements the firm jello layers. You can substitute Cool Whip with homemade whipped cream for a fresher, slightly less sweet version.
- Fresh strawberries – These will be used as a garnish for each parfait. They not only add a fresh burst of flavor but also enhance the visual appeal of the dessert.
Instructions
Layer 1: The First Layer of Strawberry Jello
-
- In a medium-sized bowl, combine 1 cup of boiling water with one packet of strawberry jello mix. Stir until the jello mix is completely dissolved in the water. This is where the jello gets its signature fruity flavor, so make sure it’s well-mixed.
-
- After the jello has dissolved, add 1 cup of cold water and stir again. This helps cool down the mixture and speeds up the setting process.
-
- Divide the mixture evenly between your cups, depending on how many you’re using. This is where you can get creative—small mason jars, plastic cups, or even glass dessert cups all work well for serving. Try to pour evenly so each layer has a similar height.
-
- Once the mixture is in the cups, refrigerate them for about 1 to 2 hours, or until the first layer is completely set. The jello should feel firm to the touch but not wobbly.
Layer 2: Adding the Whipped Cream Layer
-
- For the second layer, repeat the process of making the jello: Combine 1 packet of strawberry jello mix with 1 cup of boiling water, stirring until it dissolves completely.
-
- Add 1 cup of cold water to the mixture and stir well.
-
- Next, add 1 cup of Cool Whip to the jello and stir gently until the mixture is smooth and fully combined. This layer will have a creamy texture, and the Cool Whip helps balance out the sweetness of the jello.
-
- Pour this creamy mixture over the first set layer of jello. You might notice that the layers will separate a little bit, with the jello being darker and the Cool Whip layer looking lighter. This is normal and adds a beautiful visual effect.
-
- Refrigerate for 1 to 2 hours until this layer is set completely.
Layer 3: More Strawberry Jello for a Bold Color
-
- Repeat the process again by combining 1 packet of strawberry jello mix with 1 cup of boiling water. Stir to dissolve.
-
- Add 1 cup of cold water and stir to mix well.
-
- Pour this new jello mixture into the cups over the set Cool Whip layer. Try to pour gently so you don’t disturb the layers below.
-
- Let the third layer set in the fridge for 1 to 2 hours.
Layer 4: Adding More Creamy Delight
-
- Once again, repeat the process by combining 1 packet of strawberry jello mix with 1 cup of boiling water. Stir until dissolved.
-
- Add 1 cup of cold water, followed by 1 cup of Cool Whip to create the creamy texture.
-
- Carefully pour this mixture over the previous jello layer and refrigerate for 1 to 2 hours to set completely.
Layer 5: The Final Jello Layer
-
- For the last layer, combine 1 packet of strawberry jello mix with 1 cup of boiling water, stirring until dissolved.
-
- Add 1 cup of cold water, mix well, and pour it over the set creamy layer.
-
- Refrigerate once more for 1 to 2 hours until fully set.
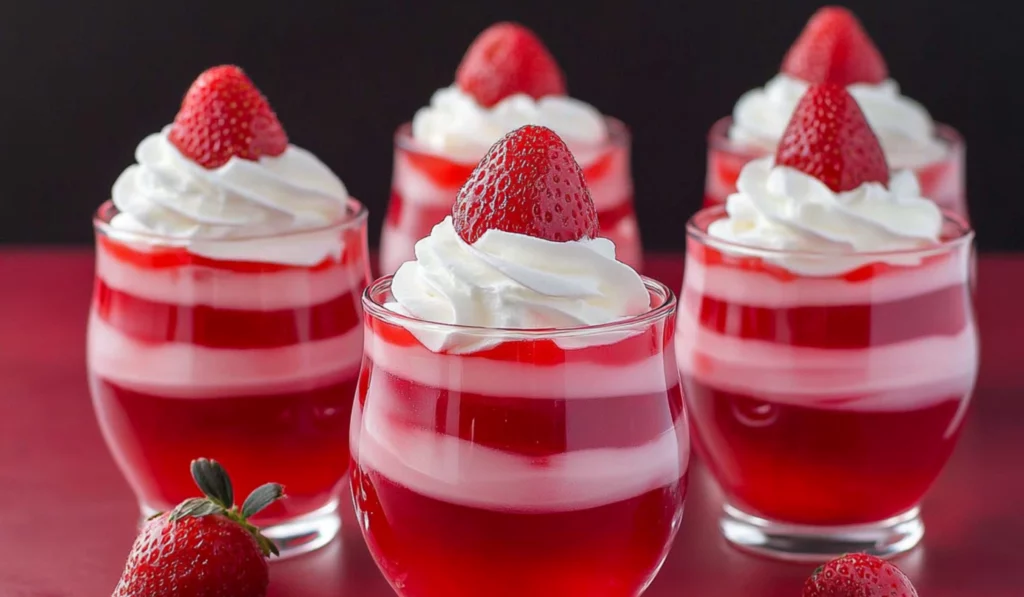
Top it off with Whipped Cream and Strawberries
Once all the layers are set, it’s time for the final touches:
-
- Top each parfait with a generous amount of Cool Whip.
-
- Garnish with fresh strawberries for a pop of color and flavor. You can slice the strawberries or leave them whole, depending on your preference.
Notes
- Let each layer set completely: Patience is key when making layered desserts. Make sure each layer is fully set before adding the next one. This will prevent the layers from mixing and maintain the beautiful, distinct layers.
- Avoid overmixing the Cool Whip: When mixing Cool Whip into the jello, be gentle to keep it airy and light. Overmixing can cause the texture to become too dense.
- Use fresh fruit for the garnish: Fresh strawberries add a sweet touch and look stunning on top of your jello cups. If you want, you can add a sprig of mint for an extra pop of color and flavor.
For beginners, Strawberry Jello Cups are an excellent choice. The recipe is straightforward, and the ingredients are easy to find. You don’t need any special skills or equipment. All you need is a bit of patience between each layer while they set, and the outcome will be a dessert that everyone will love. What’s even better is that you can customize the layers with different flavors or toppings, making this recipe versatile for any occasion. The cool, creamy texture of the jello paired with the lightness of the Cool Whip creates a dessert that is refreshing and satisfying. Plus, it’s a treat that kids will especially enjoy, making it an ideal dessert for family gatherings or school events. The best part? You don’t have to be an experienced baker or chef to pull it off. So, grab your bowls and spoons, and let’s get started with making these irresistible Strawberry Jello Cups!
Ingredients and Preparation
Before jumping into the steps, let’s go over the ingredients you’ll need. These ingredients are simple, inexpensive, and easy to find at your local grocery store. If you’re missing something, don’t worry! There are also some fun alternatives you can try.
Ingredients:
- 5 boxes of Strawberry Jello mix (3 oz each) – The star of the show! These jello mixes give the dessert its signature vibrant color and flavor. If you prefer a different flavor, feel free to experiment with raspberry, cherry, or even tropical fruit jello mixes.
- Water – For dissolving the jello and helping it set properly.
- 2 cups of Cool Whip (approximately two containers) – Cool Whip provides that creamy, light texture that perfectly complements the firm jello layers. You can substitute Cool Whip with homemade whipped cream for a fresher, slightly less sweet version.
- Fresh strawberries – These will be used as a garnish for each parfait. They not only add a fresh burst of flavor but also enhance the visual appeal of the dessert.
Ingredient Alternatives:
- Whipped Cream vs Cool Whip: While Cool Whip is convenient and stable for layering, you can always make your own whipped cream by beating heavy cream with a little sugar and vanilla. It will give a fresher flavor, but you’ll need to serve it sooner because it doesn’t hold up as well as Cool Whip.
- Fruit Variations: If strawberry isn’t your thing, swap out the jello flavor for something like raspberry or blueberry. You can also make a layered jello dessert with different flavors to make each cup a little more exciting and colorful.
- Jello Brands: Different brands of gelatin might give slightly different textures. If you’re a stickler for brand quality, look for gelatin that specifically mentions being firm enough for layered desserts.
Step-by-Step Instructions
Now that you’ve got your ingredients ready, let’s dive into the step-by-step process of creating your own Strawberry Jello Cups. While it’s simple, the key to making these cups stand out is patience. Each layer needs time to set properly, but the overall process isn’t difficult at all.
Layer 1: The First Layer of Strawberry Jello
- In a medium-sized bowl, combine 1 cup of boiling water with one packet of strawberry jello mix. Stir until the jello mix is completely dissolved in the water. This is where the jello gets its signature fruity flavor, so make sure it’s well-mixed.
- After the jello has dissolved, add 1 cup of cold water and stir again. This helps cool down the mixture and speeds up the setting process.
- Divide the mixture evenly between your cups, depending on how many you’re using. This is where you can get creative—small mason jars, plastic cups, or even glass dessert cups all work well for serving. Try to pour evenly so each layer has a similar height.
- Once the mixture is in the cups, refrigerate them for about 1 to 2 hours, or until the first layer is completely set. The jello should feel firm to the touch but not wobbly.
Layer 2: Adding the Whipped Cream Layer
- For the second layer, repeat the process of making the jello: Combine 1 packet of strawberry jello mix with 1 cup of boiling water, stirring until it dissolves completely.
- Add 1 cup of cold water to the mixture and stir well.
- Next, add 1 cup of Cool Whip to the jello and stir gently until the mixture is smooth and fully combined. This layer will have a creamy texture, and the Cool Whip helps balance out the sweetness of the jello.
- Pour this creamy mixture over the first set layer of jello. You might notice that the layers will separate a little bit, with the jello being darker and the Cool Whip layer looking lighter. This is normal and adds a beautiful visual effect.
- Refrigerate for 1 to 2 hours until this layer is set completely.
Layer 3: More Strawberry Jello for a Bold Color
- Repeat the process again by combining 1 packet of strawberry jello mix with 1 cup of boiling water. Stir to dissolve.
- Add 1 cup of cold water and stir to mix well.
- Pour this new jello mixture into the cups over the set Cool Whip layer. Try to pour gently so you don’t disturb the layers below.
- Let the third layer set in the fridge for 1 to 2 hours.
Layer 4: Adding More Creamy Delight
- Once again, repeat the process by combining 1 packet of strawberry jello mix with 1 cup of boiling water. Stir until dissolved.
- Add 1 cup of cold water, followed by 1 cup of Cool Whip to create the creamy texture.
- Carefully pour this mixture over the previous jello layer and refrigerate for 1 to 2 hours to set completely.
Layer 5: The Final Jello Layer
- For the last layer, combine 1 packet of strawberry jello mix with 1 cup of boiling water, stirring until dissolved.
- Add 1 cup of cold water, mix well, and pour it over the set creamy layer.
- Refrigerate once more for 1 to 2 hours until fully set.
Top it off with Whipped Cream and Strawberries
Once all the layers are set, it’s time for the final touches:
- Top each parfait with a generous amount of Cool Whip.
- Garnish with fresh strawberries for a pop of color and flavor. You can slice the strawberries or leave them whole, depending on your preference.
Beginner Tips and Notes
Making layered desserts like Strawberry Jello Cups can be a fun and rewarding experience, especially for beginners. Here are some helpful tips to ensure your jello cups turn out perfectly every time:
- Let each layer set completely: Patience is key when making layered desserts. Make sure each layer is fully set before adding the next one. This will prevent the layers from mixing and maintain the beautiful, distinct layers.
- Avoid overmixing the Cool Whip: When mixing Cool Whip into the jello, be gentle to keep it airy and light. Overmixing can cause the texture to become too dense.
- Use fresh fruit for the garnish: Fresh strawberries add a sweet touch and look stunning on top of your jello cups. If you want, you can add a sprig of mint for an extra pop of color and flavor.
Serving Suggestions
While these Strawberry Jello Cups are amazing on their own, you can take them to the next level by pairing them with some complementary sides or serving suggestions:
- Serve with a light fruit salad: A fresh fruit salad of mixed berries, melon, and kiwi would pair beautifully with the sweet and creamy jello cups.
- Add a scoop of vanilla ice cream: If you want to make these cups even more decadent, serve them with a scoop of vanilla ice cream or a dollop of whipped cream on the side.
- Pair with a fizzy drink: A sparkling lemon-lime soda or even a homemade lemonade would be a refreshing pairing with the sweetness of the jello cups.
Storage Tips for Leftovers
If you have any leftovers, these jello cups can be stored in the refrigerator for up to 3 days. Simply cover them with plastic wrap or store them in an airtight container to maintain their freshness. If you made a larger batch, it’s easy to scale down by using smaller cups next time.

Conclusion
With their vibrant colors, creamy texture, and simple ingredients, Strawberry Jello Cups are the perfect dessert for any occasion. They’re easy to make, fun to assemble, and look impressive when served to guests. Plus, they’re a great dessert for beginners to try their hand at, as they require no special skills or equipment. Give this recipe a try and let me know how it turns out in the comments below! I’d love to hear how your layered jello cups came together, and feel free to share any fun variations you added along the way. Happy cooking!


