Making French macarons at home is often considered a challenge, but once you get the hang of it, they become a fun, rewarding treat to bake. These delicate little cookies, with their smooth, crisp exteriors and chewy centers, are an elegant addition to any dessert table. Whether you’re a beginner or an experienced baker, this guide will help you create macarons that will impress everyone.
The Ultimate Beginner’s Guide to Making Perfect French Macarons
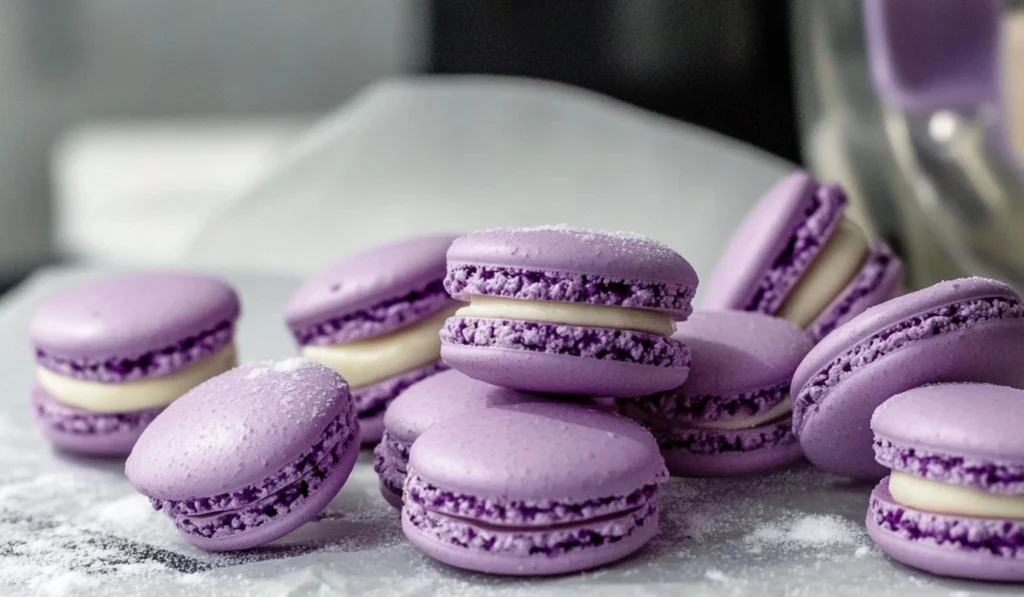
French macarons are the epitome of elegance and sophistication, yet they can be surprisingly simple to make with the right guidance. I remember my first attempt at macarons—it was a bit messy, but the end result was so rewarding! These little cookies have a delicate crisp exterior and a soft, chewy interior that makes them irresistible. Whether you’re a beginner or a seasoned baker, this step-by-step guide will help you master the art of making perfect macarons. With a bit of patience and practice, you’ll be creating these delightful treats in your own kitchen. Let’s dive in!
- Prep Time: 30 minutes
- Cook Time: 15 minutes
- Total Time: 45 minutes
- Yield: 20 sandwiched macarons 1x
- Category: Dessert
- Method: Baking
- Cuisine: French
- Diet: Vegetarian
Ingredients
For the Macaron Shells:
- 150 grams sifted super-fine almond flour (measure after sifting)
- 180 grams powdered sugar
- ¼ teaspoon salt
- 120 grams large egg whites (at room temperature, about 4 large eggs)
- 60 grams granulated sugar
- 4 drops liquid-gel food coloring (optional, for color)
- 1 teaspoon pure vanilla extract
For the Vanilla Buttercream Filling:
- 1 cup unsalted butter, softened
- 3 cups powdered sugar
- 1 teaspoon vanilla extract
- 2 tablespoons heavy cream (optional for consistency)
Instructions
1. Prepare Your Piping Bag and Baking Sheets
Preheat your oven to 315°F (157°C). Line three large baking sheets with parchment paper, and set aside. This will ensure your macarons don’t stick during baking. For the piping bag, cut the tip off a large piping bag and fit it with a large plain tip. This will help you pipe out the perfect circles for your macaron shells.
2. Sift Dry Ingredients
Sift 150 grams of almond flour and 180 grams of powdered sugar together into a medium bowl. It’s crucial to sift the almond flour to ensure a smooth macaron batter. This step eliminates any lumps and prevents gritty shells. After sifting, discard any large pieces of almond flour that don’t make it through the sifter.
3. Prepare the Meringue
In a clean, dry glass or metal bowl, beat the egg whites with an electric mixer at medium-high speed for about 30 seconds. Add ¼ teaspoon salt, then slowly begin adding the 60 grams of granulated sugar, a little bit at a time, while continuing to beat the mixture. It’s important to add the sugar slowly, about ½ teaspoon per addition, to ensure the sugar dissolves fully into the egg whites.
Once all the sugar is added, continue beating the meringue until stiff peaks form. To test, dip your whisk into the mixture, then invert it. The meringue should hold its shape and not curl over.
4. Add Color and Flavor
Once the meringue is at stiff peaks, add the food coloring and vanilla extract. Mix gently until the color is fully incorporated. You can add more or less food coloring depending on the desired intensity of the color.
5. Combine Dry Ingredients with Meringue
Carefully fold the sifted almond flour and powdered sugar mixture into the meringue in three additions. Use a spatula to fold the ingredients together, being mindful not to deflate the meringue too much. The goal is to achieve a smooth, shiny batter that falls off the spatula in thick ribbons.
6. Macaronage: Achieve the Perfect Consistency
Now comes the most crucial step: macaronage, the technique of folding the batter to the right consistency. Continue folding the batter until it reaches a lava-like consistency, meaning it should flow off the spatula in thick ribbons but still maintain structure. If you draw a figure 8 with the batter, it should not break, and it should slowly sink back into the rest of the batter.
If you overmix the batter, your macarons could spread too much or not form the desired texture, so be careful. If the batter seems too thick, mix it a bit more, but err on the side of slightly undermixed to avoid this.
7. Pipe the Macaron Shells
Transfer the macaron batter into the prepared piping bag. Hold the piping bag perpendicular to your lined baking sheets and pipe circles about 1 inch in diameter, leaving about 1 inch of space between each one. You can use a macaron template as a guide if you want perfectly uniform shells.
8. Rest the Macarons
After piping the macarons, gently tap the baking sheet on the counter several times to release any air bubbles and flatten the tops. Let the macaron shells rest for 30 to 60 minutes at room temperature, or until a skin forms on top. To test, lightly touch the top of a macaron; if it doesn’t stick to your finger, it’s ready to bake.
9. Bake the Macarons
Bake the macaron shells in the center of the preheated oven for 12 to 15 minutes, one sheet at a time. To check if they’re done, gently press on one macaron shell; it should not wiggle, and the shell should have formed feet along the bottom.
Allow the macarons to cool completely on the baking sheet before carefully removing them with a spatula.
10. Assemble the Macarons
Pair up similarly sized macaron shells. Pipe your desired filling (vanilla buttercream is a classic choice) on the bottom of one shell and sandwich it with another. Gently press down to secure the filling.
Notes
- Don’t Overmix the Batter: It’s better to err on the side of slightly undermixing your batter than to overmix it. Overmixed batter will result in flat, cracked macarons.
- Room Temperature Eggs: Make sure your egg whites are at room temperature before whipping them. Cold eggs won’t whip up to the desired consistency.
- Resting Time: Allow your macarons to rest long enough to form a skin before baking. This step is crucial for getting that perfect macaron texture.
- Don’t Rush the Cooling Process: Allow your macarons to cool completely on the baking sheet before removing them. This ensures they won’t break when you try to peel them off.
When I first attempted to make macarons, I was both excited and intimidated. The idea of creating something so sophisticated from scratch felt like a huge feat, but I was determined to succeed. After some trial and error, I found that with the right technique and patience, anyone can make macarons. This recipe breaks down the process step by step, giving you all the information you need to achieve perfect macarons every time.
Making macarons may seem like a delicate process, but don’t let that scare you! They are surprisingly easy to make once you know the key steps and tricks to avoid. This French macaron recipe is ideal for beginners, as it includes all the tips and explanations needed to ensure success. With the right ingredients, equipment, and a bit of practice, you’ll be whipping up perfect macarons in no time.
Why This Recipe Is Perfect for Beginners
Macarons are a perfect starting point for anyone looking to improve their baking skills. Unlike other complicated pastries, macarons don’t require advanced techniques, and they’re quick to prepare once you know the steps. The best part? They only require a few basic ingredients that you likely already have in your pantry! The French method of macaron making focuses on simplicity, and with just a few steps, you can create perfectly crisp and chewy macaron shells. The filling options are also endless, making macarons an easy recipe to customize to your taste.
This recipe focuses on achieving that coveted macaron “foot” and smooth, glossy tops with a perfectly chewy center. It takes practice to get everything just right, but with this guide, you’ll be making macarons that could rival those from a professional bakery.
Ingredients and Preparation
For the Macaron Shells:
- 150 grams sifted super-fine almond flour (measure after sifting)
- 180 grams powdered sugar
- ¼ teaspoon salt
- 120 grams large egg whites (at room temperature, about 4 large eggs)
- 60 grams granulated sugar
- 4 drops liquid-gel food coloring (optional, for color)
- 1 teaspoon pure vanilla extract
For the Vanilla Buttercream Filling:
- 1 cup unsalted butter, softened
- 3 cups powdered sugar
- 1 teaspoon vanilla extract
- 2 tablespoons heavy cream (optional for consistency)
The ingredients are relatively simple, but there are a few tricks to note. First, make sure the almond flour is sifted properly to prevent any lumps in the macaron batter. It’s important to measure the ingredients precisely to get the perfect macaron texture. The egg whites should be at room temperature before you begin making the meringue – this ensures they whip up properly.
Alternative Ingredients: If you’re looking to experiment with different flavors, you can swap out the vanilla for other extracts like almond, pistachio, or lemon to make flavored macarons. For the filling, you can substitute buttercream with other options like ganache or fruit jams depending on your preferences.
Step-by-Step Instructions
1. Prepare Your Piping Bag and Baking Sheets
Preheat your oven to 315°F (157°C). Line three large baking sheets with parchment paper, and set aside. This will ensure your macarons don’t stick during baking. For the piping bag, cut the tip off a large piping bag and fit it with a large plain tip. This will help you pipe out the perfect circles for your macaron shells.
2. Sift Dry Ingredients
Sift 150 grams of almond flour and 180 grams of powdered sugar together into a medium bowl. It’s crucial to sift the almond flour to ensure a smooth macaron batter. This step eliminates any lumps and prevents gritty shells. After sifting, discard any large pieces of almond flour that don’t make it through the sifter.
3. Prepare the Meringue
In a clean, dry glass or metal bowl, beat the egg whites with an electric mixer at medium-high speed for about 30 seconds. Add ¼ teaspoon salt, then slowly begin adding the 60 grams of granulated sugar, a little bit at a time, while continuing to beat the mixture. It’s important to add the sugar slowly, about ½ teaspoon per addition, to ensure the sugar dissolves fully into the egg whites.
Once all the sugar is added, continue beating the meringue until stiff peaks form. To test, dip your whisk into the mixture, then invert it. The meringue should hold its shape and not curl over.
4. Add Color and Flavor
Once the meringue is at stiff peaks, add the food coloring and vanilla extract. Mix gently until the color is fully incorporated. You can add more or less food coloring depending on the desired intensity of the color.
5. Combine Dry Ingredients with Meringue
Carefully fold the sifted almond flour and powdered sugar mixture into the meringue in three additions. Use a spatula to fold the ingredients together, being mindful not to deflate the meringue too much. The goal is to achieve a smooth, shiny batter that falls off the spatula in thick ribbons.
6. Macaronage: Achieve the Perfect Consistency
Now comes the most crucial step: macaronage, the technique of folding the batter to the right consistency. Continue folding the batter until it reaches a lava-like consistency, meaning it should flow off the spatula in thick ribbons but still maintain structure. If you draw a figure 8 with the batter, it should not break, and it should slowly sink back into the rest of the batter.
If you overmix the batter, your macarons could spread too much or not form the desired texture, so be careful. If the batter seems too thick, mix it a bit more, but err on the side of slightly undermixed to avoid this.
7. Pipe the Macaron Shells
Transfer the macaron batter into the prepared piping bag. Hold the piping bag perpendicular to your lined baking sheets and pipe circles about 1 inch in diameter, leaving about 1 inch of space between each one. You can use a macaron template as a guide if you want perfectly uniform shells.
8. Rest the Macarons
After piping the macarons, gently tap the baking sheet on the counter several times to release any air bubbles and flatten the tops. Let the macaron shells rest for 30 to 60 minutes at room temperature, or until a skin forms on top. To test, lightly touch the top of a macaron; if it doesn’t stick to your finger, it’s ready to bake.
9. Bake the Macarons
Bake the macaron shells in the center of the preheated oven for 12 to 15 minutes, one sheet at a time. To check if they’re done, gently press on one macaron shell; it should not wiggle, and the shell should have formed feet along the bottom.
Allow the macarons to cool completely on the baking sheet before carefully removing them with a spatula.
10. Assemble the Macarons
Pair up similarly sized macaron shells. Pipe your desired filling (vanilla buttercream is a classic choice) on the bottom of one shell and sandwich it with another. Gently press down to secure the filling.
Beginner Tips and Notes
- Don’t Overmix the Batter: It’s better to err on the side of slightly undermixing your batter than to overmix it. Overmixed batter will result in flat, cracked macarons.
- Room Temperature Eggs: Make sure your egg whites are at room temperature before whipping them. Cold eggs won’t whip up to the desired consistency.
- Resting Time: Allow your macarons to rest long enough to form a skin before baking. This step is crucial for getting that perfect macaron texture.
- Don’t Rush the Cooling Process: Allow your macarons to cool completely on the baking sheet before removing them. This ensures they won’t break when you try to peel them off.
Serving Suggestions
Macarons can be served on their own as a sweet treat with coffee or tea. They’re also great for special occasions like birthdays, weddings, or holidays. For added flair, you can dust the tops of your macarons with edible glitter or top them with a little bit of chocolate ganache.
Storing Macarons
Macarons are best stored in an airtight container in the fridge. They can last up to 3 days in the fridge, and the flavors will continue to mature. If you’re storing them for longer, you can freeze the macaron shells and fillings separately, then assemble them later.
Conclusion
Now that you have a foolproof recipe for French macarons, it’s time to get baking! Don’t be discouraged if your first batch isn’t perfect – macarons take practice, and each time you bake them, you’ll improve your technique. With this guide, you’ll be well-equipped to make stunning macarons that taste as good as they look. Try different fillings, colors, and flavors to make them your own, and don’t forget to share your macaron journey with friends and family!
Happy baking, and enjoy your delicious homemade macarons!


