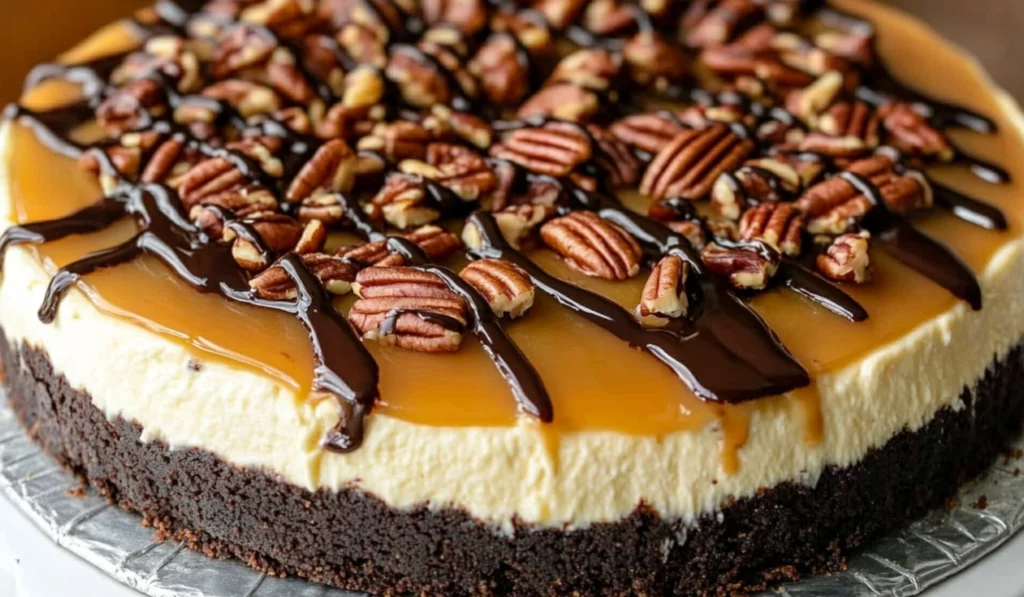
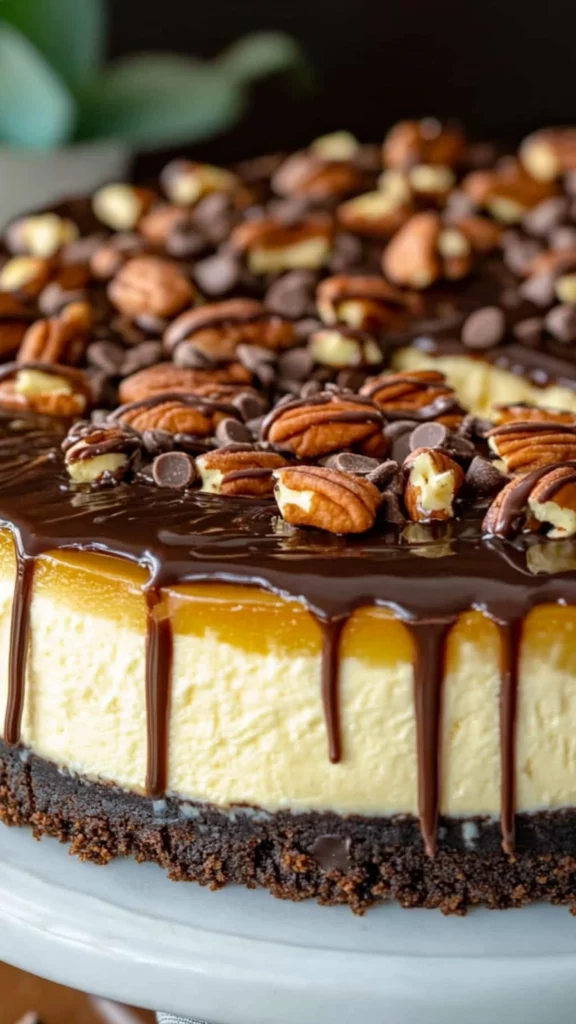
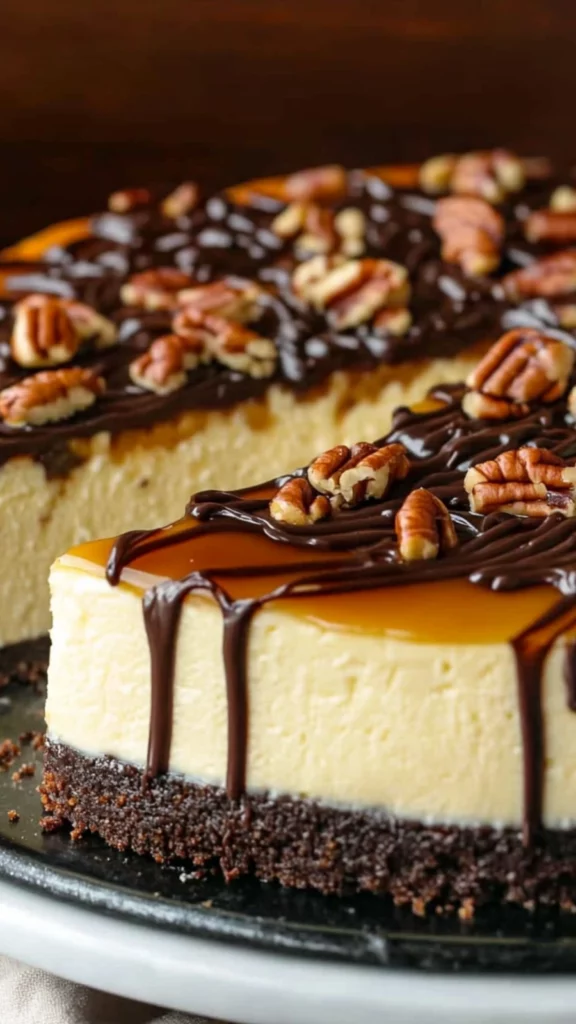
If you’re someone who loves indulgent, creamy cheesecakes with a bit of everything—chocolate, caramel, and crunchy nuts—then this Turtle Cheesecake is a recipe you won’t want to miss. The combination of a rich, velvety cheesecake sitting on a chocolate cookie crumb crust, then topped with toasted pecans, gooey caramel, and melted chocolate, makes this dessert absolutely irresistible. Each bite delivers a perfect balance of flavors and textures, making this the ultimate treat for anyone with a sweet tooth.
Turtle Cheesecake: A Decadent, Easy-to-Make Dessert

Craving a dessert that’s rich, creamy, and full of flavor? This Turtle Cheesecake is the perfect treat! With a smooth vanilla cheesecake on a chocolate cookie crust, topped with toasted pecans, caramel, and melted chocolate, it’s a slice of indulgence in every bite. Best of all, it’s beginner-friendly, making it easy to create a show-stopping dessert that tastes as amazing as it looks. Let’s dive in!
- Prep Time: 40 minutes
- Cook Time: 1 hour 10 minutes
- Total Time: 1 hour 50 minutes
- Yield: 8–10 servings 1x
- Category: Dessert
- Method: Baking
- Cuisine: American
- Diet: Vegetarian
Ingredients
For the Cookie Crumb Crust:
- 1 1/2 cups chocolate cookie crumbs
- 2 tbsp sugar
- 1/4 cup melted butter
Alternatives: If you don’t have chocolate cookie crumbs or prefer a different flavor, you can use graham cracker crumbs or even any plain cookie crumbs. To give the crust a more adventurous flavor, try using coconut-flavored cookies or even a gluten-free alternative. Instead of butter, you can use coconut oil for a dairy-free version of the crust.
For the Cheesecake Layer:
- 3 (8 oz) packages of cream cheese, softened
- 1 cup sugar
- 3 large eggs
- 1 tbsp vanilla extract (or vanilla bean paste)
- 1 cup heavy whipping cream (minus 1 tbsp for the caramel)
Alternatives: For those looking for a lighter option, you can substitute regular cream cheese with Neufchatel cheese, which has less fat content but still gives you that creamy consistency. If you’re following a dairy-free or vegan lifestyle, plant-based cream cheese and whipping cream alternatives are available in most stores. The key is to use a non-dairy version that will still whip up into a smooth, creamy filling.
For the Topping:
- 1 1/2 cups toasted pecans
- 24 soft caramel candies (such as Kraft)
- 1 tbsp whipping cream
- 1/2 cup chocolate chips
Alternatives: If pecans aren’t your favorite, walnuts, cashews, or almonds can be a great substitute, and each nut will bring its own flavor and crunch to the cheesecake. As for the caramel, feel free to swap in a homemade caramel sauce or any store-bought caramel syrup, depending on your preference. For the chocolate, you can use any type of chocolate, whether milk, dark, or white. Just make sure to chop it up into smaller pieces before melting it for easy drizzling.
Instructions
Step 1: Prepare the Cookie Crumb Crust
First, we’re going to make the base for our cheesecake. Start by combining the chocolate cookie crumbs and sugar in a small mixing bowl. Stir until the sugar is evenly distributed throughout the crumbs. Then, add in the melted butter, which will help bind the crumbs together and create a firm, buttery crust. Mix everything together until the crumbs are well-coated in butter and the mixture begins to stick together when pressed.
Next, lightly grease the bottom of a 9-inch or 10-inch springform pan. Be sure to only grease the bottom to prevent excess butter from leaking out during baking. You could also line the bottom of the pan with parchment paper to help with easy removal after the cheesecake is baked. Press the cookie crumb mixture firmly into the bottom of the prepared pan to form an even layer. To avoid any butter spillage in the oven, wrap a layer of aluminum foil around the outside of the pan.
Step 2: Prepare the Cheesecake Layer
In a large bowl, beat together the softened cream cheese and sugar until the mixture is smooth and creamy. The goal is to make sure there are no lumps, so be patient and beat until the texture is silky and consistent.
Once the cream cheese and sugar are thoroughly mixed, add the eggs one at a time, mixing well after each addition. This will help ensure that the eggs are fully incorporated into the cream cheese mixture, resulting in a smooth batter.
After the eggs, add the vanilla extract or vanilla bean paste, followed by the heavy whipping cream. You should save 1 tablespoon of the whipping cream to use later for the caramel topping. Continue mixing until everything is fully combined, and the batter is nice and smooth.
Pour the cheesecake mixture over the prepared cookie crust. It’s important to spread it out evenly so that the cheesecake bakes uniformly. Place the springform pan in the oven and bake at 325°F for 60 to 70 minutes. You’ll know the cheesecake is done when the edges are just beginning to brown slightly, and the center remains slightly wobbly. It’s okay if the cheesecake still looks a bit jiggly in the middle—it will firm up as it cools.
Step 3: Cool the Cheesecake
Once the cheesecake is done baking, remove it from the oven and carefully run a sharp knife around the edge of the pan. This helps the cheesecake shrink evenly as it cools, preventing cracks from forming. Let the cheesecake cool at room temperature for several hours. It’s essential not to refrigerate it while it’s still hot, as this can cause condensation to form and affect the texture.
After the cheesecake has cooled to room temperature, transfer it to the refrigerator and let it chill for several hours or overnight. This helps the flavors meld together and ensures the cheesecake has the perfect, firm texture.
Step 4: Prepare the Topping
While your cheesecake is chilling, you can prepare the crunchy pecan topping. Spread the pecans in a single layer on a baking sheet and toast them in a 350°F oven for about 8 to 10 minutes, tossing them halfway through to ensure they toast evenly. Once toasted, allow the pecans to cool before snapping them into smaller pieces with your fingers. Spread the pecans evenly over the surface of the cooled cheesecake, pressing them down gently to ensure they stick.
Step 5: Add the Caramel and Chocolate Drizzle
Now it’s time for the gooey caramel topping! Unwrap the soft caramels and place them in a small saucepan along with 1 tablespoon of whipping cream. Melt the caramels over low heat, stirring constantly until you have a smooth, velvety caramel sauce. Once melted, drizzle the caramel generously over the pecans, letting it drizzle down the sides of the cheesecake for that perfect finishing touch.
Next, melt the chocolate chips using a double boiler or microwave. If you’re using the microwave, do it in short bursts, stirring between each interval to prevent burning. Once melted, drizzle the chocolate over the caramel and pecans in a zigzag pattern. This creates a beautiful and decadent topping that adds both flavor and visual appeal.
Let the cheesecake cool for about an hour before slicing and serving. This gives the toppings a chance to set and ensures that each slice holds its shape.
Notes
- Baking Tip: Be careful not to overbake the cheesecake. If the edges look golden and the center is still slightly wobbly, it’s ready to come out of the oven. Overbaking can cause the cheesecake to crack or dry out.
- Avoid Cracking: If your cheesecake cracks, don’t worry! Cheesecake cracks are common and don’t affect the taste. To prevent cracking, remember to run a knife around the edge of the pan before cooling. This helps the cheesecake shrink evenly as it cools and reduces the chance of cracking.
- Crust Tip: Press the cookie crumbs firmly into the pan to avoid a crumbly crust. If the crust isn’t firm enough, you can add a bit more melted butter to help it bind together better.
- Serving Tip: This cheesecake is rich, so a small slice is all you need! Pair it with a cup of coffee or a sweet dessert wine to balance out the sweetness.
The best part? This Turtle Cheesecake is surprisingly simple to make, making it perfect for beginner cooks looking to impress their friends or family. You don’t need any special skills or equipment, just a bit of patience, and you’ll end up with a dessert that looks and tastes like it came from a professional bakery.
In this article, we’ll walk you through the process step by step, breaking down each part of the recipe into manageable, beginner-friendly instructions. Whether you’re new to cheesecake-making or an experienced home cook, this recipe is designed to make the process smooth and enjoyable. Let’s dive into this luxurious yet easy-to-make Turtle Cheesecake!
Ingredients and Preparation
Before we get started on the actual steps of the recipe, let’s first take a look at the ingredients you’ll need. This recipe includes a few simple components that come together beautifully.
For the Cookie Crumb Crust:
- 1 1/2 cups chocolate cookie crumbs
- 2 tbsp sugar
- 1/4 cup melted butter
Alternatives: If you don’t have chocolate cookie crumbs or prefer a different flavor, you can use graham cracker crumbs or even any plain cookie crumbs. To give the crust a more adventurous flavor, try using coconut-flavored cookies or even a gluten-free alternative. Instead of butter, you can use coconut oil for a dairy-free version of the crust.
For the Cheesecake Layer:
- 3 (8 oz) packages of cream cheese, softened
- 1 cup sugar
- 3 large eggs
- 1 tbsp vanilla extract (or vanilla bean paste)
- 1 cup heavy whipping cream (minus 1 tbsp for the caramel)
Alternatives: For those looking for a lighter option, you can substitute regular cream cheese with Neufchatel cheese, which has less fat content but still gives you that creamy consistency. If you’re following a dairy-free or vegan lifestyle, plant-based cream cheese and whipping cream alternatives are available in most stores. The key is to use a non-dairy version that will still whip up into a smooth, creamy filling.
For the Topping:
- 1 1/2 cups toasted pecans
- 24 soft caramel candies (such as Kraft)
- 1 tbsp whipping cream
- 1/2 cup chocolate chips
Alternatives: If pecans aren’t your favorite, walnuts, cashews, or almonds can be a great substitute, and each nut will bring its own flavor and crunch to the cheesecake. As for the caramel, feel free to swap in a homemade caramel sauce or any store-bought caramel syrup, depending on your preference. For the chocolate, you can use any type of chocolate, whether milk, dark, or white. Just make sure to chop it up into smaller pieces before melting it for easy drizzling.
Step-by-Step Instructions
Now that we have our ingredients ready, let’s break the recipe down into easy-to-follow steps. Don’t worry, while this may seem like a lengthy process, we’ve kept it simple and manageable, so you can feel confident throughout.
Step 1: Prepare the Cookie Crumb Crust
First, we’re going to make the base for our cheesecake. Start by combining the chocolate cookie crumbs and sugar in a small mixing bowl. Stir until the sugar is evenly distributed throughout the crumbs. Then, add in the melted butter, which will help bind the crumbs together and create a firm, buttery crust. Mix everything together until the crumbs are well-coated in butter and the mixture begins to stick together when pressed.
Next, lightly grease the bottom of a 9-inch or 10-inch springform pan. Be sure to only grease the bottom to prevent excess butter from leaking out during baking. You could also line the bottom of the pan with parchment paper to help with easy removal after the cheesecake is baked. Press the cookie crumb mixture firmly into the bottom of the prepared pan to form an even layer. To avoid any butter spillage in the oven, wrap a layer of aluminum foil around the outside of the pan.
Step 2: Prepare the Cheesecake Layer
In a large bowl, beat together the softened cream cheese and sugar until the mixture is smooth and creamy. The goal is to make sure there are no lumps, so be patient and beat until the texture is silky and consistent.
Once the cream cheese and sugar are thoroughly mixed, add the eggs one at a time, mixing well after each addition. This will help ensure that the eggs are fully incorporated into the cream cheese mixture, resulting in a smooth batter.
After the eggs, add the vanilla extract or vanilla bean paste, followed by the heavy whipping cream. You should save 1 tablespoon of the whipping cream to use later for the caramel topping. Continue mixing until everything is fully combined, and the batter is nice and smooth.
Pour the cheesecake mixture over the prepared cookie crust. It’s important to spread it out evenly so that the cheesecake bakes uniformly. Place the springform pan in the oven and bake at 325°F for 60 to 70 minutes. You’ll know the cheesecake is done when the edges are just beginning to brown slightly, and the center remains slightly wobbly. It’s okay if the cheesecake still looks a bit jiggly in the middle—it will firm up as it cools.
Step 3: Cool the Cheesecake
Once the cheesecake is done baking, remove it from the oven and carefully run a sharp knife around the edge of the pan. This helps the cheesecake shrink evenly as it cools, preventing cracks from forming. Let the cheesecake cool at room temperature for several hours. It’s essential not to refrigerate it while it’s still hot, as this can cause condensation to form and affect the texture.
After the cheesecake has cooled to room temperature, transfer it to the refrigerator and let it chill for several hours or overnight. This helps the flavors meld together and ensures the cheesecake has the perfect, firm texture.
Step 4: Prepare the Topping
While your cheesecake is chilling, you can prepare the crunchy pecan topping. Spread the pecans in a single layer on a baking sheet and toast them in a 350°F oven for about 8 to 10 minutes, tossing them halfway through to ensure they toast evenly. Once toasted, allow the pecans to cool before snapping them into smaller pieces with your fingers. Spread the pecans evenly over the surface of the cooled cheesecake, pressing them down gently to ensure they stick.
Step 5: Add the Caramel and Chocolate Drizzle
Now it’s time for the gooey caramel topping! Unwrap the soft caramels and place them in a small saucepan along with 1 tablespoon of whipping cream. Melt the caramels over low heat, stirring constantly until you have a smooth, velvety caramel sauce. Once melted, drizzle the caramel generously over the pecans, letting it drizzle down the sides of the cheesecake for that perfect finishing touch.
Next, melt the chocolate chips using a double boiler or microwave. If you’re using the microwave, do it in short bursts, stirring between each interval to prevent burning. Once melted, drizzle the chocolate over the caramel and pecans in a zigzag pattern. This creates a beautiful and decadent topping that adds both flavor and visual appeal.
Let the cheesecake cool for about an hour before slicing and serving. This gives the toppings a chance to set and ensures that each slice holds its shape.
Beginner Tips and Notes
While this recipe is beginner-friendly, there are a few helpful tips and tricks to ensure your cheesecake turns out perfectly every time.
- Baking Tip: Be careful not to overbake the cheesecake. If the edges look golden and the center is still slightly wobbly, it’s ready to come out of the oven. Overbaking can cause the cheesecake to crack or dry out.
- Avoid Cracking: If your cheesecake cracks, don’t worry! Cheesecake cracks are common and don’t affect the taste. To prevent cracking, remember to run a knife around the edge of the pan before cooling. This helps the cheesecake shrink evenly as it cools and reduces the chance of cracking.
- Crust Tip: Press the cookie crumbs firmly into the pan to avoid a crumbly crust. If the crust isn’t firm enough, you can add a bit more melted butter to help it bind together better.
- Serving Tip: This cheesecake is rich, so a small slice is all you need! Pair it with a cup of coffee or a sweet dessert wine to balance out the sweetness.
Serving Suggestions
This Turtle Cheesecake is a decadent dessert that works perfectly as the centerpiece of any special meal. To balance out its richness, serve it with fresh fruit like berries or citrus slices to cut through the sweetness. For an extra touch, a scoop of vanilla ice cream or a dollop of freshly whipped cream can be a delightful addition.
As for leftovers, store the cheesecake in an airtight container in the refrigerator for up to 4 days. It’s also perfect for freezing! To freeze, wrap the cheesecake tightly in plastic wrap and foil to prevent freezer burn, and it will keep for up to 2 months. Simply thaw in the fridge before serving.
Conclusion
Now that you have the step-by-step process, it’s time to dive in and try this Turtle Cheesecake for yourself! Whether you’re an experienced baker or a beginner in the kitchen, this recipe is simple, fun, and sure to impress. The combination of creamy cheesecake, rich caramel, smooth chocolate, and crunchy pecans makes this dessert unforgettable. I hope you give it a try and experience the magic of Turtle Cheesecake in your own home.
Don’t forget to share your results in the comments below! I’d love to hear how your cheesecake turned out and any creative twists you made. Happy baking!


