When it comes to indulgent desserts, few things compare to the combination of a rich, creamy cheesecake, a buttery shortbread crust, gooey caramel, and the crunch of candy bars. And when you throw Twix bars into the mix? Well, it’s magic. This Twix cheesecake is every chocolate lover’s dream, offering a unique twist on the classic cheesecake by combining all the flavors of a beloved candy bar. Whether you’re a Twix fan or simply someone who loves decadent desserts, this cheesecake is sure to satisfy your sweet tooth.

Twix Cheesecake Recipe: The Ultimate Dessert for Chocolate Lovers

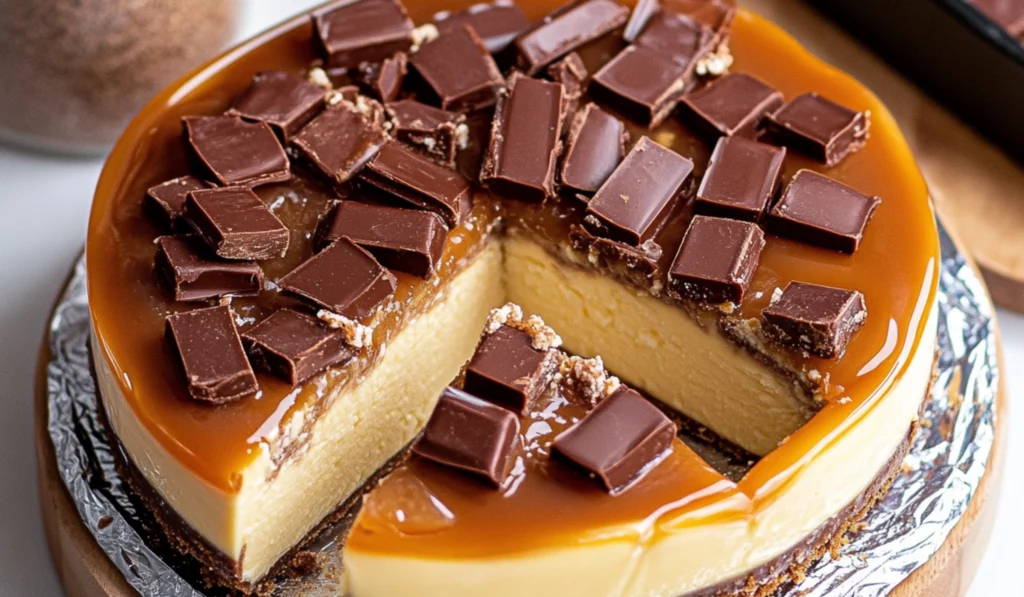
Craving a dessert that combines chocolate, caramel, and cheesecake? This Twix cheesecake is your answer! With a buttery shortbread crust, creamy cheesecake filled with Twix pieces, and a rich caramel topping, it’s a dream come true for candy lovers. Whether it’s a special occasion or just a treat for yourself, this easy-to-make dessert is sure to impress! Let’s get baking!
- Prep Time: 1 hour
- Cook Time: 1 hour 20 minutes
- Total Time: 8 hours 20 minutes (includes resting time)
- Yield: 12 slices 1x
- Category: Dessert
- Method: Baking
- Cuisine: American
Ingredients
For the Shortbread Crust:
- 190 g all-purpose flour
- 90 g powdered sugar
- ¼ teaspoon salt
- 180 g butter (room temperature)
For the Cheesecake:
- 800 g cream cheese (full fat, room temperature)
- 260 g granulated sugar
- 200 g sour cream (18% fat, room temperature)
- 1 ½ tablespoons cornstarch
- 2 ½ teaspoons vanilla extract
- 4 large eggs (room temperature)
- 300 g Twix bars (chopped into small pieces, about 6 packs)
For the Caramel Sauce:
- 70 g granulated sugar
- 50 g corn syrup (or glucose syrup)
- 200 g heavy cream
- 40 g cold butter
- Pinch of salt
- 2 packs of Twix bars (for decoration)
Instructions
1. Making the Shortbread Crust
Start by preheating your oven to 180°C (350°F). Prepare your springform pan by lining the bottom with parchment paper. This is important because it ensures that the crust doesn’t stick to the pan and makes removing the cheesecake easier once it’s done.
Next, in a mixing bowl, combine the flour, powdered sugar, and salt. Stir these dry ingredients together so they’re well-mixed. Then, add the room-temperature butter. Use a fork or pastry cutter to mix the butter into the dry ingredients until the mixture resembles coarse crumbs. This step is key for getting the right texture for the crust.
Once the dough is crumbly, press it into the bottom of the prepared springform pan. You can use your fingers or the back of a spoon to evenly distribute the dough and press it down firmly. To ensure an even crust, use a fork to poke a few holes in the dough.
Now it’s time to bake the crust. Place it in the preheated oven and bake for 18 minutes, or until the crust turns a light golden color. Once baked, let the crust cool to room temperature. This ensures that it’s firm and ready to hold the cheesecake filling.
2. Preparing the Cheesecake Filling
While the crust cools, it’s time to prepare the cheesecake filling. Reduce the oven temperature to 160°C (325°F). In a large mixing bowl, add the softened cream cheese. Using a hand mixer or stand mixer with a paddle attachment, cream the cream cheese for about 1 minute on low speed. Once it’s smooth, add the granulated sugar and mix for another minute.
In a small bowl, combine the sour cream and cornstarch. Stir until smooth, then add this mixture to the cream cheese along with the vanilla extract. Mix everything together until well combined. The sour cream helps add a bit of tanginess to the cheesecake, balancing the sweetness of the caramel and Twix bars.
Next, add the eggs one at a time. After each addition, mix on low speed until just incorporated. Be sure to scrape down the sides of the bowl to ensure that all the ingredients are well-mixed.
Once all the eggs have been added, fold in the chopped Twix pieces using a rubber spatula. Gently stir the Twix into the batter, being careful not to break the pieces up too much. The goal is to evenly distribute the Twix throughout the cheesecake batter.
3. Baking the Cheesecake
To bake the cheesecake, we’re going to use a water bath. This technique ensures that the cheesecake bakes gently and evenly, reducing the risk of cracks. In a large metal tin (about 5 cm high), pour in some boiling water. You’ll want the water to come about two-thirds of the way up the sides of the springform pan.
Place the springform pan into the metal tin with the boiling water. The water should come up around the sides of the cheesecake pan, but not over the edge. Be careful not to let water get inside the cheesecake pan, as it can ruin the texture.
Bake the cheesecake for 1 hour and 20 minutes. The cheesecake should still be slightly wobbly in the center when you give it a gentle shake. After the baking time is up, turn off the oven and leave the cheesecake inside for another hour with the oven door slightly open. This gradual cooling helps prevent cracks from forming.
Once the hour has passed, remove the cheesecake from the oven and take it out of the water bath. Let it cool to room temperature for about an hour, then refrigerate it for at least 6 hours or overnight for the best results.
4. Making the Caramel Sauce
While the cheesecake is baking and cooling, it’s time to make the caramel sauce. In a small saucepan, heat the granulated sugar and corn syrup over medium heat, stirring occasionally until the sugar turns a golden brown color. Be sure to watch it closely so it doesn’t burn.
In another saucepan, heat the heavy cream until it begins to bubble. Once the sugar has turned golden, reduce the heat and carefully add the hot cream to the sugar mixture. It will bubble up, so stir slowly and cautiously to avoid burns.
Continue stirring for about 2 minutes over medium-high heat until the caramel thickens. Then, turn off the heat and stir in the cold butter and a pinch of salt. The butter will melt into the caramel, creating a smooth sauce.
Transfer the caramel to a bowl, cover it with plastic wrap (so the wrap touches the surface of the caramel), and refrigerate it to cool.
5. Assembling the Twix Cheesecake
Once the cheesecake has fully chilled, it’s time to assemble. Run a sharp knife around the edge of the springform pan to loosen the cheesecake from the sides. Open the springform and transfer the cheesecake to a serving plate.
Drizzle the caramel sauce over the top of the cheesecake, spreading it evenly. Then, chop the remaining Twix bars into small pieces and scatter them over the top of the cheesecake. This adds a lovely crunch and gives the dessert its signature Twix look.
Return the cheesecake to the fridge until you’re ready to serve. The caramel will set up nicely, and the Twix pieces will stay in place.
Notes
- If you’re new to cheesecakes, don’t worry if your cheesecake cracks slightly during baking. It happens, and the caramel and Twix pieces will cover it up beautifully.
- Be sure the cream cheese is softened to room temperature before mixing. Cold cream cheese can result in a lumpy filling.
- When making the caramel, keep an eye on it the whole time. Sugar can go from golden to burnt very quickly.
- If you don’t have a springform pan, you can use a regular cake pan, but make sure it’s lined with parchment paper so you can easily remove the cheesecake.
I remember the first time I made this Twix cheesecake—it was during the holiday season, and I was looking for something that would not only taste amazing but also leave a lasting impression. My usual cheesecake recipes had become predictable, so I decided to take a risk and experiment. I had a pack of Twix bars sitting in my pantry, and inspiration struck: why not turn this favorite candy into a show-stopping dessert? After a bit of trial and error, this Twix cheesecake was born. The combination of a buttery shortbread crust, a creamy cheesecake filling dotted with chopped Twix bars, and a luscious caramel topping made this dessert an instant hit. Since then, it’s been a go-to for every special occasion and a beloved treat for my friends and family.
What makes this Twix cheesecake perfect for beginners is that, while it may seem like an intimidating dessert, it’s surprisingly easy to make. The process is broken down into clear steps, and there’s plenty of room for success even if you’re new to the world of cheesecakes. Best of all, the ingredients are simple, and the baking technique is straightforward, so you can be confident in your ability to create a dessert that will impress.
Why This Recipe Is Perfect for Beginners
Even if you’re not an experienced baker, this Twix cheesecake is a great choice for you. The ingredients are easy to find and measure, and the recipe is written in beginner-friendly language to guide you step by step. The process is simple: make the shortbread crust, mix the cheesecake filling, bake, and assemble. While it does require some patience with the cooling and chilling times, the steps themselves are not difficult to follow. Plus, once you’re done, you’ll have a dessert that looks like it came from a professional bakery. No complicated techniques are required, just some careful attention to detail.
The beauty of this recipe is that it combines several flavors and textures—creamy, crunchy, and caramel-y—all in one bite. It’s perfect for a special occasion or any time you want to make a deliciously memorable dessert. Whether you’re making it for a family gathering, a birthday, or a holiday dinner, this cheesecake is bound to be the star of the show.
Ingredients and Preparation
To make this delectable Twix cheesecake, you’ll need a handful of ingredients. These are common baking items that you can easily find at your local grocery store, with the addition of some Twix bars to bring the flavor to life. The recipe makes 12 generous slices of cheesecake, which is perfect for serving a crowd.
For the Shortbread Crust:
- 190 g all-purpose flour
- 90 g powdered sugar
- ¼ teaspoon salt
- 180 g butter (room temperature)
For the Cheesecake:
- 800 g cream cheese (full fat, room temperature)
- 260 g granulated sugar
- 200 g sour cream (18% fat, room temperature)
- 1 ½ tablespoons cornstarch
- 2 ½ teaspoons vanilla extract
- 4 large eggs (room temperature)
- 300 g Twix bars (chopped into small pieces, about 6 packs)
For the Caramel Sauce:
- 70 g granulated sugar
- 50 g corn syrup (or glucose syrup)
- 200 g heavy cream
- 40 g cold butter
- Pinch of salt
- 2 packs of Twix bars (for decoration)
Equipment:
- 23 cm (9-inch) springform pan
- Parchment paper
- Hand mixer or stand mixer
- Rubber spatula
- Aluminum foil
Step-by-Step Instructions
Making a Twix cheesecake is easier than it sounds! The key to success is following each step carefully. Let’s break it down:
1. Making the Shortbread Crust
Start by preheating your oven to 180°C (350°F). Prepare your springform pan by lining the bottom with parchment paper. This is important because it ensures that the crust doesn’t stick to the pan and makes removing the cheesecake easier once it’s done.
Next, in a mixing bowl, combine the flour, powdered sugar, and salt. Stir these dry ingredients together so they’re well-mixed. Then, add the room-temperature butter. Use a fork or pastry cutter to mix the butter into the dry ingredients until the mixture resembles coarse crumbs. This step is key for getting the right texture for the crust.
Once the dough is crumbly, press it into the bottom of the prepared springform pan. You can use your fingers or the back of a spoon to evenly distribute the dough and press it down firmly. To ensure an even crust, use a fork to poke a few holes in the dough.
Now it’s time to bake the crust. Place it in the preheated oven and bake for 18 minutes, or until the crust turns a light golden color. Once baked, let the crust cool to room temperature. This ensures that it’s firm and ready to hold the cheesecake filling.
2. Preparing the Cheesecake Filling
While the crust cools, it’s time to prepare the cheesecake filling. Reduce the oven temperature to 160°C (325°F). In a large mixing bowl, add the softened cream cheese. Using a hand mixer or stand mixer with a paddle attachment, cream the cream cheese for about 1 minute on low speed. Once it’s smooth, add the granulated sugar and mix for another minute.
In a small bowl, combine the sour cream and cornstarch. Stir until smooth, then add this mixture to the cream cheese along with the vanilla extract. Mix everything together until well combined. The sour cream helps add a bit of tanginess to the cheesecake, balancing the sweetness of the caramel and Twix bars.
Next, add the eggs one at a time. After each addition, mix on low speed until just incorporated. Be sure to scrape down the sides of the bowl to ensure that all the ingredients are well-mixed.
Once all the eggs have been added, fold in the chopped Twix pieces using a rubber spatula. Gently stir the Twix into the batter, being careful not to break the pieces up too much. The goal is to evenly distribute the Twix throughout the cheesecake batter.
3. Baking the Cheesecake
To bake the cheesecake, we’re going to use a water bath. This technique ensures that the cheesecake bakes gently and evenly, reducing the risk of cracks. In a large metal tin (about 5 cm high), pour in some boiling water. You’ll want the water to come about two-thirds of the way up the sides of the springform pan.
Place the springform pan into the metal tin with the boiling water. The water should come up around the sides of the cheesecake pan, but not over the edge. Be careful not to let water get inside the cheesecake pan, as it can ruin the texture.
Bake the cheesecake for 1 hour and 20 minutes. The cheesecake should still be slightly wobbly in the center when you give it a gentle shake. After the baking time is up, turn off the oven and leave the cheesecake inside for another hour with the oven door slightly open. This gradual cooling helps prevent cracks from forming.
Once the hour has passed, remove the cheesecake from the oven and take it out of the water bath. Let it cool to room temperature for about an hour, then refrigerate it for at least 6 hours or overnight for the best results.
4. Making the Caramel Sauce
While the cheesecake is baking and cooling, it’s time to make the caramel sauce. In a small saucepan, heat the granulated sugar and corn syrup over medium heat, stirring occasionally until the sugar turns a golden brown color. Be sure to watch it closely so it doesn’t burn.
In another saucepan, heat the heavy cream until it begins to bubble. Once the sugar has turned golden, reduce the heat and carefully add the hot cream to the sugar mixture. It will bubble up, so stir slowly and cautiously to avoid burns.
Continue stirring for about 2 minutes over medium-high heat until the caramel thickens. Then, turn off the heat and stir in the cold butter and a pinch of salt. The butter will melt into the caramel, creating a smooth sauce.
Transfer the caramel to a bowl, cover it with plastic wrap (so the wrap touches the surface of the caramel), and refrigerate it to cool.
5. Assembling the Twix Cheesecake
Once the cheesecake has fully chilled, it’s time to assemble. Run a sharp knife around the edge of the springform pan to loosen the cheesecake from the sides. Open the springform and transfer the cheesecake to a serving plate.
Drizzle the caramel sauce over the top of the cheesecake, spreading it evenly. Then, chop the remaining Twix bars into small pieces and scatter them over the top of the cheesecake. This adds a lovely crunch and gives the dessert its signature Twix look.
Return the cheesecake to the fridge until you’re ready to serve. The caramel will set up nicely, and the Twix pieces will stay in place.
Beginner Tips and Notes
- If you’re new to cheesecakes, don’t worry if your cheesecake cracks slightly during baking. It happens, and the caramel and Twix pieces will cover it up beautifully.
- Be sure the cream cheese is softened to room temperature before mixing. Cold cream cheese can result in a lumpy filling.
- When making the caramel, keep an eye on it the whole time. Sugar can go from golden to burnt very quickly.
- If you don’t have a springform pan, you can use a regular cake pan, but make sure it’s lined with parchment paper so you can easily remove the cheesecake.
Serving Suggestions
This Twix cheesecake is rich and indulgent, so it pairs perfectly with a simple cup of coffee or a glass of dessert wine. If you’re looking to make it even more luxurious, serve it with a dollop of freshly whipped cream or a scoop of vanilla ice cream.
Storage Tips
Leftovers can be stored in the fridge for up to 5 days. Be sure to cover the cheesecake tightly to prevent it from absorbing any other food odors. It also freezes well—just slice it into individual pieces and wrap each piece tightly in plastic wrap before freezing. Thaw overnight in the fridge for the best texture.

Conclusion
This Twix cheesecake is the ultimate dessert for anyone who loves a combination of rich, creamy, and crunchy flavors. It’s simple enough for beginner bakers but impressive enough to serve at any celebration. Whether you’re making it for a holiday dinner, a family gathering, or a special occasion, this cheesecake will steal the show every time. So, grab your Twix bars and get ready to create a dessert that will have everyone asking for seconds!


