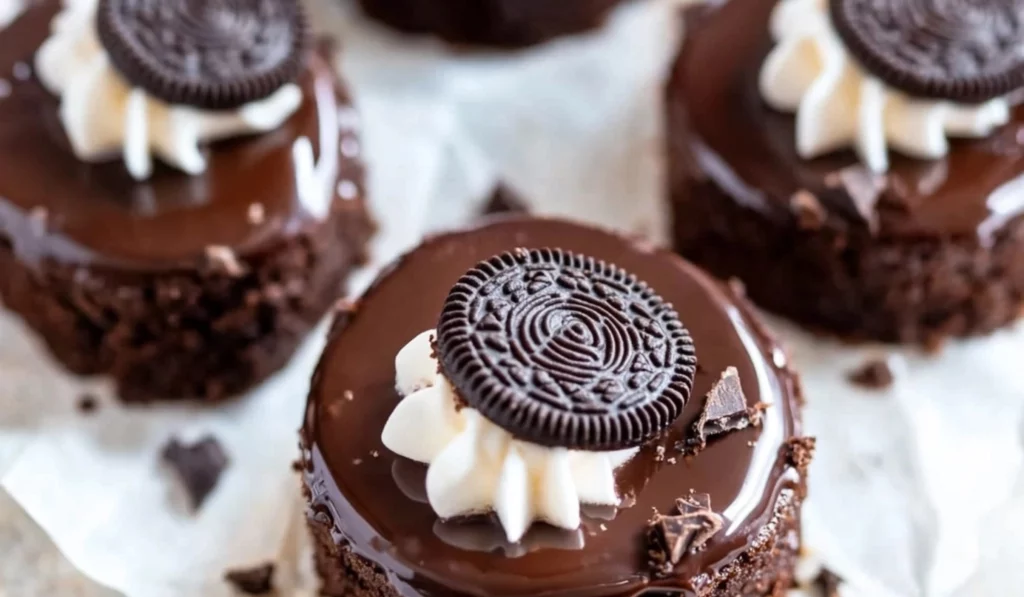
If you’re looking for a quick yet impressive dessert that will have everyone asking for seconds, this easy chocolate dessert is the answer. Picture this: a crunchy, buttery Oreo cookie base, topped with a velvety, rich chocolate ganache, and finished with a swirl of creamy whipped topping. It’s the kind of treat that’s both indulgent and simple enough for even the most novice home cooks to prepare. And the best part? It’s ready to be devoured after just a little chilling time—perfect for those who want a fuss-free dessert that still feels like a luxurious indulgence.
Easy Chocolate Dessert: A Beginner’s Guide to the Ultimate Indulgence

Sometimes, the best desserts are the simplest ones. This easy chocolate dessert combines a crunchy Oreo base, silky chocolate ganache, and a swirl of whipped cream to create a treat that’s both indulgent and effortless. Whether you’re a beginner or a busy cook, this recipe is a quick, impressive way to satisfy your sweet cravings. I discovered this dessert on a busy day when I needed something easy but delicious, and it quickly became a favorite. It’s the perfect go-to treat when you want something rich, sweet, and completely satisfying.
- Prep Time: 15 minutes
- Cook Time: 5 minutes
- Total Time: 1 hour 15 minutes
- Yield: 12 servings 1x
- Category: Dessert
- Method: No-bake
- Cuisine: American
- Diet: Vegetarian
Ingredients
For the Base:
- 20 Oreo cookies (about 1½ cups crushed)
- 6 tablespoons butter (melted)
For the Ganache:
- 12 oz semi-sweet chocolate (54% cocoa is ideal, but dark chocolate also works well)
- 12 oz heavy cream
Instructions
- Make the Cookie Base: Start by crushing the Oreo cookies. If you have a food processor, simply pulse the cookies until they form fine crumbs. If you don’t have one, place the cookies in a large zip-top bag and use a rolling pin to crush them. You want the crumbs to be as fine as possible, so they create a firm, even base when pressed into the pan.
Tip: If you have trouble crushing the cookies, don’t worry about making the crumbs uniform in size. A few larger pieces will just add texture to the base and won’t affect the overall outcome of the dessert.
- Combine with Butter: Once you have the crumbs, melt the butter and add it to the crushed Oreos. Mix until the crumbs are well-coated and the butter is fully absorbed. This is what helps bind the crust together and gives it a nice richness. Don’t skip this step, as the butter is what gives the base its structure and flavor.
Tip: If you want to make the dessert a bit richer, you can add a pinch of salt to the butter-crumb mixture. It enhances the chocolate flavor and makes the base more indulgent.
- Press into the Pan: Next, transfer the mixture into a 12-section mini cheesecake pan or an 8- to 9-inch springform pan. Use your fingers or the back of a spoon to press the mixture down firmly, ensuring the base is evenly distributed. This creates a stable foundation for the ganache to sit on top of. You want the base to be compact and firm, so the ganache won’t seep through once poured.
Tip: Use the flat side of a measuring cup or the back of a spoon to press the crumbs down. This will create an even base that’s easy to slice through later.
- Prepare the Ganache: In a small saucepan, heat the heavy cream over medium heat until it’s just hot—be careful not to let it boil. Alternatively, you can heat the cream in the microwave for 1-2 minutes in a microwave-safe bowl. The cream should be hot but not boiling, as this helps the chocolate melt smoothly.
Tip: Watch the cream closely to make sure it doesn’t boil. If it boils, it can curdle, and the ganache won’t be as smooth. If you do accidentally overheat the cream, don’t worry! You can still salvage it by stirring in a small amount of butter to emulsify the mixture.
- Make the Ganache: Place the chopped semi-sweet chocolate into a medium-sized mixing bowl. Pour the hot cream over the chocolate and whisk until smooth. This will create a glossy, creamy ganache that will top your cookie base. You should see the chocolate melt immediately as the hot cream is poured over it.
Tip: Be sure to whisk thoroughly, as this will help prevent any lumps in the ganache. If you find that your ganache is a bit too thick after mixing, you can add a little more hot cream to thin it out to your desired consistency.
- Assemble the Dessert: Pour the ganache over the pressed Oreo cookie base, spreading it out evenly with a spatula. Make sure the ganache covers the entire surface, filling in any gaps. Once it’s evenly distributed, cover the pan with plastic wrap and refrigerate for at least 1 hour for mini desserts (or 6-8 hours for a larger pan) until the ganache is set. This is the most important step, as it gives the ganache time to firm up and achieve the perfect texture.
Tip: If you’re in a hurry, you can place the pan in the freezer for 20-30 minutes to speed up the chilling process. Just keep in mind that the ganache will set more slowly in the freezer, so be sure to check it before serving.
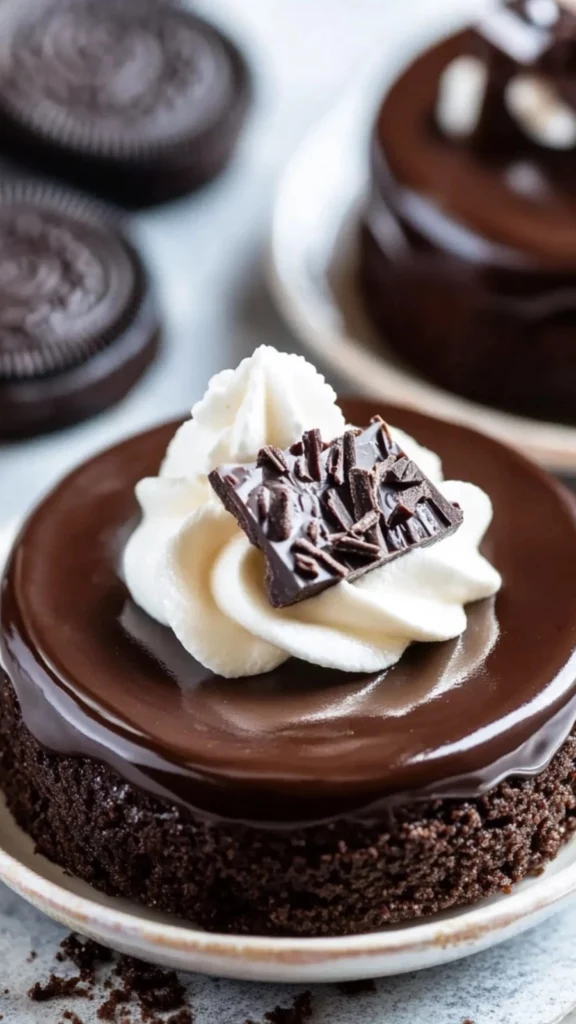
- Top with Whipped Cream: Once the ganache is fully set, you can top it with whipped cream. You can either use store-bought whipped cream or make your own by whipping heavy cream with a little sugar until soft peaks form. The whipped cream adds a light, airy contrast to the rich ganache, making each bite perfectly balanced.
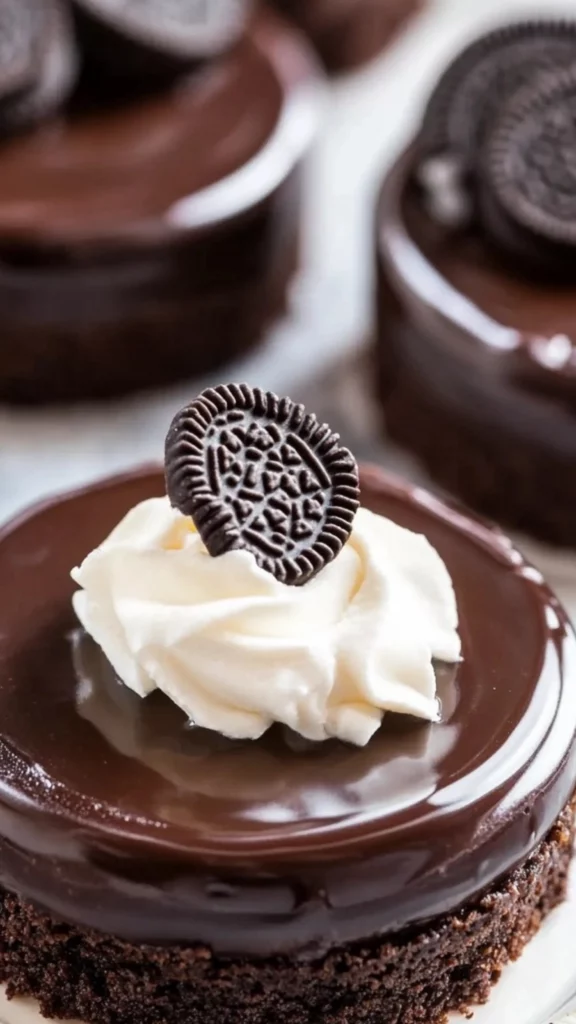
Tip: If you want to get fancy, you can pipe the whipped cream onto the ganache for a decorative touch. Use a piping bag with a star tip for a more elegant presentation.
Notes
1. Watch the Chocolate Carefully: The key to making the perfect ganache is ensuring the cream is hot but not boiling. If the cream is too hot, it can cause the chocolate to seize up, resulting in a grainy texture. Keep an eye on the cream as it heats up and remove it from the heat as soon as you see steam rising.
2. Press the Crumbs Firmly: When pressing the Oreo mixture into the pan, make sure to press it down firmly and evenly. This helps ensure that the base stays intact when you slice the dessert later. Use the back of a spoon or your fingers to compact it well. The firmer the base, the better it will hold up to the rich ganache on top.
3. Patience is Key: While this dessert is quick to prepare, it does need time to set. Don’t rush the chilling process. If you’re making mini cheesecakes, 1 hour in the fridge should be sufficient. For larger pans, be prepared to wait a bit longer. The ganache needs time to firm up so that you can easily slice the dessert without it falling apart.
4. Be Flexible with Tools: If you don’t have a mini cheesecake pan or a springform pan, no problem! You can use any similar pan you have at home, as long as it has a removable base or can hold the dessert together while it chills. A regular round cake pan will work just fine. If you don’t have a removable base, you can line the pan with parchment paper to make removal easier.
I remember the first time I made this dessert. A friend had invited me over for a gathering, and I was tasked with bringing a dessert that would satisfy everyone’s sweet tooth. I was hesitant—was I really capable of making something that looked impressive without stressing over complicated steps? Then I found this recipe, and it was a game-changer. The Oreo base was a no-brainer, and the ganache, well, it practically made itself. The best part? It looked like a gourmet dessert without requiring any advanced techniques. Needless to say, it was a hit, and I was asked for the recipe again and again.
For beginners, this easy chocolate dessert is perfect because it requires minimal ingredients, no special skills, and is ready to enjoy in just a few hours (most of which is just chill time!). It’s a delightful blend of flavors and textures that will surely become a go-to treat for anyone looking to make something quick, satisfying, and sure to impress.
Ingredients and Preparation
For the Base:
- 20 Oreo cookies (about 1½ cups crushed)
- 6 tablespoons butter (melted)
For the Ganache:
- 12 oz semi-sweet chocolate (54% cocoa is ideal, but dark chocolate also works well)
- 12 oz heavy cream
This simple list of ingredients is all you need to create a show-stopping dessert. The combination of Oreo cookies and butter creates a firm, flavorful base that’s almost like a cookie crust. The ganache—made from semi-sweet chocolate and heavy cream—adds that smooth, melt-in-your-mouth richness that pairs perfectly with the cookie base.
Ingredient Alternatives:
- If you’re not a fan of Oreos or want to switch things up, you can use any chocolate cookie that suits your taste. Graham crackers also make a great alternative for a lighter base that contrasts nicely with the richness of the ganache.
- If you prefer a sweeter dessert, you can substitute the semi-sweet chocolate with milk chocolate. Just keep in mind that the sweetness level will increase, so you might want to balance it with a darker cookie base. Alternatively, you can use a 70% cocoa chocolate for a richer, slightly more bitter flavor that pairs well with the sweetness of the cookies.
- For a dairy-free version, swap the butter with a dairy-free alternative such as coconut oil, and use coconut cream instead of heavy cream. The flavor may change slightly, but it will still result in a delicious dessert.
With just these few ingredients, you can make an indulgent chocolate treat that’s sure to impress friends and family. And as a beginner, you’ll find that every step is easy to follow, ensuring a successful outcome even if you’re not a seasoned baker.
Step-by-Step Instructions
This dessert is perfect for beginners because of how simple the process is. Let’s break it down into easy steps:
- Make the Cookie Base: Start by crushing the Oreo cookies. If you have a food processor, simply pulse the cookies until they form fine crumbs. If you don’t have one, place the cookies in a large zip-top bag and use a rolling pin to crush them. You want the crumbs to be as fine as possible, so they create a firm, even base when pressed into the pan.Tip: If you have trouble crushing the cookies, don’t worry about making the crumbs uniform in size. A few larger pieces will just add texture to the base and won’t affect the overall outcome of the dessert.
- Combine with Butter: Once you have the crumbs, melt the butter and add it to the crushed Oreos. Mix until the crumbs are well-coated and the butter is fully absorbed. This is what helps bind the crust together and gives it a nice richness. Don’t skip this step, as the butter is what gives the base its structure and flavor.Tip: If you want to make the dessert a bit richer, you can add a pinch of salt to the butter-crumb mixture. It enhances the chocolate flavor and makes the base more indulgent.
- Press into the Pan: Next, transfer the mixture into a 12-section mini cheesecake pan or an 8- to 9-inch springform pan. Use your fingers or the back of a spoon to press the mixture down firmly, ensuring the base is evenly distributed. This creates a stable foundation for the ganache to sit on top of. You want the base to be compact and firm, so the ganache won’t seep through once poured.Tip: Use the flat side of a measuring cup or the back of a spoon to press the crumbs down. This will create an even base that’s easy to slice through later.
- Prepare the Ganache: In a small saucepan, heat the heavy cream over medium heat until it’s just hot—be careful not to let it boil. Alternatively, you can heat the cream in the microwave for 1-2 minutes in a microwave-safe bowl. The cream should be hot but not boiling, as this helps the chocolate melt smoothly.Tip: Watch the cream closely to make sure it doesn’t boil. If it boils, it can curdle, and the ganache won’t be as smooth. If you do accidentally overheat the cream, don’t worry! You can still salvage it by stirring in a small amount of butter to emulsify the mixture.
- Make the Ganache: Place the chopped semi-sweet chocolate into a medium-sized mixing bowl. Pour the hot cream over the chocolate and whisk until smooth. This will create a glossy, creamy ganache that will top your cookie base. You should see the chocolate melt immediately as the hot cream is poured over it.Tip: Be sure to whisk thoroughly, as this will help prevent any lumps in the ganache. If you find that your ganache is a bit too thick after mixing, you can add a little more hot cream to thin it out to your desired consistency.
- Assemble the Dessert: Pour the ganache over the pressed Oreo cookie base, spreading it out evenly with a spatula. Make sure the ganache covers the entire surface, filling in any gaps. Once it’s evenly distributed, cover the pan with plastic wrap and refrigerate for at least 1 hour for mini desserts (or 6-8 hours for a larger pan) until the ganache is set. This is the most important step, as it gives the ganache time to firm up and achieve the perfect texture.Tip: If you’re in a hurry, you can place the pan in the freezer for 20-30 minutes to speed up the chilling process. Just keep in mind that the ganache will set more slowly in the freezer, so be sure to check it before serving.
- Top with Whipped Cream: Once the ganache is fully set, you can top it with whipped cream. You can either use store-bought whipped cream or make your own by whipping heavy cream with a little sugar until soft peaks form. The whipped cream adds a light, airy contrast to the rich ganache, making each bite perfectly balanced.Tip: If you want to get fancy, you can pipe the whipped cream onto the ganache for a decorative touch. Use a piping bag with a star tip for a more elegant presentation.
Beginner Tips and Notes
1. Watch the Chocolate Carefully: The key to making the perfect ganache is ensuring the cream is hot but not boiling. If the cream is too hot, it can cause the chocolate to seize up, resulting in a grainy texture. Keep an eye on the cream as it heats up and remove it from the heat as soon as you see steam rising.
2. Press the Crumbs Firmly: When pressing the Oreo mixture into the pan, make sure to press it down firmly and evenly. This helps ensure that the base stays intact when you slice the dessert later. Use the back of a spoon or your fingers to compact it well. The firmer the base, the better it will hold up to the rich ganache on top.
3. Patience is Key: While this dessert is quick to prepare, it does need time to set. Don’t rush the chilling process. If you’re making mini cheesecakes, 1 hour in the fridge should be sufficient. For larger pans, be prepared to wait a bit longer. The ganache needs time to firm up so that you can easily slice the dessert without it falling apart.
4. Be Flexible with Tools: If you don’t have a mini cheesecake pan or a springform pan, no problem! You can use any similar pan you have at home, as long as it has a removable base or can hold the dessert together while it chills. A regular round cake pan will work just fine. If you don’t have a removable base, you can line the pan with parchment paper to make removal easier.
Serving Suggestions
Once your easy chocolate dessert is set and topped with whipped cream, it’s ready to serve. For added flair, you can drizzle some chocolate syrup over the top or sprinkle crushed Oreos or chocolate shavings for texture and visual appeal. This dessert pairs wonderfully with a strong cup of coffee or a glass of dessert wine. For a festive touch, add sprinkles, berries, or a dusting of cocoa powder to finish it off.
Storage Tips: Leftovers? No problem! Store this dessert in an airtight container in the fridge for up to 4 days. You can also freeze individual servings for later enjoyment. Just make sure to wrap each slice tightly in plastic wrap before freezing. To thaw, simply remove it from the freezer and let it sit at room temperature for about 15 minutes.
Conclusion
This easy chocolate dessert is a perfect choice for beginners who want to make a delicious, impressive treat with minimal effort. It’s simple, quick, and bursting with chocolatey goodness, making it ideal for any occasion—from a casual dinner party to a special family gathering. The best part? You don’t need any special equipment or advanced cooking skills to pull it off. So, give this recipe a try and let me know how it turns out! I’d love to hear about your experience in the comments below. Happy baking, and enjoy every indulgent bite!
By following this beginner-friendly recipe, you’ll learn how to create a dessert that looks professional and tastes amazing—without any stress. And with so many opportunities to make it your own, you can customize it to suit your preferences and impress your guests each time you make it. Enjoy!


