Valentine’s Day is the perfect opportunity to treat your loved ones with a special dessert that’s as beautiful as it is delicious. Whether you’re looking to celebrate with your partner, family, or friends, this Easy Valentine Trifle is the perfect choice. It’s simple to prepare, requires minimal ingredients, and delivers a stunning result that will have everyone swooning.
Easy Valentine Trifle Recipe: A Simple Yet Elegant Dessert for Your Loved One

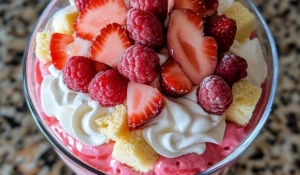
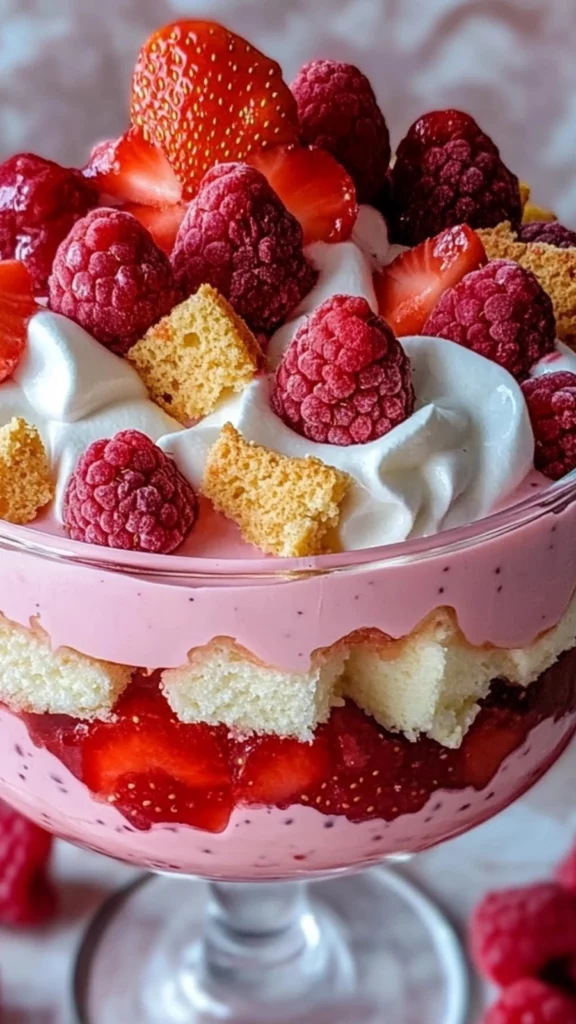
This Easy Valentine Trifle is the perfect dessert to celebrate love. With layers of cheesecake pudding, cake, whipped cream, and fresh berries, it’s simple to make and beautifully festive. Even beginners can whip up this sweet treat in no time, making it a fun and delicious way to share the love this Valentine’s Day!
- Prep Time: 20 minutes
- Cook Time: 0 minutes
- Total Time: 2 hours 20 minutes (including refrigeration)
- Yield: 8 servings 1x
- Category: Dessert
- Method: No-Bake
- Cuisine: American
- Diet: Vegetarian
Ingredients
- 4 cups cheesecake-flavored pudding (instant works fine; vanilla flavor is also okay)
- Milk (as required by your pudding recipe)
- 3–4 cups fresh whipped cream (fresh is best for the best texture!)
- 2–3 cups of cake cubes (about a 9x13 size cake—use your favorite flavor)
- 1 cup raspberries
- 2 cups strawberries (sliced)
- Optional: More berries for extra layers, the more, the better!
Instructions
1. Prep the Ingredients
Start by washing and patting the berries dry with a paper towel. Allow them to air dry while you prep the rest of the ingredients. This step is important because moisture on the berries can make the layers soggy. Slice the strawberries into thin pieces and set them aside.
Raspberries are often more delicate than strawberries, so handle them with care. If you need to, gently pat them dry with a paper towel before using. Keep in mind that fresh berries will yield a firmer texture than frozen ones, so always opt for fresh when possible for the best visual and textural result.
2. Prepare the Cake
Cut your cake into cubes. You can use a store-bought cake or bake one yourself. If you’re using a 9×13-sized cake, aim for about 2-3 cups of cake cubes. The size of the cubes doesn’t need to be precise, but about 1-inch pieces will give the right texture. If the cake is dry, consider drizzling it with a little bit of milk before assembling.
To make the cake cubes extra flavorful, you can brush them lightly with a flavored syrup like vanilla, strawberry, or even a bit of Grand Marnier for a subtle adult twist. This will give the cake a bit more moisture and infuse it with additional flavor.
3. Whip the Cream
In a large mixing bowl, whip the cream until stiff peaks form. Fresh whipped cream is key here for achieving a light and airy texture that perfectly balances out the richness of the pudding. If you’re using a hand mixer or stand mixer, start on a low speed and gradually increase to medium-high to avoid splattering. This step takes about 3-4 minutes.
You’ll know the whipped cream is done when it holds its shape and forms stiff peaks. Don’t over-whip it, though, or you’ll end up with butter! If you want to add a little sweetness to your whipped cream, you can add a tablespoon or two of powdered sugar or a dash of vanilla extract. This will enhance the flavor and complement the sweetness of the pudding and cake layers.
4. Make the Pudding
Prepare the cheesecake-flavored pudding according to the instructions on the package. Typically, you’ll mix the pudding mix with cold milk and whisk until it thickens. If you want a stronger flavor, you can color the pudding pink with a few drops of food coloring or use a strawberry-flavored pudding mix. Once it’s ready, set it aside to cool slightly.
For an extra creamy pudding, you can use half-and-half instead of regular milk. This will give the pudding a richer, more decadent texture. If you want a fruitier flavor, you can even add a couple of tablespoons of strawberry jam or preserves into the pudding mix for an added layer of sweetness and fruitiness.
5. Assemble the Trifle
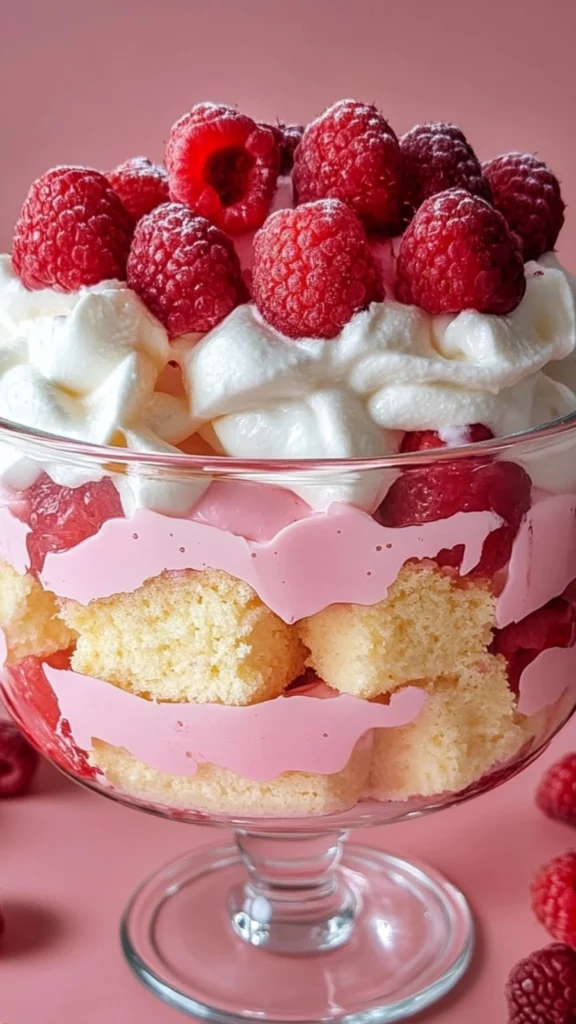
Now comes the fun part—layering! You can either use a trifle dish or a large glass bowl to create those stunning visible layers. Start by adding a layer of pudding to the bottom of the dish.
Then, add a layer of cake cubes, gently pressing them into the pudding so they can soak up the creamy goodness. After that, sprinkle a layer of fresh raspberries and sliced strawberries. For the next layer, add whipped cream. To make it look pretty, arrange the outer edge of the strawberries and cake in a neat line along the sides of the glass.
Repeat these layers until you’ve used up all your ingredients. Make sure you finish with a fluffy layer of whipped cream on top. If desired, garnish with extra berries on the top for a final touch of color and texture.
This layered presentation is what makes the trifle so visually stunning. If you’re looking to make it even more visually appealing, you can alternate the fruit and cake layers to create a striped effect, or top with edible flowers like violets or pansies for a truly elegant touch.
6. Refrigerate
Once the trifle is assembled, cover it with plastic wrap or a lid and refrigerate it for at least 2 hours to allow the flavors to meld together and the pudding to firm up. The longer it sits, the better the flavors will develop, so feel free to make it ahead of time!
Allowing the trifle to chill also gives the layers time to set properly. If you’re making the trifle the night before your celebration, it will be ready to serve when you need it.
Notes
- Cake Soaking: If you’re concerned about the cake soaking up too much pudding and becoming too soggy, try placing the cake cubes on a baking sheet and allowing them to dry out slightly before layering. You can even toast the cake cubes lightly in the oven for a minute or two to add a crispy texture.
- Whipped Cream Consistency: Make sure not to over-whip the cream, or it could turn into butter. Stop whipping as soon as stiff peaks form—this will give you a light, fluffy texture that complements the other layers.
- Layering: The key to a beautiful trifle is in the layers! Don’t be afraid to mix and match colors and fruits. You can alternate the layers to create a unique pattern or add extra whipped cream for more volume.
- Cake Variations: If you’re making your cake from scratch and want a flavorful twist, consider adding a dash of vanilla extract, almond extract, or even a splash of liqueur like Grand Marnier or Chambord to the cake batter for a little extra depth.
I remember the first time I made a trifle for a special occasion—it seemed complicated at first, but it turned out to be so easy and fun! The layers of pudding, cake, whipped cream, and fresh fruit create a dessert that’s both indulgent and refreshing. This recipe is perfect for beginners because it doesn’t require advanced baking skills or too many ingredients. You get all the impressive flavors and colors without the hassle.
The key to this Valentine’s Day trifle is its ease. You don’t need to be a master baker to pull it off. All you need are a few basic ingredients, and you’ll have a beautiful and festive dessert in just a couple of hours. Not only is it visually stunning with its pink and red layers, but it’s also a great way to enjoy a lighter, fruit-filled treat with the richness of pudding and whipped cream. Let’s dive into this beginner-friendly recipe that’s bound to be a hit!
Ingredients and Preparation
For this easy Valentine trifle, you will need the following ingredients:
- 4 cups cheesecake-flavored pudding (instant works fine; vanilla flavor is also okay)
- Milk (as required by your pudding recipe)
- 3-4 cups fresh whipped cream (fresh is best for the best texture!)
- 2-3 cups of cake cubes (about a 9×13 size cake—use your favorite flavor)
- 1 cup raspberries
- 2 cups strawberries (sliced)
- Optional: More berries for extra layers, the more, the better!
Alternative Ingredient Suggestions
- Pudding: While cheesecake-flavored pudding is a fun way to add a bit of flair to this trifle, you can easily swap it out with vanilla pudding if that’s what you have on hand or prefer. You could even use a strawberry-flavored pudding mix for an extra burst of Valentine’s Day color and flavor.
- Cake: If you don’t have a store-bought cake, you can substitute with pound cake, angel food cake, or even a simple sponge cake. These options will also work well to soak up the pudding and create that signature moist trifle texture.
- Berries: Feel free to swap raspberries with blueberries, blackberries, or even sliced kiwi for a unique twist. For a more tropical flavor, consider adding mango slices or pineapple.
- Whipped Cream: If fresh whipped cream is unavailable, you can use store-bought whipped topping, but fresh whipped cream adds a richer taste and texture.
This trifle recipe is versatile, and you can make it your own by playing around with different flavors, textures, and colors. With these simple ingredients, you’ll have a dessert that’s both visually stunning and delicious.
Step-by-Step Instructions
This recipe comes together easily in just a few simple steps. Follow along to create a beautiful and festive trifle perfect for your Valentine’s Day celebration!
1. Prep the Ingredients
Start by washing and patting the berries dry with a paper towel. Allow them to air dry while you prep the rest of the ingredients. This step is important because moisture on the berries can make the layers soggy. Slice the strawberries into thin pieces and set them aside.
Raspberries are often more delicate than strawberries, so handle them with care. If you need to, gently pat them dry with a paper towel before using. Keep in mind that fresh berries will yield a firmer texture than frozen ones, so always opt for fresh when possible for the best visual and textural result.
2. Prepare the Cake
Cut your cake into cubes. You can use a store-bought cake or bake one yourself. If you’re using a 9×13-sized cake, aim for about 2-3 cups of cake cubes. The size of the cubes doesn’t need to be precise, but about 1-inch pieces will give the right texture. If the cake is dry, consider drizzling it with a little bit of milk before assembling.
To make the cake cubes extra flavorful, you can brush them lightly with a flavored syrup like vanilla, strawberry, or even a bit of Grand Marnier for a subtle adult twist. This will give the cake a bit more moisture and infuse it with additional flavor.
3. Whip the Cream
In a large mixing bowl, whip the cream until stiff peaks form. Fresh whipped cream is key here for achieving a light and airy texture that perfectly balances out the richness of the pudding. If you’re using a hand mixer or stand mixer, start on a low speed and gradually increase to medium-high to avoid splattering. This step takes about 3-4 minutes.
You’ll know the whipped cream is done when it holds its shape and forms stiff peaks. Don’t over-whip it, though, or you’ll end up with butter! If you want to add a little sweetness to your whipped cream, you can add a tablespoon or two of powdered sugar or a dash of vanilla extract. This will enhance the flavor and complement the sweetness of the pudding and cake layers.
4. Make the Pudding
Prepare the cheesecake-flavored pudding according to the instructions on the package. Typically, you’ll mix the pudding mix with cold milk and whisk until it thickens. If you want a stronger flavor, you can color the pudding pink with a few drops of food coloring or use a strawberry-flavored pudding mix. Once it’s ready, set it aside to cool slightly.
For an extra creamy pudding, you can use half-and-half instead of regular milk. This will give the pudding a richer, more decadent texture. If you want a fruitier flavor, you can even add a couple of tablespoons of strawberry jam or preserves into the pudding mix for an added layer of sweetness and fruitiness.
5. Assemble the Trifle
Now comes the fun part—layering! You can either use a trifle dish or a large glass bowl to create those stunning visible layers. Start by adding a layer of pudding to the bottom of the dish.
Then, add a layer of cake cubes, gently pressing them into the pudding so they can soak up the creamy goodness. After that, sprinkle a layer of fresh raspberries and sliced strawberries. For the next layer, add whipped cream. To make it look pretty, arrange the outer edge of the strawberries and cake in a neat line along the sides of the glass.
Repeat these layers until you’ve used up all your ingredients. Make sure you finish with a fluffy layer of whipped cream on top. If desired, garnish with extra berries on the top for a final touch of color and texture.
This layered presentation is what makes the trifle so visually stunning. If you’re looking to make it even more visually appealing, you can alternate the fruit and cake layers to create a striped effect, or top with edible flowers like violets or pansies for a truly elegant touch.
6. Refrigerate
Once the trifle is assembled, cover it with plastic wrap or a lid and refrigerate it for at least 2 hours to allow the flavors to meld together and the pudding to firm up. The longer it sits, the better the flavors will develop, so feel free to make it ahead of time!
Allowing the trifle to chill also gives the layers time to set properly. If you’re making the trifle the night before your celebration, it will be ready to serve when you need it.
Beginner Tips and Notes
This easy Valentine trifle is a forgiving dessert, but here are a few tips to ensure everything goes smoothly:
- Cake Soaking: If you’re concerned about the cake soaking up too much pudding and becoming too soggy, try placing the cake cubes on a baking sheet and allowing them to dry out slightly before layering. You can even toast the cake cubes lightly in the oven for a minute or two to add a crispy texture.
- Whipped Cream Consistency: Make sure not to over-whip the cream, or it could turn into butter. Stop whipping as soon as stiff peaks form—this will give you a light, fluffy texture that complements the other layers.
- Layering: The key to a beautiful trifle is in the layers! Don’t be afraid to mix and match colors and fruits. You can alternate the layers to create a unique pattern or add extra whipped cream for more volume.
- Cake Variations: If you’re making your cake from scratch and want a flavorful twist, consider adding a dash of vanilla extract, almond extract, or even a splash of liqueur like Grand Marnier or Chambord to the cake batter for a little extra depth.
Serving Suggestions
While this trifle is delicious on its own, you can pair it with a few extra treats to create a complete Valentine’s Day spread:
- Chocolate-Covered Strawberries: These are a classic Valentine’s Day favorite and pair wonderfully with the fruity sweetness of the trifle.
- Heart-Shaped Cookies: Light, buttery shortbread or sugar cookies shaped like hearts can make a lovely addition on the side.
- Sparkling Wine or Champagne: A glass of bubbly will elevate the occasion and complement the sweet, creamy layers of the trifle.
Storage Tips for Leftovers
If you happen to have any leftovers (though I doubt that will happen!), store the trifle in the refrigerator, covered with plastic wrap or a tight-fitting lid. The dessert will keep for up to 2-3 days, but keep in mind that the cake may become softer over time.
For the freshest texture, it’s best to enjoy the trifle within the first 24 hours after making it, but it will still be delicious for a couple of days. If you notice the layers start to get too soggy, you can give the dessert a quick stir before serving to freshen it up again.
Conclusion
There you have it—the ultimate beginner-friendly, no-fuss Valentine’s Day dessert! This Easy Valentine Trifle is not only simple to prepare but also perfect for any level of cook. Its vibrant layers of cheesecake-flavored pudding, cake, whipped cream, and fresh berries make it a showstopper for any celebration. Whether you’re enjoying it with loved ones or making it for a special occasion, this trifle is sure to make your Valentine’s Day extra sweet!
Have fun making it and feel free to add your own personal touch. I hope it brings joy to your day and that your loved ones enjoy every delicious bite!