I’ll never forget the first time I made chimichangas. I was craving some good, comforting Mexican food, but I didn’t want to go out to a restaurant. I had some leftover rotisserie chicken, and I thought, “Why not try making chimichangas?” I found a simple recipe online, and to my surprise, they were incredibly easy to make! The crispy, golden-brown tortilla, the flavorful chicken filling, and the gooey, melted cheese… it was pure comfort food heaven. These Chicken Chimichangas quickly became a family favorite. This recipe is my take on that initial success, and it’s perfect for anyone, especially beginner cooks. It’s quick (ready in about 25 minutes!), it’s easy (just a few simple steps!), and it’s absolutely delicious. Plus, using rotisserie chicken makes it even faster and easier! If you’re looking for a satisfying, crowd-pleasing meal that’s perfect for a weeknight dinner or a fun weekend treat, these Chicken Chimichangas are your perfect solution. They’re crispy, cheesy, and oh-so-good!
The Best Chicken Chimichangas: Crispy, Cheesy, and Oh-So-Easy!

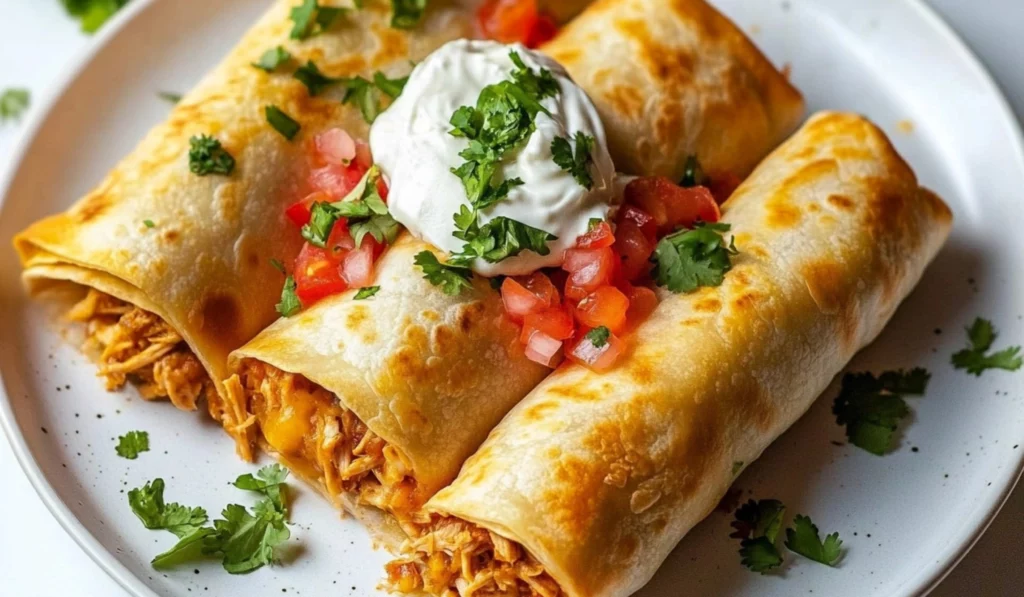
These Chicken Chimichangas are the perfect combination of crispy tortilla, flavorful chicken filling, and gooey melted cheese. They’re a fun and easy meal that’s perfect for a weeknight dinner or a casual get-together. This easy recipe is ideal for beginner cooks, requiring minimal prep and delivering maximum flavor.
- Prep Time: 5 minutes
- Cook Time: 20 minutes
- Total Time: 25 minutes
- Yield: 4 servings 1x
- Category: Main Course, Dinner
- Method: Frying, Sautéing
- Cuisine: Mexican, Tex-Mex
Ingredients
- 2 cups shredded cooked chicken
- 1 small sweet onion, diced
- 1 tbsp avocado oil (plus more for frying)
- 1 tsp chili powder
- ½ tsp ground cumin
- ½ tsp paprika
- Salt and pepper to taste
- ¼ cup salsa verde
- 1 cup Monterey Jack cheese, shredded
- ½ cup Oaxaca cheese, shredded
- 1 tbsp fresh lime juice
- 4 large flour tortillas (burrito size)
- 1 cup refried beans
- Guacamole, sour cream, salsa, and cilantro for garnish (optional)
Instructions
Cook the Filling:
-
Sauté the Onion: Heat 1 tablespoon of avocado oil in a large skillet (cast iron is ideal) over medium heat. Add the diced onion and sauté until softened and translucent, about 5 minutes. Sautéing the onion first brings out its sweetness and prevents it from from being too strong in the final dish.
-
Add the Chicken and Spices: Add the shredded chicken, chili powder, cumin, paprika, salt, and pepper to the skillet. Stir and cook until everything is well combined and the chicken is heated through, about 3-5 minutes. Cooking the chicken with the spices allows the flavors to meld together.
Mix in Salsa and Cheese:
-
Combine the Filling Ingredients: Place the chicken mixture in a bowl. Add the salsa verde, Monterey Jack cheese, and Oaxaca cheese. Stir until the cheese starts to melt from the heat of the chicken. The salsa verde adds moisture and flavor to the filling.
-
Add Lime Juice: Add the lime juice and stir to combine. The lime juice adds a touch of acidity that brightens the flavors.
Assemble the Chimichangas:
-
Prepare the Tortillas: Lay a flour tortilla flat on a clean surface.
-
Add Refried Beans: Spread ¼ cup of refried beans in the center of the tortilla, leaving a border around the edges. The refried beans help to seal the chimichanga and prevent the filling from spilling out.
-
Add Chicken Filling: Top the refried beans with about ¼ of the chicken and cheese mixture.
-
Fold and Roll: Fold in the sides of the tortilla towards the center, then roll up tightly, like a burrito. Tucking in the ends helps to keep the filling inside.
Pan Fry the Chimichangas:
-
Heat Oil in Skillet: In the same skillet (or another large skillet), heat a thin layer of avocado oil over medium heat. You want enough oil to coat the bottom of the skillet.
-
Fry Chimichangas: Place each chimichanga seam-side down in the hot oil. Cook for about 2-3 minutes per side, turning as needed, until all sides are golden brown and crispy. Add more oil if necessary between batches. Frying the chimichangas gives them their signature crispy texture.
Serve:
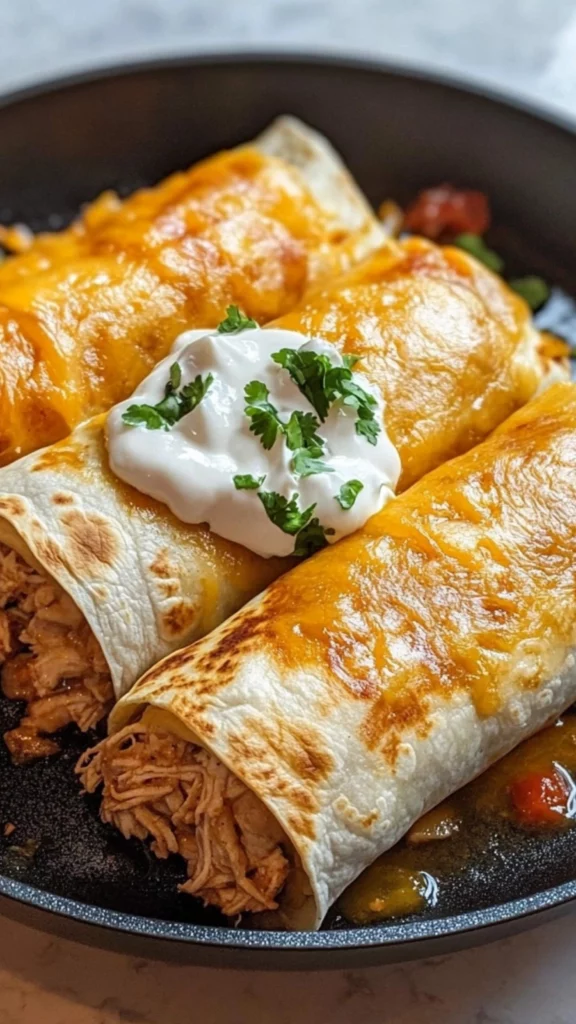
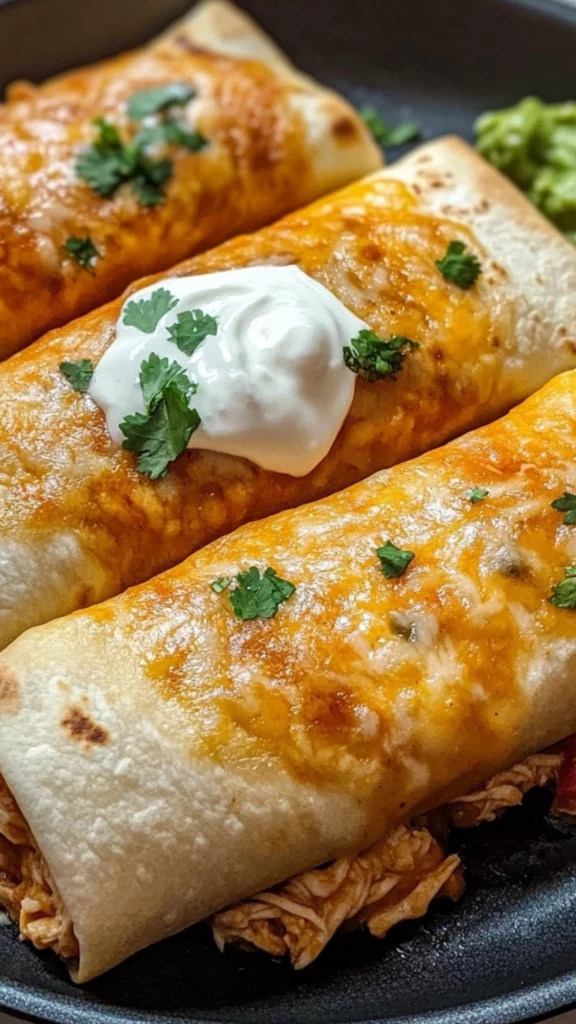
- Garnish and Serve: Serve the chimichangas hot with guacamole, sour cream, salsa, and fresh cilantro. These garnishes add flavor, texture, and visual appeal.
Notes
- Use rotisserie chicken for a quick and easy meal.
- Don’t overfill the tortillas.
- Fry chimichangas seam-side down first to seal.
- Get creative with different fillings and toppings.
Ingredients and Preparation: Your Chimichanga Toolkit – The Building Blocks of Deliciousness
These Chicken Chimichangas are wonderfully adaptable. Feel free to adjust them to your preferences, dietary needs, or what you happen to have on hand in your refrigerator and pantry. Remember, the key to stress-free and successful cooking is mise en place – having all your ingredients prepped, measured, and ready to go before you even turn on the stove. This simple step will make your cooking experience so much smoother, more enjoyable, and ultimately more successful.
The Filling: The Heart of the Chimichanga:
- 2 cups shredded chicken (rotisserie or homemade) – Alternatives: You can use leftover chicken from any preparation – grilled, baked, or even poached. Canned chicken (drained well) can also work in a pinch. For a vegetarian version, you can substitute black beans (mashed slightly) or pinto beans. Using rotisserie chicken is a huge time-saver!
- 1 small sweet onion, diced – Alternatives: You can use white or yellow onion. Sweet onions add a touch of sweetness to balance the savory flavors.
- 1 tbsp avocado oil (plus more for frying) – Alternatives: You can use olive oil, vegetable oil, or canola oil. Avocado oil has a high smoke point, making it ideal for frying.
- 1 tsp chili powder – Adds a warm, smoky flavor.
- ½ tsp ground cumin – Adds an earthy, slightly smoky flavor.
- ½ tsp paprika – Adds a touch of sweetness and color (smoked paprika adds a deeper flavor).
- Salt and pepper to taste – Essential for enhancing the flavors of all the ingredients.
- ¼ cup salsa verde – Adds a tangy and slightly spicy flavor.
- 1 cup Monterey Jack cheese, shredded – Adds a mild, melty, and stretchy texture.
- ½ cup Oaxaca cheese, shredded – Adds a creamy, slightly tangy flavor and melts beautifully.
- 1 tbsp fresh lime juice – Adds a bright, citrusy flavor that balances the richness of the cheese and chicken.
The Assembly:
- 4 large flour tortillas (burrito size) – Alternatives: You can use smaller tortillas for mini chimichangas. Make sure they are burrito size so you have enough room for the filling.
- 1 cup refried beans – Alternatives: You can use black beans or pinto beans (mashed). Refried beans act as a “glue” to help seal the chimichangas.
The Garnish (Optional but Recommended!):
- Guacamole – Adds a creamy and refreshing element.
- Sour cream – Adds a tangy and cooling element.
- Salsa – Adds a spicy and flavorful element.
- Fresh cilantro, chopped – Adds a fresh and vibrant touch.
Step-by-Step Instructions: Your Path to Crispy Chimichangas – A Beginner-Friendly and Detailed Guide
Cook the Filling:
- Sauté the Onion: Heat 1 tablespoon of avocado oil in a large skillet (cast iron is ideal) over medium heat. Add the diced onion and sauté until softened and translucent, about 5 minutes. Sautéing the onion first brings out its sweetness and prevents it from from being too strong in the final dish.
- Add the Chicken and Spices: Add the shredded chicken, chili powder, cumin, paprika, salt, and pepper to the skillet. Stir and cook until everything is well combined and the chicken is heated through, about 3-5 minutes. Cooking the chicken with the spices allows the flavors to meld together.
Mix in Salsa and Cheese:
- Combine the Filling Ingredients: Place the chicken mixture in a bowl. Add the salsa verde, Monterey Jack cheese, and Oaxaca cheese. Stir until the cheese starts to melt from the heat of the chicken. The salsa verde adds moisture and flavor to the filling.
- Add Lime Juice: Add the lime juice and stir to combine. The lime juice adds a touch of acidity that brightens the flavors.
Assemble the Chimichangas:
- Prepare the Tortillas: Lay a flour tortilla flat on a clean surface.
- Add Refried Beans: Spread ¼ cup of refried beans in the center of the tortilla, leaving a border around the edges. The refried beans help to seal the chimichanga and prevent the filling from spilling out.
- Add Chicken Filling: Top the refried beans with about ¼ of the chicken and cheese mixture.
- Fold and Roll: Fold in the sides of the tortilla towards the center, then roll up tightly, like a burrito. Tucking in the ends helps to keep the filling inside.
Pan Fry the Chimichangas:
- Heat Oil in Skillet: In the same skillet (or another large skillet), heat a thin layer of avocado oil over medium heat. You want enough oil to coat the bottom of the skillet.
- Fry Chimichangas: Place each chimichanga seam-side down in the hot oil. Cook for about 2-3 minutes per side, turning as needed, until all sides are golden brown and crispy. Add more oil if necessary between batches. Frying the chimichangas gives them their signature crispy texture.
Serve:
- Garnish and Serve: Serve the chimichangas hot with guacamole, sour cream, salsa, and fresh cilantro. These garnishes add flavor, texture, and visual appeal.
Beginner Tips and Notes: Your Kitchen Companion – Helpful Hints and Hacks for Culinary Success
- Troubleshooting: Kitchen Calamities Conquered: If your filling is too dry, you can add a little more salsa verde or a tablespoon of sour cream to moisten it. If your chimichangas are browning too quickly, reduce the heat to medium-low. If the cheese isn’t melting, make sure the chicken mixture is hot enough.
- Prep Efficiency: Time-Saving Strategies: You can shred the chicken ahead of time and store it in the refrigerator until you’re ready to make the chimichangas. You can also prepare the filling ahead of time and store it in the refrigerator. When you’re ready to cook, simply assemble and fry.
- Tool Substitutions: Improvise and Adapt: If you don’t have a cast iron skillet, you can use any large skillet for frying the chimichangas. A non-stick skillet works well.
- Flavor Boosters: Culinary Creativity Unleashed: Feel free to experiment with different flavor combinations and ingredients to create your own signature chimichangas. Try adding other ingredients to the filling, such as black beans, corn, bell peppers, or jalapenos. You can also use different cheeses, such as pepper jack or cheddar. For a spicier chimichanga, add a pinch of cayenne pepper or a few dashes of hot sauce to the filling. You can also use different sauces, such as enchilada sauce or queso.
Serving Suggestions: Completing the Culinary Picture – From Simple to Spectacular
These Chicken Chimichangas are a delicious and satisfying meal on their own, but you can definitely enhance them with some complementary sides or serving suggestions to create a more elaborate and enjoyable dining experience.
- Sides: A Perfect Pairing: A side of Mexican rice or cilantro lime rice is a classic accompaniment to chimichangas. A refreshing salad, such as a Mexican street corn salad or a simple green salad with a lime vinaigrette, also pairs well.
- Drinks: A Refreshing Addition: Serve your chimichangas with a refreshing drink, such as a margarita, a Mexican beer, or a horchata.
- Leftovers: Repurposing Deliciousness: Store leftover chimichangas in an airtight container in the refrigerator for up to 3 days. Reheat them in the oven or in a skillet for the best texture. You can also crumble them and use them as a topping for salads or nachos.
A Culinary Adventure: From Simple Dish to Fiesta Favorite
These Chicken Chimichangas are a perfect example of how easy and delicious a home-cooked meal can be. They’re a fantastic option for busy weeknights, a great way to use up leftover chicken and a crowd-pleasing dish that’s perfect for both casual dinners and fun get-togethers. They’re crispy, cheesy, and oh-so-satisfying, making them a guaranteed hit with everyone at your table. So, gather your ingredients, follow the instructions, and get ready to enjoy a culinary triumph! Don’t be afraid to experiment with different fillings, toppings, and sauces to create your own signature chimichangas. The possibilities are endless! And most importantly, have fun! Cooking should be an enjoyable experience, a chance to express your creativity and share delicious food with the people you love. We’d love to see your Chicken Chimichangas creations! Share your photos and any variations you try in the comments below. Happy cooking! What other quick, easy, and flavorful recipes would you like to see us explore? Are you interested in learning more about different cooking techniques or perhaps mastering other culinary skills? Let us know in the comments! We’re here to support you on your culinary journey, one delicious bite at a time. We can’t wait to hear about your culinary triumphs! Share your photos and tag us in your creations – we’re excited to see what you make! We’re confident that this recipe will become a regular part of your meal rotation. It’s a guaranteed crowd-pleaser and a delicious way to bring some fiesta fun to your dinner table. Enjoy!


