If you’ve ever been to an Italian restaurant or attended a fancy dinner party, you’ve likely encountered the smooth, delicate allure of panna cotta. This classic dessert has been wowing taste buds for centuries, and for good reason. With its creamy texture and subtle vanilla flavor, panna cotta is the epitome of indulgence in a simple, elegant form. The beauty of this dessert is not only in its taste but in how incredibly easy it is to make—perfect for beginners who want to impress their guests without feeling overwhelmed in the kitchen.

Vanilla Panna Cotta: A Simple, Creamy Italian Dessert for Beginners

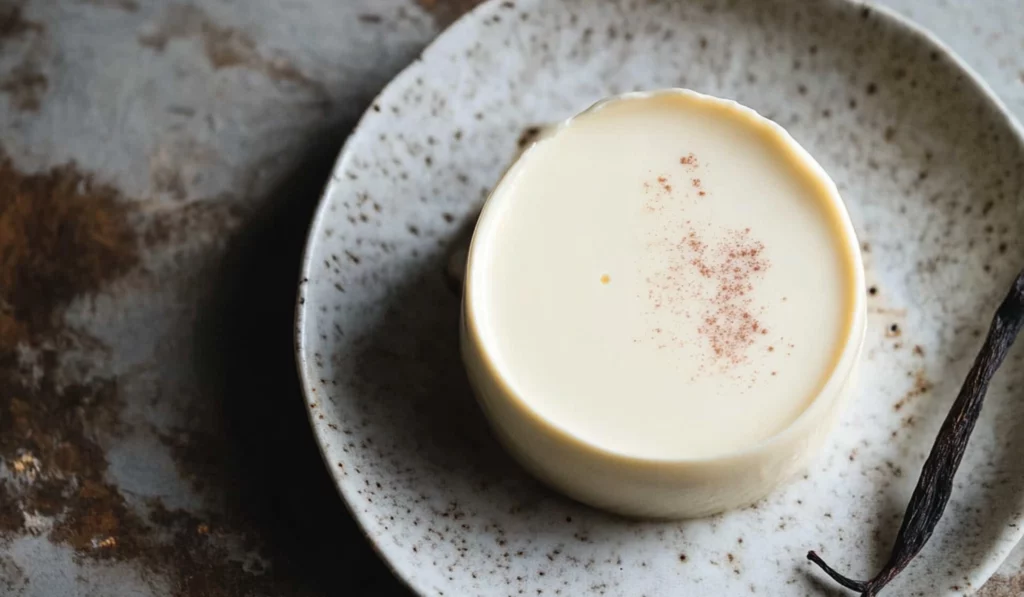
Vanilla Panna Cotta is the perfect dessert for beginners—smooth, creamy, and effortlessly impressive. With just 10 minutes of prep time, this classic Italian treat comes together easily and looks like a restaurant-worthy indulgence. Let it set in the fridge, and you’ll have a delicious dessert ready to wow your guests without the stress.
- Prep Time: 10 minutes
- Cook Time: 0 minutes
- Total Time: 4 hours 10 minutes
- Yield: 6 servings 1x
- Category: Dessert
- Method: No-bake
- Cuisine: Italian
- Diet: Vegetarian
Ingredients
- 1 ½ cups plus 1 tablespoon heavy cream (375ml)
- 1 cup + 1 tablespoon whole milk (250ml)
- ½ cup caster sugar (95g)
- 4 teaspoons gelatin powder (12g sachet)
- 3 teaspoons vanilla paste or 1 vanilla bean
Instructions
1. Heat the Milk, Cream, and Vanilla
Begin by pouring the milk, heavy cream, and vanilla paste (or vanilla bean) into a medium saucepan. Heat the mixture over medium heat, stirring occasionally. Keep a close eye on it as you bring it to a simmer. Be careful not to let it boil over—once it starts simmering, turn off the heat. You should see little bubbles around the edges of the saucepan, but no vigorous boiling.
2. Dissolve the Sugar
Once the milk and cream mixture has come to a simmer, add the sugar to the saucepan. Stir gently until the sugar has completely dissolved. This process will only take about 2 minutes. The sugar adds sweetness and balances the richness of the cream and milk, creating the creamy, smooth base for the panna cotta.
3. Add the Gelatin
Now it’s time to add the gelatin, which will give the panna cotta its silky texture. Sprinkle the gelatin powder evenly over the surface of the milk and cream mixture. It’s essential to do this gradually, whisking constantly to prevent any lumps from forming. Gelatin can clump together if added too quickly, so take your time here. Whisk until the gelatin is fully dissolved into the mixture.
4. Cool the Mixture
Once the gelatin is dissolved, pour the panna cotta mixture into individual moulds or ramekins. You can also use small glass jars for a more rustic look. Allow the panna cotta to cool at room temperature for about 30 minutes. This step is essential as it prevents condensation from forming inside the moulds when it’s placed in the refrigerator.
Note: Sometimes, a skin forms on the top of the panna cotta as it cools. This is normal and can be removed with a spoon if desired. However, this step is entirely optional—it doesn’t affect the texture or flavor of the dessert.
5. Refrigerate
After the panna cotta has cooled for 30 minutes, cover the moulds with plastic wrap or a lid, and refrigerate for at least 4-6 hours (or overnight). The panna cotta needs this time to set properly. The result should be a firm yet silky texture that will gently jiggle when you tap the side of the mould. Once set, it’s ready to be served.
Notes
- Be Careful with Gelatin: When using gelatin, it’s important to add it slowly to avoid clumping. Also, always dissolve it in a warm mixture rather than adding it to cold ingredients.
- Avoid Overheating: If you accidentally let the cream and milk mixture boil over, it could affect the texture of your panna cotta. Always heat it gently and pay attention as it simmers.
- Topping Ideas: Feel free to get creative with toppings for your panna cotta. Fresh berries, raspberry coulis, chocolate sauce, or even a drizzle of caramel all pair wonderfully with the creamy base. You can also garnish with fresh mint or toasted nuts for an extra touch of flavor.
- Room Temperature vs. Chilled: Panna cotta is best served chilled, but you can let it sit at room temperature for a few minutes before serving if you prefer a slightly softer texture.
I first tried making panna cotta after a friend recommended it as a simple yet sophisticated dessert to finish off a dinner party. I remember being amazed at how such a luxurious treat could come together with just a few basic ingredients. From the silky texture to the rich vanilla aroma, panna cotta immediately became one of my go-to desserts for special occasions. The best part? It requires minimal prep time—just about 10 minutes—and can be made ahead, allowing you to focus on other aspects of your meal.
Whether you’re a beginner cook or simply looking for a no-fuss dessert that looks like a masterpiece, Vanilla Panna Cotta is the answer. It’s a make-ahead dessert that requires minimal effort yet delivers maximum flavor. If you want a dessert that will make a lasting impression, this one’s for you.
Why This Recipe Is Perfect for Beginners
Panna cotta is the perfect beginner dessert for a few reasons. First, it’s incredibly simple to make. You don’t need advanced baking skills or expensive equipment—just a saucepan, a whisk, and some basic kitchen tools. Second, it’s a no-bake dessert, which eliminates the stress of monitoring ovens or dealing with tricky baking times. The only “cooking” involved is gently heating the milk and cream and dissolving the gelatin, both of which are beginner-friendly tasks.
The beauty of panna cotta also lies in its versatility. You can customize it with different flavors, toppings, or even sauces to fit your occasion. Plus, it’s the kind of dessert you can make ahead of time, giving you more freedom to focus on other dishes or simply relax before serving.
Lastly, the smooth, silky texture and delicate vanilla flavor make this dessert feel incredibly luxurious, but in reality, it’s straightforward and forgiving. It’s a great recipe to build confidence in the kitchen and an excellent base to experiment with other flavors like chocolate, coffee, or fruit.
Ingredients and Preparation
The key to making perfect Vanilla Panna Cotta is using simple, high-quality ingredients. Here’s what you’ll need:
Ingredients
- 1 ½ cups plus 1 tablespoon heavy cream (375ml)
- 1 cup + 1 tablespoon whole milk (250ml)
- ½ cup caster sugar (95g)
- 4 teaspoons gelatin powder (12g sachet)
- 3 teaspoons vanilla paste or 1 vanilla bean
Ingredient Alternatives
- Heavy cream: If you’re looking for a lighter version, you can substitute half of the heavy cream with a lower-fat option like half-and-half or even whole milk. Keep in mind, though, that using lower-fat alternatives might affect the creamy texture.
- Vanilla paste: If you don’t have vanilla paste, you can easily substitute with vanilla extract or scrape the seeds from a vanilla bean pod. The paste gives a richer, more concentrated vanilla flavor, but all options will work perfectly fine.
- Gelatin powder: Gelatin is what gives panna cotta its signature firm yet creamy texture. If you prefer a vegetarian or vegan version, look for agar-agar, a plant-based gelling agent. Follow package instructions for the right amount of agar to substitute for gelatin.
Step-by-Step Instructions
Now that you have all your ingredients ready, let’s dive into the simple, step-by-step process of making Vanilla Panna Cotta. The method is beginner-friendly and easy to follow, ensuring that your panna cotta turns out perfectly every time.
1. Heat the Milk, Cream, and Vanilla
Begin by pouring the milk, heavy cream, and vanilla paste (or vanilla bean) into a medium saucepan. Heat the mixture over medium heat, stirring occasionally. Keep a close eye on it as you bring it to a simmer. Be careful not to let it boil over—once it starts simmering, turn off the heat. You should see little bubbles around the edges of the saucepan, but no vigorous boiling.
2. Dissolve the Sugar
Once the milk and cream mixture has come to a simmer, add the sugar to the saucepan. Stir gently until the sugar has completely dissolved. This process will only take about 2 minutes. The sugar adds sweetness and balances the richness of the cream and milk, creating the creamy, smooth base for the panna cotta.
3. Add the Gelatin
Now it’s time to add the gelatin, which will give the panna cotta its silky texture. Sprinkle the gelatin powder evenly over the surface of the milk and cream mixture. It’s essential to do this gradually, whisking constantly to prevent any lumps from forming. Gelatin can clump together if added too quickly, so take your time here. Whisk until the gelatin is fully dissolved into the mixture.
4. Cool the Mixture
Once the gelatin is dissolved, pour the panna cotta mixture into individual moulds or ramekins. You can also use small glass jars for a more rustic look. Allow the panna cotta to cool at room temperature for about 30 minutes. This step is essential as it prevents condensation from forming inside the moulds when it’s placed in the refrigerator.
Note: Sometimes, a skin forms on the top of the panna cotta as it cools. This is normal and can be removed with a spoon if desired. However, this step is entirely optional—it doesn’t affect the texture or flavor of the dessert.
5. Refrigerate
After the panna cotta has cooled for 30 minutes, cover the moulds with plastic wrap or a lid, and refrigerate for at least 4-6 hours (or overnight). The panna cotta needs this time to set properly. The result should be a firm yet silky texture that will gently jiggle when you tap the side of the mould. Once set, it’s ready to be served.
Beginner Tips and Notes
- Be Careful with Gelatin: When using gelatin, it’s important to add it slowly to avoid clumping. Also, always dissolve it in a warm mixture rather than adding it to cold ingredients.
- Avoid Overheating: If you accidentally let the cream and milk mixture boil over, it could affect the texture of your panna cotta. Always heat it gently and pay attention as it simmers.
- Topping Ideas: Feel free to get creative with toppings for your panna cotta. Fresh berries, raspberry coulis, chocolate sauce, or even a drizzle of caramel all pair wonderfully with the creamy base. You can also garnish with fresh mint or toasted nuts for an extra touch of flavor.
- Room Temperature vs. Chilled: Panna cotta is best served chilled, but you can let it sit at room temperature for a few minutes before serving if you prefer a slightly softer texture.
Serving Suggestions
Vanilla Panna Cotta is a versatile dessert that can be paired with a variety of complementary sides or toppings to elevate its flavor profile:
- Fresh Berries: Raspberries, strawberries, or blueberries add a burst of fresh, tart flavor that balances the sweetness of the panna cotta.
- Fruit Sauces: Raspberry coulis, strawberry puree, or even mango sauce make great additions. You can also drizzle a bit of chocolate or caramel sauce for an extra indulgent touch.
- Crunchy Toppings: For added texture, consider topping your panna cotta with toasted almonds, hazelnuts, or even crushed biscotti. The crunch pairs beautifully with the creamy panna cotta.
- Serve with Coffee or Tea: This dessert pairs beautifully with a cup of coffee or a light herbal tea. The richness of the panna cotta complements the smoothness of a well-brewed cup of coffee, making it a perfect dessert for an afternoon gathering.
Storage Tips If you have leftovers, panna cotta can be stored in the fridge for up to 2-3 days. Simply cover the moulds with plastic wrap or store the panna cotta in an airtight container. If you’re making the dessert ahead of time, it can be refrigerated overnight, which makes it a fantastic make-ahead dessert for parties or dinner gatherings.

Why You Should Try Vanilla Panna Cotta
Vanilla Panna Cotta is the perfect dessert for beginners looking to create something that feels luxurious with minimal effort. With just a few simple ingredients and a bit of patience, you can make a dessert that’s silky, creamy, and utterly delicious. Whether you’re serving it at a special dinner party or enjoying it on a quiet evening at home, this classic Italian treat is sure to impress. Plus, it’s easily customizable to suit your preferences with various toppings, sauces, or even flavor infusions.
So, why not give this delightful recipe a try? It’s a great way to build your kitchen confidence, and I’d love to hear how it turns out! Share your experience in the comments below, and let me know what creative toppings you added to make it your own. Enjoy!


